
Lawn
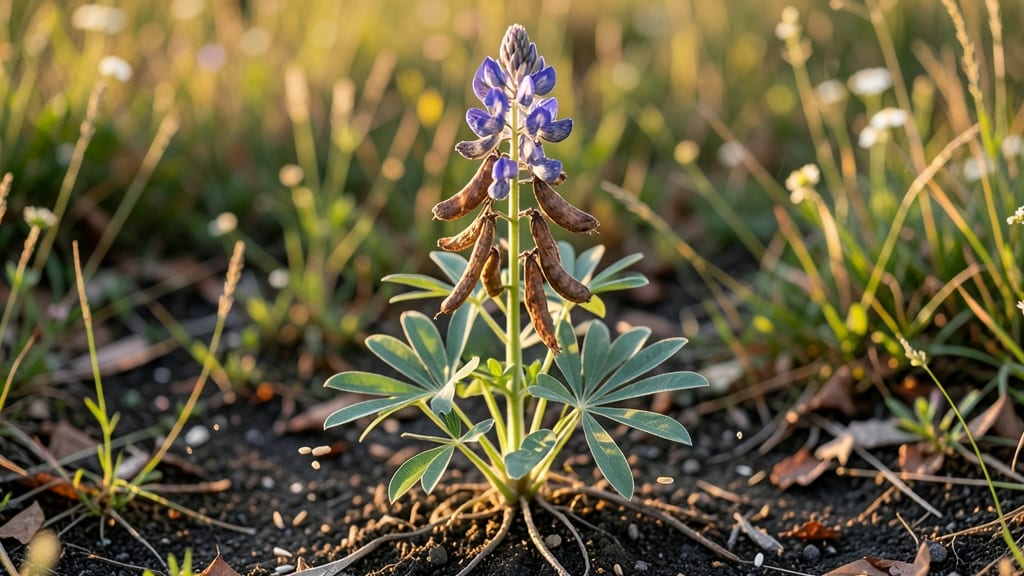
Harvesting flower seed pods saves money and keeps your garden thriving year after year. 🌸 I learned the hard way that letting seed heads dry on the plant doesn’t always mean the seeds inside are ready—some need careful timing and handling to stay viable.
The right technique turns last year’s blooms into next season’s star performers without wasting a single pod.
Start by watching for pods that turn brown and crispy while still clinging to the plant—this is your cue they’re ready. A gentle twist usually releases them, but some stubborn pods need a small knife or scissors.
Once collected, spread them on a tray to dry completely before storing in labeled paper envelopes (plastic traps moisture and causes mold).
When spring rolls around, you’ll have seeds that germinate faster and stronger than store-bought varieties. The key is patience—some seeds take weeks to sprout, but the payoff is plants that look exactly like their parents, only hardier because they’re adapted to your local climate.
No more guessing which flowers will thrive!
This method works for everything from delicate cosmos to tough-as-nails sunflowers. Just avoid damp or moldy pods—they’ll ruin your whole batch. With a little practice, you’ll be the neighbor everyone envies for their endless supply of free, homegrown blooms.
📚 In This Guide
- What you need
- Instructions
- Tips and common mistakes
- Wrapping up and next steps
What you need
- ● Mature flower seed pods (from plants like cleome, cosmos, marigold, or snapdragons—ensure they’re dry and browned for best results).
- ● Paper bags or envelopes (kraft paper or seed-saving envelopes, 1–2 per pod type).
- ● Sharp scissors or pruning shears (sterilized to avoid cross-contamination).
- ○ Small paper towels or silica gel packets (to speed up drying, optional but helpful).
- ● Permanent marker (for labeling pods with plant names/dates).
- ● Air-tight containers or glass jars (for long-term storage, quart-sized or larger).
- ● Ruler or measuring tape (to track pod dimensions for germination notes).
- ● Desiccant packs (for extra moisture control in humid climates).
- ● Digital scale (to weigh seeds for accurate planting ratios).
- ● Seed-saving journal (to log varieties, germination rates, and growing conditions).
- ● Glove or tweezers (for handling prickly or delicate pods safely).
- ● Sunlight or dehydrator (if pods need extra drying time).
How to harvest flower seed pods for next season’s garden
Here’s my foolproof method for collecting seeds that stay viable and ready to plant.
🌿 Step 1: Identify Mature Seed Pods
Wait until the seed pods turn a dry, papery brown color—this means they’re fully mature and ready for harvest. Some flowers, like poppies or cosmos, develop pods that split open naturally, while others, such as zinnias or sunflowers, stay closed until you collect them. Run your fingers gently over the pod—if it feels brittle and crumbly, it’s time.
Harvest on a dry, sunny morning after the dew has evaporated. This prevents moisture from causing mold or rot in your stored seeds. Use clean, sharp scissors or pruners to snip the stems just above the pod. Avoid tugging or pulling, as this can damage the delicate seed heads.
🪴 Step 2: Dry the Seed Pods Properly
Spread the harvested pods on a clean, dry surface in a single layer. I like to use a mesh screen or an old window screen to allow airflow on all sides. Place them in a warm, dry spot away from direct sunlight—too much heat can scorch the pods and reduce seed viability.
Let them dry for 7-14 days, flipping them occasionally to ensure even drying. You’ll know they’re ready when the pods are completely dry to the touch and rattle when shaken. If any pods still feel damp, leave them a few more days—rushing this step risks moldy seeds.
🌱 Step 3: Extract Seeds from the Pods
Once fully dry, gently crush the pods between your fingers or use a small hammer to break them open. Some seeds, like those from poppies, will spill out easily, while others, like milkweed, may require a bit more force. Place a sheet of paper or a small tray beneath the pods to catch the seeds and prevent spills.
Sift through the debris to separate the seeds from chaff or broken pod pieces. A fine-mesh strainer works well for this. Store the seeds in a labeled envelope or small jar—write the flower variety and harvest date on it to keep track.
⏰ Step 4: Store Seeds for Long-Term Viability
Place the dried seeds in an airtight container, such as a glass jar with a tight-sealing lid or a sealed envelope. Add a small packet of silica gel or a few grains of uncooked rice to absorb any remaining moisture. Store the container in a cool, dark place, like a pantry or basement, where temperatures stay between 40-50°F.
Most flower seeds remain viable for 1-5 years depending on the type. Check your stored seeds annually—discard any that smell musty or show signs of mold. Labeling each container with the flower name and harvest year ensures you’ll know exactly what you’re planting next season.
☀️ Step 5: Test Viability Before Planting
Before using your stored seeds, do a quick viability test. Place 10 seeds in a damp paper towel, fold it over, and seal it in a plastic bag. Keep them in a warm spot for 5-7 days, checking daily for sprouts. If at least 50% of the seeds sprout, they’re ready to plant. If fewer than half sprout, consider collecting fresh seeds next year.
This simple test saves you from planting hundreds of seeds only to find they didn’t germinate. If your seeds pass, plant them in well-draining soil and keep them moist until germination. You’ll have a head start on next year’s garden with zero waste!
Tips & tricks for perfect flower seed pod harvesting
Real talk: Harvesting flower seeds properly can make or break next year’s garden. Here’s what nobody tells you about getting it right.
Harvest Timing Secret: The 7-14 day drying period isn’t just about waiting—it’s about creating the perfect conditions. If your climate is naturally humid, extend drying to 2 weeks rather than cutting it short. I’ve seen pods develop mold after just 5 days in damp weather, so don’t rush this step. Place a small fan nearby on low setting to maintain gentle airflow without disturbing the pods.
Storage Wisdom: That 40-50°F storage temperature is non-negotiable for long-term viability, but here’s the trick: If your basement gets closer to 55°F, move seeds to the fridge’s crisper drawer where temps stay consistent. The fridge’s humidity control also helps prevent moisture buildup that can shorten seed life. Label containers with both the flower name AND harvest year—you’ll thank yourself when you’re sorting through jars next spring.
Viability Test Hack: For the 5-7 day germination test, I recommend using a clear plastic bag so you can see sprouts without opening it. Place the bag near a sunny window (not direct sunlight) to encourage consistent warmth. If you’re impatient, check daily starting day 3—some fast-growing seeds like cosmos may sprout earlier than the 50% threshold.
Pro Tips for Flower Seed Pods
- Real talk: Harvesting flower seeds properly can make or break next year’s garden.
- Harvest Timing Secret: The 7-14 day drying period isn’t just about waiting—it’s about creating the perfect conditions.
- The fridge’s humidity control also helps prevent moisture buildup that can shorten seed life.
Frequently asked questions
Got questions about harvesting flower seed pods? You’re not alone! Here are some of the most common queries—and their simple solutions—to help you master zero-waste gardening.
When is the best time to collect flower seed pods?
Timing is everything! Harvest seed pods when they’re fully mature but before they burst open or attract pests. For most annuals (like zinnias or cosmos), this is usually late summer to early fall. Perennials (like coneflowers) may need a little longer—wait until the pods turn brown and dry.
How do I know if a seed pod is ready to harvest?
Look for these signs:
- Color change: Pods shift from green to tan, brown, or their mature hue.
- Texture: They feel dry and papery to the touch (not soft or squishy).
- Sound: A gentle shake should produce a rustling sound, not loose seeds.
Can I save seeds from hybrid flowers?
Probably not—and that’s okay! Hybrid flowers (like many petunias or impatiens) often produce seeds that won’t grow true to the parent plant. Stick to heirloom or open-pollinated varieties (check seed packets!) for reliable results. If you’re unsure, try harvesting anyway—you might get a fun surprise!
What if my seed pods get eaten by pests before I can collect them?
Don’t worry—pests are a common nuisance! To protect your pods:
- Use row covers or fine mesh netting over plants as they mature.
- Handpick pests (like slugs or beetles) early in the morning.
- Try neem oil or insecticidal soap as a natural deterrent.
How should I store flower seeds until planting?
Proper storage keeps seeds viable for years! Follow these steps:
- Let pods dry completely (1–2 weeks in a cool, dark place like a paper bag).
- Remove seeds and place them in a sealed envelope or airtight container.
- Add a desiccant packet (or a silica gel packet) to absorb moisture.
- Label with the plant name and date—most seeds last 1–5 years!
Wrapping up and next steps
Harvesting flower seed pods is a simple yet rewarding way to embrace sustainability and ensure next year’s garden thrives with minimal effort!
Whether you’re saving heirloom varieties or reducing waste, these dried treasures hold the promise of future blooms. Start small—collect just a few pods this season—and watch your garden grow into a self-sustaining haven.
Ready to take the next step? Grab a pair of scissors, a paper bag, and a sunny windowsill—your zero-waste gardening adventure begins now! 🌱✨