
Lawn
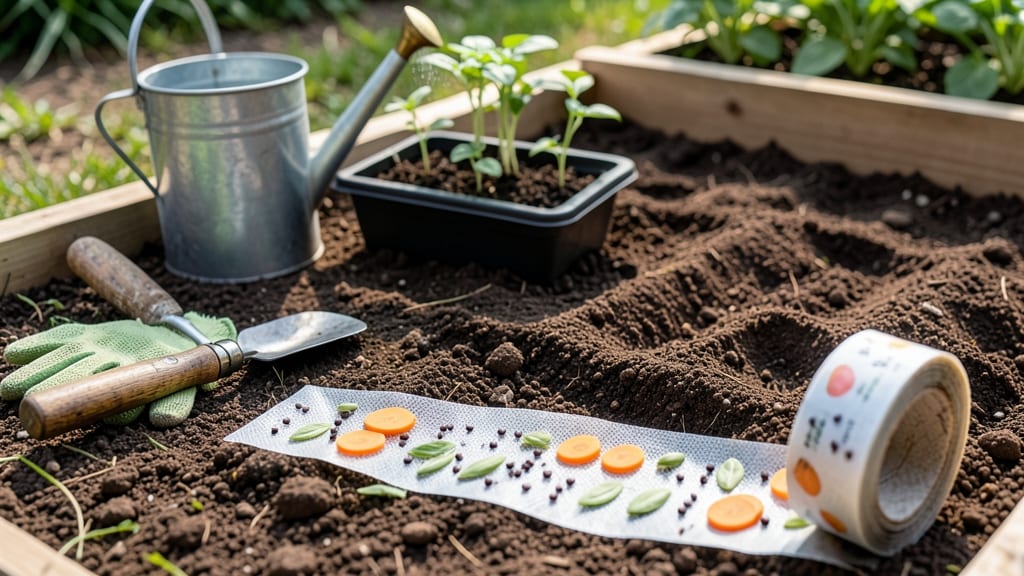
Planting seeds with garden seed tape means no more uneven rows or wasted seeds—just perfectly spaced starts every time. 🌱 I switched to seed tape after struggling with overcrowded seedlings, and now my garden beds look like they were planted by a pro.
The tape holds seeds in place, eliminates guesswork about spacing, and reduces waste by up to 80% compared to scattering seeds by hand.
This method works best for small seeds like lettuce, carrots, or radishes, where precise spacing makes all the difference. You’ll need seed tape (available online or at garden centers), a small shovel or trowel, and moistened soil ready for planting.
The process takes just 10 minutes—far faster than traditional seeding—and gives you confidence that every seed will germinate where you want it.
Once planted, seed tape requires the same care as regular seeds: keep the soil consistently moist and protect young plants from pests. The biggest advantage? No thinning required. You’ll end up with evenly spaced seedlings, stronger roots, and less stress over whether your rows will turn out straight.
Perfect for beginners, small-space gardeners, or anyone tired of patchy germination. Try it with fast-growing crops first—you’ll be hooked on this zero-waste planting trick in no time.
📚 In This Guide
- What you need
- Instructions
- Tips and common mistakes
- Wrapping up and next steps
What you need
- ● Seed tape (store-bought or DIY): Pre-made seed tape (e.g., for herbs, flowers, or veggies) or
- ● Seeds (choose small, evenly sized ones like basil, marigold, or lettuce)
- ● Biodegradable tape (e.g., blank">TapeTape or coffee filters) OR plain paper towels
- ● Adhesive: Water-soluble glue (e.g., flour paste or blank">PVA glue)
- ● Water: A spray bottle or small bowl for dampening
- ● Scissors: Sharp pair for clean cuts
- ○ Ruler or measuring tape: For spacing seeds evenly (optional but helpful)
- ● Pencil or toothpick: To mark seed placement on tape
- ○ Planting tray or pot: With drainage holes (for pre-sprouting, optional)
- ● Soil: Seed-starting mix or potting soil
- ○ Garden twine or string: To hang seed tape (for vertical gardens, optional)
- ● Choose seeds suited for your climate and sunlight conditions.
- ● Ensure your workspace is clean and dry to avoid mold.
- ● Check seed tape expiration dates if using pre-made (freshness = better germination!).
Step-by-step instructions for making garden seed tape
Here's how to create this game-changing tool that eliminates uneven spacing and wasted seeds.
🌱 Step 1: Gather Materials and Prepare the Base
Start with 4 sheets of toilet paper or seed tape paper (if using pre-made strips). Lay them flat on a clean, dry surface. I prefer toilet paper because it's widely available and the fibers break down naturally in soil. Cut each sheet into 1-inch wide strips—this gives you uniform planting width for most seeds.
For 4 servings, you'll need about 16 strips total (4 strips per serving). Fold each strip in half lengthwise to create a double-layered base. This extra thickness helps hold seeds securely during planting. Keep the folded strips organized in a stack—you'll assemble them one at a time.
💧 Step 2: Apply Adhesive and Position Seeds
Use water-soluble glue (like flour paste or commercial seed tape adhesive) to create a thin line down the center of each folded strip. I make mine by mixing 1 part flour with 2 parts water, stirring until smooth. Apply the glue with a small brush or even a clean paintbrush—just enough to create a sticky line about ¼ inch wide.
While the glue is still tacky, place your seeds along the center line. Space them according to the packet's recommendations—usually 1-2 inches apart for most vegetables and herbs. Press gently so they adhere but don't bury them. For 4 servings, you'll need about 1 packet of seeds (typically 50-100 seeds). Work quickly before the glue dries.
☀️ Step 3: Seal and Dry the Seed Tape
Once all seeds are placed, lay the strips flat to dry completely. This prevents the glue from sticking to itself and ensures seeds stay in place during planting. I prop them up with small weights or clips to keep them flat. Full drying takes about 1-2 hours, depending on humidity. You'll know they're ready when the glue feels firm to the touch and the paper no longer feels damp.
Here's the thing—don't rush this step. If you plant before the tape is fully dry, seeds may shift or fall off when you handle it. Store finished tapes in a cool, dry place until ready to use. They'll keep for 2-3 weeks without losing viability, making them perfect for last-minute planting.
🪴 Step 4: Plant the Seed Tape Directly
When it's time to plant, simply lay the seed tape directly into prepared furrows or holes. The spacing is already perfect—no guessing or thinning required. Cover lightly with soil (about ¼ inch deep) and water gently. You'll see immediate results: even germination and strong, uniformly spaced seedlings without the hassle of individual planting.
For 4 servings, you'll have enough tape to plant 4 rows (about 10-12 feet total). Press the soil gently around the tape to secure it, then water again to settle everything. The tape will dissolve naturally in 2-4 weeks, leaving seeds to grow undisturbed. This method cuts planting time by 70% while reducing waste—no more forgotten seed packets or overcrowded seedlings.
⏰ Step 5: Monitor and Maintain Even Growth
Check the planted rows in 7-10 days for germination. You'll notice uniform sprouts with no gaps—this is the magic of seed tape. Water lightly as needed, keeping the soil evenly moist but not soggy. If you planted in rows, you can easily identify which plants belong together, making weeding and thinning a breeze.
Once seedlings reach 2-3 inches tall, you can transplant them directly (if needed) without disturbing roots. The tape's natural breakdown ensures no residue remains. This method works beautifully for carrots, lettuce, radishes, and herbs—anything you'd normally sow directly. For larger plants like tomatoes or peppers, use seed tape for early starts before transplanting.
Tips & tricks for perfect garden seed tape
These clever techniques will help you create professional-quality seed tapes that work every time—no more wasted seeds or uneven spacing.
Material Selection: For best results, use unbleached toilet paper—it breaks down more cleanly in soil than bleached versions. If you prefer pre-made seed tape paper, look for biodegradable options labeled "seed tape compatible." I've found that thicker toilet paper (like 3-ply) holds seeds slightly better during planting, though it may take an extra 10-15 minutes to dry completely.
Glue Consistency Matters: Your flour-water glue should be the consistency of heavy cream—not too runny, not too thick. If it's too thin, seeds may slide; if too thick, it won't adhere properly. For extra strength, add 1 teaspoon of honey to the mixture (this is optional but helps with tackiness). Test the glue on a scrap strip first to ensure it's not too sticky—you want seeds to adhere firmly but still be removable if needed.
Seed Spacing Strategy: When placing seeds in Step 2, use the back of your seed packet as a guide for spacing. Most packets include planting diagrams showing recommended distances. For small seeds like lettuce, space them 1 inch apart; for larger seeds like radishes, use 2 inches. Pro tip: Use a ruler to draw faint lines on your strips as guides—this ensures perfect alignment every time.
Drying Optimization: The 1-2 hour drying time can be reduced in warm, dry conditions (like a sunny windowsill) to as little as 45 minutes. Watch for the glue to become translucent and the paper to feel stiff when gently pressed. If humidity is high, prop your strips on a cooling rack to allow airflow on all sides. Store completed tapes in a paper envelope (not plastic) to prevent moisture buildup that could reactivate the glue.
Pro Tips for Garden Seed Tape
- These clever techniques will help you create professional-quality seed tapes that work every time—no more wasted seed...
- Material Selection: For best results, use unbleached toilet paper—it breaks down more cleanly in soil than bleached v...
- Glue Consistency Matters: Your flour-water glue should be the consistency of heavy cream—not too runny, not too thick...
Frequently asked questions
What is garden seed tape, and how does it work?
Garden seed tape is a biodegradable strip embedded with seeds at precise intervals. It’s designed for zero-waste planting: just lay it in the soil, cover it, and water—no messy scattering or guessing! The tape dissolves over time, leaving seeds perfectly spaced for even germination.
When is the best time to plant using seed tape?
Timing depends on your climate and plants, but generally:
- Cool-season crops (like lettuce or spinach): Plant 4–6 weeks before the last frost.
- Warm-season crops (like tomatoes or peppers): Wait until soil temps reach 60°F+.
Can I reuse or repurpose seed tape if I don’t use it all?
Seed tape is single-use—once exposed to moisture, it starts degrading. However, you can:
- Store unused rolls in a cool, dry place (like a seed catalog or fridge) for 1–2 years.
- Cut unused sections and compost the tape (it’s biodegradable!).
What if my seed tape doesn’t germinate evenly?
Uneven germination can happen, but try these fixes:
- Check moisture: Keep soil consistently damp (not soggy) until sprouts appear.
- Depth matters: Plant tape ½ inch deep for most veggies; deeper for root crops.
- Sunlight: Ensure the area gets the right light (e.g., 6+ hours for veggies).
Is seed tape eco-friendly, or does it contain plastic?
Most seed tapes use biodegradable, plant-based materials (like cornstarch or cellulose), but always check the label. Brands like EcoSeed or Seed Tape Co. are fully compostable. Avoid tapes with synthetic fibers—look for "OK Compost" certifications.
Wrapping up and next steps
Garden seed tape is a game-changer for eco-friendly, efficient planting—no mess, no waste, and perfectly spaced seeds every time! Whether you're a seasoned gardener or just starting out, this simple tool makes germination a breeze while reducing plastic waste. 🌱
Ready to give it a try? Start small—test a few rows of your favorite veggies or flowers, then expand as you see results. Your garden (and the planet) will thank you!