
Lawn
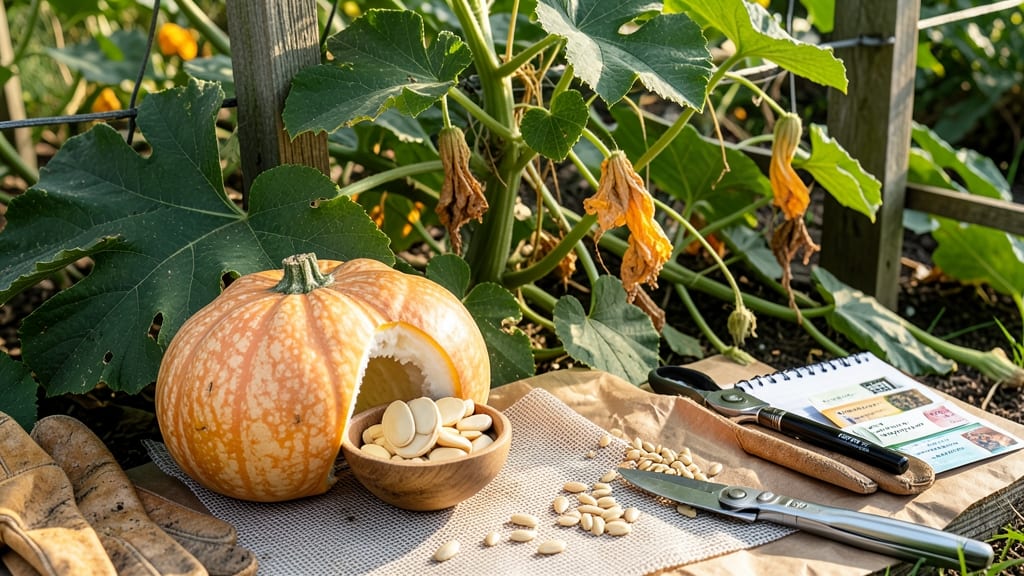
Saving squash seeds from your homegrown harvest means never buying them again. 🌱 The trick to twist-free extraction starts with selecting healthy, disease-free squash—especially important for varieties like butternut or acorn that can cross-pollinate easily.
I learned this the hard way when my first batch of seeds produced oddly shaped fruit the next season.
You’ll need ripe squash, a clean knife, a bowl of water, and a fine-mesh strainer. The process is simple: scoop out the seeds, ferment them in water for 3-4 days (this removes the gel that sticks to them), then rinse and dry on a paper towel.
Most gardeners overlook the fermentation step, but it’s what keeps seeds from clumping together when stored.
Once completely dry, store seeds in a cool, dark place in a sealed container. Test viability by planting a few in damp paper towels—if they sprout within 7-10 days, your batch is good for another season.
I’ve saved seeds this way for five years, and my plants always come back stronger than store-bought varieties.
For beginners, start with self-pollinating varieties like zucchini or pattypan to avoid cross-contamination. Advanced gardeners can experiment with isolation techniques for heirloom squash. Either way, you’ll save money and preserve flavors that disappear from commercial seed racks every year.
📚 In This Guide
- What you need
- Instructions
- Tips and common mistakes
- Wrapping up and next steps
What you need
- ● Mature squash fruits: Choose 3–5 fully ripened, healthy squash (e.g., acorn, butternut, or zucchini) with hard, dry seeds.
- ● Knife or serrated knife: A sharp, clean knife (preferably stainless steel) to slice open the squash.
- ● Large bowl or basin: A wide, deep container (e.g., 1–2 gallon size) to catch seed pulp and water.
- ● Water: Enough to fill the bowl halfway (about 2–3 gallons, depending on squash size).
- ● Fine-mesh strainer or cheesecloth: A 1–2 mm mesh strainer or cheesecloth to separate seeds from pulp.
- ● Paper towels or clean cloth: For drying seeds (avoid cotton—it can mold).
- ● Small paper envelopes or seed packets: Acid-free, labeled with the squash variety and date (e.g., 3x5-inch envelopes).
- ● Permanent marker: For labeling seeds clearly.
- ○ Spray bottle (optional but helpful): For misting seeds during drying.
- ● Seed fermentation jar: A clean glass jar (quart size) for fermenting seeds (speeds up mold prevention).
- ● Fine-tip tweezers: For picking out bad seeds or debris.
- ● Dehydrator or food dehydrator: For faster drying (set to 95–105°F).
- ● Humidity pack (silica gel): To absorb moisture during long-term storage.
- ● Digital scale: For weighing seeds (helpful for large batches).
Step-by-step guide to extracting viable squash seeds without twisting
Here's my foolproof method for saving squash seeds that stay dry, viable, and ready for next season.
🌱 Step 1: Select and Prepare the Squash for Seed Extraction
Choose a fully mature squash that's at least 3 months old—you'll know it's ready when the skin turns hard and the stem dries completely. Cut the squash open lengthwise and scoop out the seeds into a bowl, leaving behind the stringy pulp. I like to wear gloves for this step because squash flesh can be surprisingly sticky.
Rinse the seeds under cool water to remove all pulp residue. The goal is clean seeds—any remaining pulp will mold during drying. Spread them on a paper towel in a single layer, leaving 1 inch of space between each seed. This prevents them from sticking together during the drying process, which is critical for viability.
💧 Step 2: Dry Seeds Thoroughly for Long-Term Storage
Place the paper towel with seeds in a warm, dry spot with good airflow—70-75°F is ideal. I use a mesh screen over a fan in my kitchen during summer months. The seeds need to dry completely, which takes 7-10 days depending on humidity. You'll know they're ready when they feel light in your hand and the paper towel beneath them is completely dry.
Don't rush this step. Seeds with any moisture left will mold or develop fungal growth, rendering them unusable. If your climate is humid, prop up the paper towel with a small rack or wooden frame to allow airflow underneath. Test dryness by gently pressing a seed—it should make a hollow sound when dropped on a hard surface.
✂️ Step 3: Separate and Store Seeds for Next Year's Planting
Once completely dry, separate the seeds by variety if you saved multiple types. I use small envelopes labeled with the squash variety and the year harvested. Store them in a cool, dark place—50-60°F is perfect. A sealed glass jar with a silica gel packet inside helps prevent moisture absorption over time.
Seeds stored this way remain viable for 4-5 years, though germination rates drop after the first year. I always test a few seeds annually by planting them in moist paper towels to verify viability before committing to a full garden planting. This simple test gives you confidence that your saved seeds will perform next season.
🌿 Step 4: Verify Seed Quality Before Planting
If you're unsure about seed viability, perform a germination test 4-6 weeks before your last frost date. Place 10 seeds between damp paper towels in a sealed plastic bag. Keep them in a warm spot (75-80°F) and check daily. Healthy seeds should sprout within 5-10 days—if 80% or more germinate, your seeds are ready for planting.
This test also helps you adjust planting times. If germination is slow, you'll know to start seeds indoors earlier next year. I've found that squash seeds saved from particularly hot summers sometimes need a brief cold stratification period (2 weeks in the fridge) to break dormancy, so this test reveals those nuances.
Tips & tricks for perfect squash seed preservation
Between us, saving squash seeds properly can make all the difference between next year's thriving garden and wasted effort. Here's what nobody tells you about keeping those seeds viable and ready to grow.
Seed Selection Matters: The 3-month maturity rule is non-negotiable for viability. Look for squash with completely dry stems—this indicates full seed development. I've learned the hard way that immature seeds (even from mature-looking squash) often fail to germinate. Also, avoid any squash that shows signs of disease, as those seeds may carry pathogens that survive drying.
Drying Strategy: That 70-75°F range for drying isn't just arbitrary—it's the Goldilocks zone for seed viability. Too hot and you risk damaging the seed coats; too cool and you risk mold. I've found that placing a small fan near the seeds (while maintaining airflow) speeds up drying by about 25% without overheating. Just avoid direct sunlight, which can scorch the delicate seed coats and reduce germination rates.
Storage Wisdom: The 50-60°F storage range is perfect for preserving seed viability, but here's the secret: add a small packet of silica gel to your storage container. I've seen seeds stored without it develop condensation over time, which can trigger mold growth even after proper drying. For extra protection, I double-bag seeds in small portions—this prevents moisture from outside air while keeping seeds accessible for testing.
Pro Tips for Squash Seed Saving
- Between us, saving squash seeds properly can make all the difference between next year's thriving garden and wasted e...
- Seed Selection Matters: The 3-month maturity rule is non-negotiable for viability. Look for squash with completely dr...
- Drying Strategy: That 70-75°F range for drying isn't just arbitrary—it's the Goldilocks zone for seed viability. Too ...
Frequently asked questions
Got questions about squash seed saving? You’re not alone! Here are some of the most common concerns—and their straightforward answers—to help you master the process like a pro.
How do I know when squash seeds are fully mature and ready to save?
Seeds are ready when the squash is fully colored, hard-skinned, and hollow inside. For winter squash (like butternut or acorn), wait until the stem dries and turns brown. Summer squash (zucchini, pattypan) seeds mature faster—harvest when the fruit is overripe and mushy. Pro tip: If you twist off a section and see fully formed, dark seeds, they’re ready!
Can I save hybrid squash seeds for next year’s garden?
Generally, no—hybrid seeds (marked with an "F1" label) won’t produce true-to-type plants. For reliable results, save seeds from heirloom or open-pollinated varieties. If you’re unsure, check the seed packet or ask your local nursery. Troubleshooting: If you accidentally save hybrid seeds, treat them as a fun experiment!
What’s the best way to clean and dry squash seeds for long-term storage?
After fermenting (3–5 days in water), rinse seeds in a mesh strainer, then spread them on a paper towel in a single layer. Let them dry in a warm, dark place for 1–2 weeks, stirring occasionally. Store dried seeds in a cool, dry spot (like a jar in your pantry) for up to 5 years. Alternative: Use a fan to speed up drying if humidity is high!
Why are my saved squash seeds sprouting mold or smelling bad?
Mold or foul odors usually mean seeds didn’t dry properly or were stored damp. Discard affected seeds immediately. To prevent this, ensure seeds are 100% dry before storing, and keep them in an airtight container with a silica gel packet to absorb moisture. Quick fix: If seeds smell but look dry, they’re likely fine—just store them in a sealed bag with a desiccant.
Do I need to save seeds from every squash variety I grow?
Not necessarily! Focus on saving seeds from your favorite varieties or those with unique traits (like disease resistance or great flavor). If you grow multiple types, consider labeling seeds by variety to avoid confusion. Bonus tip: Save extra seeds to share with fellow gardeners—community seed swaps are a great way to diversify your stash!
Wrapping up and next steps
Saving squash seeds is a rewarding way to ensure next year’s harvest thrives—without the twist! 🌱 By mastering the simple extraction method, you’ll enjoy fresh, homegrown produce while cutting costs and preserving heirloom varieties.
Start small, stay consistent, and soon you’ll be sharing seeds (and success stories!) with fellow gardeners.
Ready to dive deeper? Grab a few squash, gather your tools, and try it today! Your future harvest—and wallet—will thank you.