
Propagation
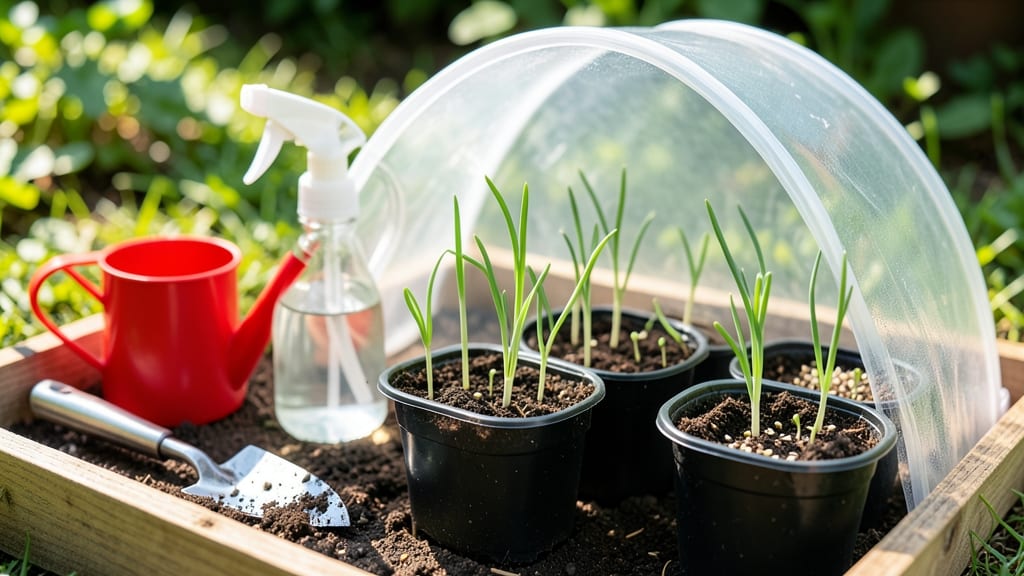
Growing onions from seed in pots lets you skip the grocery store entirely. 🌱 I once spent $8 on a bag of onions that sprouted in my pantry—now I grow them in 6-inch pots on my balcony, with harvests that last all winter.
The secret isn't fancy soil or expensive containers; it's patience and the right spacing.
You'll need shallow pots with drainage, a well-draining soil mix, and onion seeds (short-day varieties work best). Start indoors 8-10 weeks before your last frost, or direct-sow in spring.
The key is keeping seedlings thin—about 1 inch apart—and giving them bright light. Leggy onions? They need more sun or less crowding.
By midsummer, you'll be pulling fresh green onions or watching tops flop over (time to harvest bulbs!). The flavor beats store-bought, and you avoid onion maggot issues that plague in-ground gardens. Even in small spaces, this method delivers.
Perfect for beginners or urban gardeners. Once you master the basics, you can experiment with different varieties or extend harvests by staggering plantings. The first time you pull a perfect onion from your pot, you'll never buy them again.
📚 In This Guide
- What you need
- Instructions
- Tips and common mistakes
- Wrapping up and next steps
What you need
- ● Onion seeds: Choose short-day or long-day varieties based on your climate (e.g., 'Texas Early White' or 'Sweet Sandwich'). Aim for 1 packet (50–100 seeds) per pot.
- ● Containers: Pots with 6–8" diameter and depth (or larger for multiple bulbs). Use 3–5 pots per batch, with drainage holes.
- ● Potting mix: Well-draining, seed-starting mix (avoid garden soil). You’ll need 1–2 bags (1–2 cubic feet) depending on pot size.
- ● Watering can or spray bottle: For gentle hydration (avoid oversaturating seeds).
- ● Grow lights or sunny windowsill: 6–8 hours of light daily (grow lights are ideal for indoor setups).
- ● Fertilizer: A balanced, water-soluble fertilizer (5-5-5 or 10-10-10) for transplanting. Dilute to half-strength.
- ● Plant labels & marker: Track varieties (e.g., 'Red Creole' vs. 'Yellow Granex').
- ● Twine or plant ties: Secure tall pots in windy spots.
- ○ Heat mat (optional): Speeds germination if temps dip below 60°F (15°C).
- ● Trowel or spoon: For gentle seed placement in soil.
- ● Mulch (straw or shredded leaves): Retains moisture in outdoor pots.
Step-by-Step instructions for growing onions from seed in pots
Here’s my foolproof method for growing robust onions from seed in containers—perfect for small spaces and year-round harvests.
🌱 Step 1: Prepare Containers and Planting Mix
Use 4-inch deep pots (or deeper for larger varieties) with drainage holes—onions despise soggy roots. Fill each pot with well-draining potting mix (avoid garden soil; it compacts and suffocates roots). I like to mix in 20% perlite to improve aeration and prevent waterlogging. Moisten the mix until it’s damp but not dripping—think of a wrung-out sponge.
Tap the pot gently to settle the soil, then create a 1/4-inch deep furrow in the center. This ensures seeds stay at the right depth for even germination. Real talk: if you plant too shallow, seeds dry out; too deep, they rot before sprouting. Aim for that 1/4-inch sweet spot every time.
🌱 Step 2: Sow Seeds and Maintain Moisture
Drop 2-3 seeds per pot, spacing them 1 inch apart in the furrow. Cover lightly with a thin layer of soil—just enough to obscure the seeds. Mist the surface with water until the soil feels uniformly damp. Here’s the thing: onions need consistent moisture to germinate, but they’ll rot if overwatered. Aim for damp, not wet.
Place pots in a warm spot (65-75°F)—a seedling heat mat speeds germination to 10-14 days. Cover with a humidity dome or plastic wrap to retain moisture, but remove it once sprouts appear. Watch for first true leaves (the second set after the initial seed leaves)—that’s your cue to thin seedlings to the strongest one per pot. Snip the extras at soil level with scissors.
☀️ Step 3: Provide Light and Gradually Increase Space
Onions need 6-8 hours of sunlight daily, but they’ll tolerate partial shade in hot climates. Place pots near a south-facing window or under grow lights if natural light is weak. You’ll know they’re getting enough light when leaves grow thick and upright—not leggy or pale. If stems stretch toward the light, move pots closer (within 6 inches of the source).
When seedlings develop 4-5 leaves (about 6-8 weeks after sowing), transplant the strongest one to a larger 6-inch pot if growing long-day varieties. This prevents overcrowding and encourages bulb development. Here’s where it gets fun: long-day onions need 14+ hours of light to form bulbs, so supplement with a grow light in short-day seasons.
💧 Step 4: Water and Fertilize for Bulb Development
Water deeply once a week, letting the top 1-2 inches of soil dry between waterings. Overwatering causes rot, but underwatering stunts growth. You’ll see the bulbs swelling above the soil—this is when to reduce water slightly to toughen skins. Feed every 4 weeks with a balanced fertilizer (10-10-10) diluted to half strength. Too much nitrogen = leafy tops, no bulbs.
When tops yellow and flop (usually 10-12 weeks after transplanting), stop watering entirely. Leave bulbs in pots to dry for 2 weeks in a shady spot. This cures skins and improves storage life. Brush off excess soil, then braid or store in a cool, dry place for up to 6 months. Pro tip: if you forget to cure, bulbs will still work—just expect shorter shelf life.
⏰ Step 5: Harvest and Plan for Next Season
Harvest green onions (scallions) anytime by cutting 2 inches above the soil—they’ll regrow! For bulbs, dig up when diameter reaches 1-2 inches. You’ll know they’re ready when tops fall over naturally. Twist gently to loosen soil, then brush off debris. Store in a mesh bag for airflow to prevent mold.
Save seeds from your best bulbs for next year: let a few plants flower, then collect seeds from dried seed heads. Start fresh pots in early spring or late summer for continuous harvests. I’ve grown onions this way for years—no garden needed, just patience and consistent care.
Tips & tricks for growing onions from seed in pots
A few game-changing strategies that'll transform your container-grown onions from scrappy to spectacular—no green thumb required!
Seedling Selection: When thinning to the strongest seedling in Step 2, look for plants with the thickest stems and most vibrant green leaves. Avoid leggy seedlings—they're reaching for light and won't develop proper bulbs. Confession: I've wasted entire pots on weak seedlings that never matured. The 1-inch spacing between seeds gives you room to choose the best one without crowding, which is crucial for bulb formation later.
Light Optimization: Those 6-8 hours of sunlight per day are non-negotiable, but here's the secret: rotate your pots every few days to ensure even light exposure on all sides. I place mine on a lazy Susan near my south-facing window. For indoor growers, LED grow lights are your best friend—place them just 6 inches above the plants to prevent stretching. The key is mimicking natural sunlight patterns to develop strong, sturdy stems that support those beautiful bulbs.
Soil Science: The 20% perlite mix in Step 1 isn't just about drainage—it's about creating the perfect air-to-moisture ratio. Too much perlite (over 25%) can dry out seeds too quickly, while too little (under 15%) risks compaction. I test soil moisture by sticking my finger 1 inch deep—if it feels dry, it's time to water. The damp-but-not-wet rule prevents both drowning and dehydrating your delicate seedlings.
Bulb Development Hack: When you notice bulbs swelling above soil in Step 4, here's my pro move: gently mound additional soil around the base to encourage even growth. This creates a natural barrier that prevents tops from flopping too early. I also switch to a liquid fertilizer (still 10-10-10) at this stage—it absorbs faster and feeds those expanding bulbs directly. The goal is to toughen skins while maintaining growth momentum.
Pro Tips for Grow Onions From Seed In Pots
- A few game-changing strategies that'll transform your container-grown onions from scrappy to spectacular—no green thu...
- Seedling Selection: When thinning to the strongest seedling in Step 2, look for plants with the thickest stems and mo...
- Light Optimization: Those 6-8 hours of sunlight per day are non-negotiable, but here's the secret: rotate your pots e...
Frequently asked questions
Got questions about growing onions from seed in pots? You’re not alone! Here are some of the most common concerns—and their easy solutions—to help you succeed with your homegrown harvest.
How deep should onion seeds be planted in pots?
Plant onion seeds about ¼ inch (0.6 cm) deep in well-draining potting mix. Since seeds are tiny, a light sprinkle over the soil works best. Press gently to ensure good soil contact, then water lightly to keep the soil moist (not soggy).
How long does it take for onion seeds to sprout in pots?
Onion seeds typically sprout in 7–14 days under ideal conditions (warmth, moisture, and indirect light). If you don’t see sprouts after 2 weeks, gently check for seeds—some may have been buried too deep or dried out. Patience is key!
Can I grow onions from seed in pots indoors year-round?
Yes! Onions thrive indoors with 6–8 hours of bright light daily (a sunny windowsill or grow lights work). However, they prefer cooler temps (55–70°F / 13–21°C). In winter, supplement with grow lights to prevent leggy growth. For best flavor, transplant seedlings outdoors in spring if possible.
What’s the difference between growing green onions vs. bulbing onions from seed?
Green onions (scallions) are harvested young (when 6–8 inches tall) for their leafy tops. Bulbing onions need 8–10 weeks to mature and form a full bulb. Choose short-day varieties (like ‘Texas Early White’) for pots—they mature faster than long-day types.
Why are my onion seedlings turning yellow or falling over?
Yellowing or flopping seedlings often signal overcrowding, poor drainage, or pests. Thin seedlings to 2 inches apart, ensure pots have drainage holes, and check for aphids or onion flies. Boost nutrients with a balanced fertilizer (like 10-10-10) if growth stalls.
Can I reuse the same pots for multiple onion harvests?
After harvesting, sterilize pots with a 1:10 bleach-water solution (rinse well) to prevent disease. Refresh the potting mix with compost to replenish nutrients. Just avoid reusing the same mix if you suspect soil-borne pathogens.
Still stumped? Drop your question in the comments—we’re happy to help you troubleshoot!
Wrapping up and next steps
Growing onions from seed in pots is a rewarding way to enjoy fresh, homegrown produce—even in small spaces!
With just a few supplies, patience, and consistent care, you’ll soon be harvesting vibrant green onions or full-sized bulbs. Don’t let limited space hold you back—this method proves that big flavors come in small packages.
Ready to take the next step? Start with just one pot and experiment with varieties like red or yellow onions. Once you’ve mastered the basics, expand your garden or try growing other alliums like garlic or shallots. Happy growing—your kitchen (and taste buds) will thank you! 🌱✨