
Size
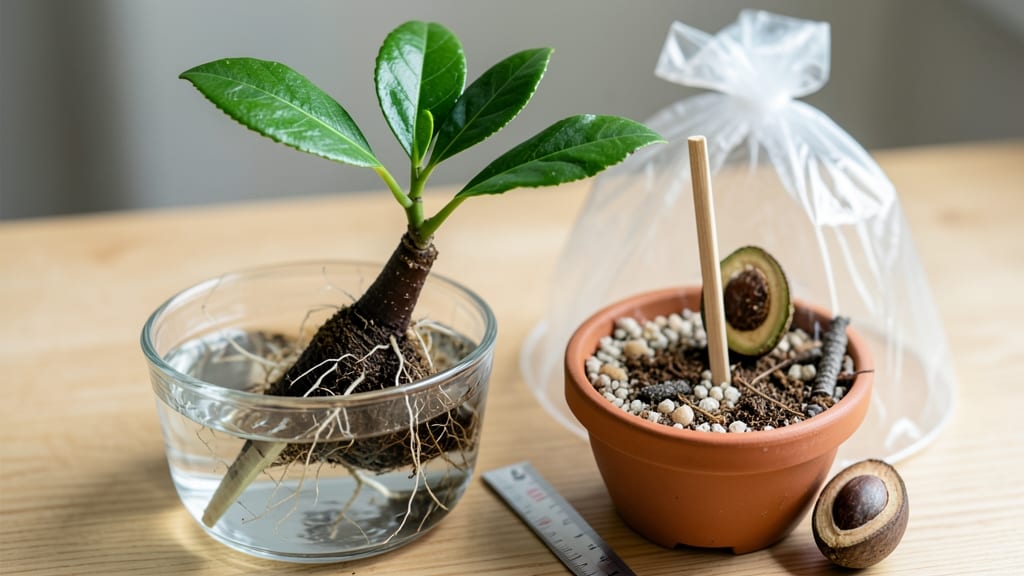
Growing an avocado seed into a plant turns kitchen scraps into a living green thumb project. 🌱 I’ve sprouted over a dozen avocado seeds, and the toothpick method—without the messy twist—works every time. No special tools, just patience and a sunny windowsill.
The secret starts with a fresh seed: rinse off any fruit residue, then insert 3-4 toothpicks around the middle to suspend it over a jar of water. Keep the base submerged (about 1 inch) and change the water every 2-3 days to prevent mold.
Roots should appear in 2-6 weeks—if not, your seed might be past its prime.
Once roots hit 3-4 inches, transplant into well-draining soil and place in bright, indirect light. Water when the top 1 inch feels dry, and watch for new leaves in 4-8 weeks.
The plant may grow slowly at first, but with consistent care, it’ll reach 6 feet indoors over a few years.
Common pitfalls? Overwatering causes rot, while too little light stunts growth. Rotate the pot weekly for even exposure, and fertilize lightly every 2 months once leaves appear. This isn’t just a science experiment—it’s a zero-waste gift that keeps growing.
📚 In This Guide
- What you need
- Instructions
- Tips and common mistakes
- Wrapping up and next steps
What you need
- ● 1 fresh, organic avocado pit – Choose a seed from a ripe, healthy avocado (Hass or Fuerte varieties work best).
- ● 3–4 toothpicks or wooden skewers – For suspending the seed without piercing it (about 3–4 inches long).
- ● 1 glass or jar with water – A clear container (8–12 oz) that can hold the seed submerged at the bottom.
- ● Filtered or room-temperature water – Avoid tap water if it’s heavily chlorinated (let it sit out for 24 hours first).
- ● 1 small bowl or saucer – For draining excess water during the rooting phase.
- ● Potting soil (well-draining mix) – A 4–6 inch pot works for transplanting (cactus/succulent mix is ideal).
- ● Fertilizer (balanced liquid or compost) – For young seedlings (use sparingly!).
- ● Spray bottle – To mist leaves and maintain humidity.
- ● Clear plastic wrap or humidity dome – Creates a greenhouse effect for faster growth.
- ● Ruler or measuring tape – To track root/seedling progress (fun for kids!).
- ● Patience (2–6 weeks for roots!) – Germination speed depends on temperature and seed freshness.
- ● Warm, indirect sunlight – A sunny windowsill (60–75°F is ideal).
- ● Consistency – Change water every 2–3 days to prevent mold or bacteria.
Step-by-step instructions for growing an avocado seed
Here's my foolproof method for sprouting avocado seeds—no special tools or tricky twists required.
🌱 Step 1: Prepare the Seed for Planting
Start with a fresh avocado pit—one that's firm but not dried out. Rinse it thoroughly to remove any remaining fruit residue, then let it air dry for 10-15 minutes. You'll notice the seed has a smooth, shiny side (the "top") and a rough, bumpy side (the "bottom"). The bumpy side is where roots will emerge, so this is the side that should face down.
Insert 3-4 toothpicks evenly around the middle of the seed, spacing them about ½ inch apart. The toothpicks should hold the seed steady when suspended over a glass of water. If you don't have toothpicks, clean wooden skewers work just as well. Avoid metal skewers—they can leach into the water and harm the seed.
Place the seed over a glass filled with 2-3 inches of water, ensuring the bumpy bottom half sits just above the waterline. The toothpicks should support the seed so it doesn't touch the water directly. This setup keeps the seed stable while allowing the base to absorb moisture.
💧 Step 2: Maintain Moisture and Monitor Growth
Change the water every 2-3 days to prevent bacterial growth and keep it fresh. You'll see the seed begin to sprout roots within 2-4 weeks, depending on temperature and humidity. The roots will grow downward into the water, while a small shoot will emerge from the top.
Here's the thing—don't let the water level drop below the roots. If it does, the seed will dry out and stop growing. I like to use a clear glass so I can easily monitor the water level and root development. Once roots reach about 2-3 inches, it's time to move to soil.
Watch for signs of mold or foul odors—these mean the water needs changing immediately. Fresh water keeps the environment clean and encourages healthy root growth. If the seed starts to smell or looks slimy, dump the water and rinse the seed before replacing it in fresh water.
🪴 Step 3: Transplant to Soil for Continued Growth
Fill a 6-inch pot with well-draining potting mix—avoid garden soil, as it can compact and suffocate roots. Make a small hole in the center of the pot, about 1 inch deep, and gently place the seed so the roots are submerged in the hole. The top of the seed should sit just above the soil line.
Press the soil lightly around the seed to secure it, but don't pack it down too tightly. Water the soil gently until it's evenly moist, but not soggy. Place the pot in a location with bright, indirect light—direct sunlight can scorch the young shoot. A sunny windowsill works well, but avoid placing it in harsh afternoon sun.
Keep the soil consistently moist by watering whenever the top inch feels dry. You'll notice new leaves emerging within 2-4 weeks after transplanting. This is your signal that the seedling is thriving. If the leaves turn yellow or wilt, it's usually a sign of overwatering—let the soil dry out slightly before watering again.
☀️ Step 4: Provide Light and Care for Maturity
Once the seedling reaches about 6-8 inches tall, it's ready for more light. Gradually introduce it to 4-6 hours of direct sunlight daily, increasing exposure by 1 hour per day to avoid shocking the plant. You'll see the leaves darken and thicken as they adapt to stronger light.
Avocado seedlings grow best in warm conditions, ideally between 65-85°F. If your home runs cooler, consider using a small space heater nearby or placing the pot on a heat mat. Avoid cold drafts, as they can stunt growth or even kill the plant.
Fertilize the seedling every 4-6 weeks with a balanced, water-soluble fertilizer diluted to half strength. Over-fertilizing can burn young roots, so always follow the package instructions carefully. You'll know the plant is healthy when it grows steadily and develops glossy, dark green leaves.
Tips & tricks for growing avocado seeds successfully
Here's what I've learned from years of growing avocado seedlings—these simple tricks make all the difference between success and frustration.
Seed Selection: Choose your avocado pit carefully—look for one that's plump, firm, and free of cracks or soft spots. I've found that Hass avocado seeds tend to sprout more reliably than other varieties. If your seed feels light or hollow when tapped, it's likely already dried out and won't sprout. The 10-15 minute drying time after rinsing is crucial; it prevents mold while keeping the seed hydrated enough to start rooting.
Water Quality Matters: Use filtered or distilled water when possible, as tap water can contain chlorine or fluoride that may inhibit root growth. I've noticed that seeds in chlorinated water often develop slower roots or show signs of stress. Change the water every 2-3 days as instructed, but also watch for cloudiness—this is your first sign that bacteria is developing. A splash of hydrogen peroxide (1 part to 10 parts water) when changing water can help prevent mold without harming the seed.
Lighting Strategy: While bright, indirect light is ideal for mature seedlings, your sprouting seed needs something different. Place your setup near a window that gets morning sun but avoid harsh afternoon rays. I've had success using a simple LED grow light on a timer for 6-8 hours daily once the shoot appears—this prevents leggy growth while maintaining the seed's energy reserves. The key is gradual adaptation, just like the instructions recommend for mature plants.
Transplanting Timing: Don't rush to move your seed to soil just because the roots hit 2-3 inches. Wait until you see a small shoot emerging from the top—this means the seed has successfully germinated and is ready for the next phase. I've seen many beginners transplant too early, which stresses the delicate roots. When transplanting, use your finger to gently loosen the roots in the water before placing them in the soil hole—this reduces shock.
Pro Tips for Make An Avocado Seed Grow
- Here's what I've learned from years of growing avocado seedlings—these simple tricks make all the difference between ...
- Seed Selection: Choose your avocado pit carefully—look for one that's plump, firm, and free of cracks or soft spots. ...
- Water Quality Matters: Use filtered or distilled water when possible, as tap water can contain chlorine or fluoride t...
Frequently asked questions
How long does it take for an avocado seed to sprout?
Patience is key! With proper care, your avocado seed should sprout within 2 to 6 weeks. The timeline depends on factors like temperature, humidity, and moisture levels. Keep the soil consistently damp (not soggy) and place it in a warm, bright spot—just avoid direct sunlight at first. If you don’t see sprouts after 6 weeks, gently check the seed for signs of rot or dryness.
Can I use tap water to grow my avocado seed?
Yes, but with a caveat! Tap water is fine, but if it’s heavily chlorinated, let it sit out for 24 hours before using to allow chlorine to evaporate. For faster and healthier growth, filtered or distilled water is ideal. Avoid using saltwater or heavily treated water, as these can harm the seed’s development.
What if my avocado seed doesn’t sprout? What went wrong?
Don’t worry—even experienced growers face this! Common issues include:
- Overwatering or underwatering: The soil should stay moist but not waterlogged.
- Poor drainage: Ensure the pot has drainage holes to prevent root rot.
- Low humidity or temperature: Keep it in a warm (70–85°F) and humid environment.
- Old or damaged seed: If the seed is cracked, moldy, or overly dry, it may not sprout.
Can I grow an avocado tree indoors? What do I need to know?
Avocado trees thrive indoors with the right setup. Place your seedling near a sunny window (south- or west-facing is best) or under a grow light for 6–8 hours daily. As it grows, ensure it gets:
- Well-draining soil (a mix of potting soil and perlite works well).
- Regular pruning to encourage bushier growth.
- Fertilizer (balanced liquid fertilizer) every 2–3 months once leaves appear.
Can I eat the avocado from my homegrown tree?
Yes, but it’ll take time! Avocado trees grown from seeds are not true to type, meaning the fruit may differ from the parent avocado in size, taste, or texture. It can take 5–13 years for a seed-grown tree to bear fruit. For a faster harvest, consider grafting a known variety onto your seedling once it’s established. Patience pays off—your first homegrown avocado will be a rewarding experience!
Wrapping up and next steps
Growing an avocado seed is a rewarding, zero-waste project that brings life to something you’d otherwise toss! With just a few simple steps—like the viability test and a little patience—you’ve got a chance to nurture a tiny tree.
Whether you’re a green thumb or a curious beginner, this experiment is a fun way to connect with nature while reducing waste.
Ready to take it further? Once your seedling sprouts roots, plant it in soil and watch it grow into a full avocado tree! 🌱 Who knows—you might just harvest fruit in a few years. Happy growing!