
Lawn
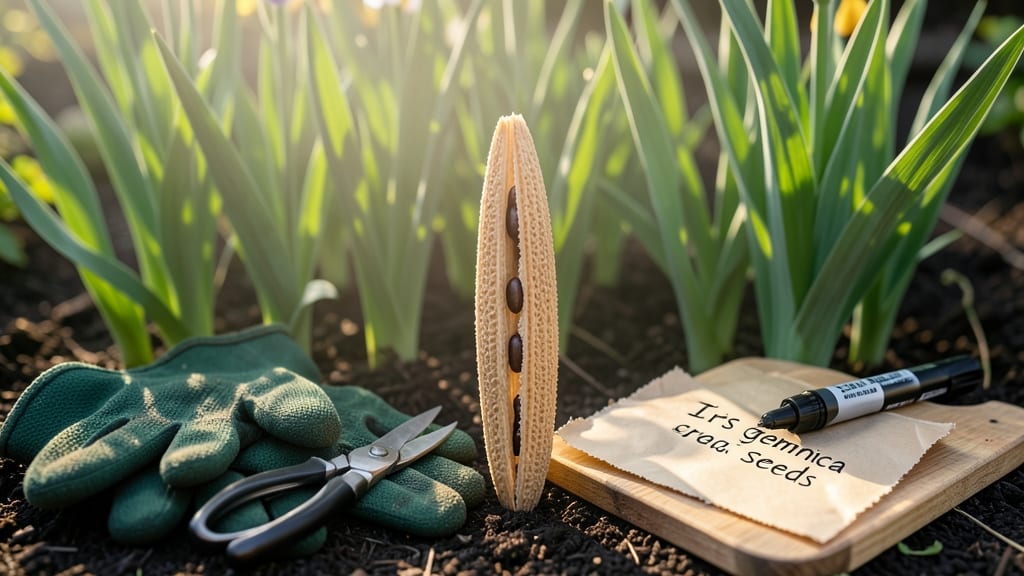
Uncovering seeds from the iris flower seed pod feels like revealing nature’s secret—because most gardeners never even try. 🌿 While irises usually spread by rhizomes, seed-grown plants develop unique color variations and hardiness that cuttings can't match.
The key is knowing exactly when to harvest those pods before they burst open and scatter seeds everywhere.
You'll need just three things: sharp scissors, a paper bag for collecting, and patience—because timing is everything. Harvest pods when they turn from green to tan and start splitting open, usually 6-8 weeks after flowering.
Gently twist them off the stalk to avoid damaging the plant, then lay them in a dry, shaded spot to finish ripening before extracting the plump, black seeds inside.
Germination takes longer than you'd expect—6-12 months in cold frames—but the payoff is worth it. These seedlings grow into sturdy plants with bold, vibrant blooms that often outperform their parent plants. The secret? Keep them consistently moist during their first year while protecting them from harsh winter winds.
This method works best for bearded irises and some Siberian varieties, though not all irises produce viable seeds. For guaranteed results, combine seed-growing with division—plant a few seeds while propagating your existing rhizomes. The combination gives you both stability and surprise in your garden.
📚 In This Guide
- What you need
- Instructions
- Tips and common mistakes
- Wrapping up and next steps
What you need
- ● Mature iris seed pods: 5–10 fully dried, brown pods (harvested after blooming in late summer/early fall).
- ● Sharp pruning shears or scissors: For cleanly snipping pods from stems (sterilize with rubbing alcohol first!).
- ● Paper towels or newspaper: To line a flat surface for drying/separating seeds.
- ● Small bowl or container: For collecting seeds (glass or ceramic works best).
- ○ Fine-mesh sieve (optional but helpful): To sift out debris (3–5mm mesh size).
- ● Labeling tags & permanent marker: To mark seed varieties if saving for future planting.
- ● Desiccant (e.g., silica gel packets): Speeds up drying if pods are damp.
- ● Glove (gardening or nitrile): Protects hands from prickly stems or sap.
- ● Magnifying glass: For inspecting seed viability (look for plump, intact seeds).
- ● Seed envelope or airtight container: For long-term storage (add a moisture absorber like rice).
Step-by-Step guide to stress-free iris seed pod extraction
Here’s how I harvest iris seeds without damaging the plant or losing the precious pods.
🌿 Step 1: Identify and Select Mature Seed Pods
Wait until the iris seed pods turn a dull brown and begin to dry out—this usually happens 4-6 weeks after flowering. You’ll see them hanging like tiny sausage-shaped bulbs from the plant’s stems. Avoid harvesting green or partially dried pods, as they won’t contain viable seeds.
Gently twist the pod to check for readiness—it should separate easily from the stem without tearing. If it resists, leave it another week. I always harvest on a dry, overcast morning to prevent pods from cracking prematurely in the sun.
✂️ Step 2: Harvest and Prepare Pods for Drying
Use clean, sharp pruning shears to snip the pods from the stem, leaving a ½-inch stem attachment to help with handling. Place them in a single layer on a paper towel-lined tray—this prevents moisture buildup that can cause mold. I avoid plastic containers because they trap humidity.
Store the tray in a cool, dry, well-ventilated spot (around 65-70°F) for 2-3 weeks. You’ll know they’re fully dry when they feel lightweight and papery to the touch. If any pod starts to split open prematurely, remove it immediately to save the seeds inside.
💧 Step 3: Extract Seeds from Dried Pods
Once the pods are completely dry, gently squeeze the sides to release the seeds. Iris seeds are flat and winged, resembling tiny black beans with delicate membranes. I place the pods in a clean paper bag and shake them lightly over a white bowl—the contrast makes seeds easy to spot.
Discard any pods that feel hollow or contain no seeds. Store the extracted seeds in an envelope or small glass jar with a silica gel packet to absorb excess moisture. Label the container with the variety name and harvest date—iris seeds lose viability quickly if stored improperly.
🌱 Step 4: Stratify Seeds for Optimal Germination
Iris seeds require stratification to break dormancy. Place the seeds in a ziplock bag with a damp paper towel, seal it, and refrigerate for 8-12 weeks at 35-40°F. Check the towel weekly—it should stay moist but not soggy. If mold appears, discard the batch and start fresh.
After stratification, sow the seeds ¼ inch deep in a well-draining seed-starting mix under bright, indirect light. Germination can take 3-6 months, so patience is key. I keep the soil consistently moist but never waterlogged—iris seedlings hate dampness.
⏰ Step 5: Transplant Seedlings When Ready
Wait until seedlings develop 2-3 true leaves (not just the initial cotyledons) before transplanting. Choose a sunny spot with well-draining soil—iris roots despise soggy conditions. Dig a hole twice as wide as the root ball but only as deep as the container.
Space seedlings 12-18 inches apart to allow room for growth. Water deeply after planting to settle the soil, but avoid overwatering—the first few weeks are critical for root establishment. Mulch lightly with 1 inch of organic matter to retain moisture without suffocating the young plants.
Tips & tricks for perfect iris seed pod extraction
These pro-level techniques will help you maximize seed yield while keeping your iris plants healthy and happy.
Pod Maturity Test: The dull brown color is your first clue, but don't rely on it alone. In Step 1, when you twist the pod, it should separate cleanly with just a gentle twist—like pulling a ripe tomato from the vine. If it feels tough or resists, leave it another week. I've learned this the hard way after harvesting premature pods that yielded no seeds. The perfect pod should feel slightly papery and make a faint pop when detached.
Drying Environment: The 65-70°F temperature range in Step 2 is ideal, but ventilation matters just as much. Place your drying tray near an open window or under a gentle fan to create airflow without direct drafts. I've had mold issues when pods were stacked too closely—always maintain that single layer. If you notice condensation on the tray, move to a warmer spot or reduce humidity in the room.
Seed Extraction Hack: For Step 3, I've found that placing the dried pods in a clean paper bag and gently rolling them between your palms works better than squeezing. This preserves the delicate winged membranes that help with seed dispersal. After shaking, use a fine-mesh sieve over your white bowl to catch any tiny seeds that might escape. The contrast really helps spot those tiny black beans against the white background.
Stratification Success: The 8-12 week cold treatment in Step 4 is non-negotiable for iris seeds, but here's my pro tip: Use a small refrigerator drawer or dedicated seed-starting fridge to maintain consistent 35-40°F temperatures. I mark the ziplock bags with the date and variety name using a permanent marker—this prevents mix-ups when dealing with multiple seed batches. If you notice any mold after the first week, discard immediately and start fresh with a new damp towel.
Pro Tips for Iris Flower Seed Pod
- These pro-level techniques will help you maximize seed yield while keeping your iris plants healthy and happy.
- Pod Maturity Test: The dull brown color is your first clue, but don't rely on it alone.
- Drying Environment: The 65-70°F temperature range in Step 2 is ideal, but ventilation matters just as much.
Frequently asked questions
Got questions about iris flower seed pods?
You’re not alone! Here are some of the most common queries—plus clear, stress-free answers to help you navigate the process like a pro.
How do I know when iris seed pods are ready for harvesting?
Iris seed pods typically ripen in late summer to early fall (August–October, depending on your climate). Look for dry, brown, and papery pods that split open naturally—this signals maturity. Avoid harvesting if they’re still green or moist, as seeds won’t be viable.
Why are my iris seed pods rotting before they ripen?
Rotting pods usually mean excess moisture or fungal issues. Ensure your irises are planted in well-draining soil and avoid overhead watering. If pods are already rotting, trim them off to prevent spreading disease. For future growth, improve airflow around plants and consider a fungicide if needed.
Can I grow irises from seed pods instead of dividing rhizomes?
While slower (taking 2–3 years to bloom), iris seeds are a fun, low-cost alternative. Collect seeds from dried pods, sow them in trays with moist seed-starting mix, and keep them in indirect light until germination (spring is ideal). Pro tip: Stratify seeds (4–6 weeks in the fridge) to mimic winter and boost success rates!
What’s the best way to store iris seed pods for later planting?
Store pods in a cool, dry place (like a paper bag with holes) until they fully dry. Once brittle, crack them open to release seeds, then store seeds in an airtight container with silica gel or rice to absorb moisture. Label with the harvest date—seeds lose viability after 1–2 years.
Do iris seed pods require special care after extraction?
After removing seeds, discard the empty pods to avoid pests. Clean seeds gently with a soft brush to remove debris. For immediate planting, sow them shallowly (¼ inch deep) in well-draining soil. If storing, keep seeds in a dark, cool spot until spring planting. No fancy equipment needed!
Still stuck? Drop your question in the comments—we’re happy to help turn your iris seed pod project into a blooming success!
Wrapping up and next steps
Extracting iris flower seed pods may seem tricky at first, but with the right tools and patience, you’ll unlock a rewarding gardening adventure! 🌱 Whether you’re saving seeds for propagation or simply admiring nature’s craftsmanship, this process connects you closer to your garden’s growth cycle.
Now that you’re armed with insights—from timing to storage tips—why not take the next step?
💡 Ready to grow? Try planting a few seeds this season and observe the magic of irises blooming from your own harvest. Share your progress with fellow gardeners or experiment with hybrid varieties—your green thumb is about to shine even brighter! 🌸