
Lawn
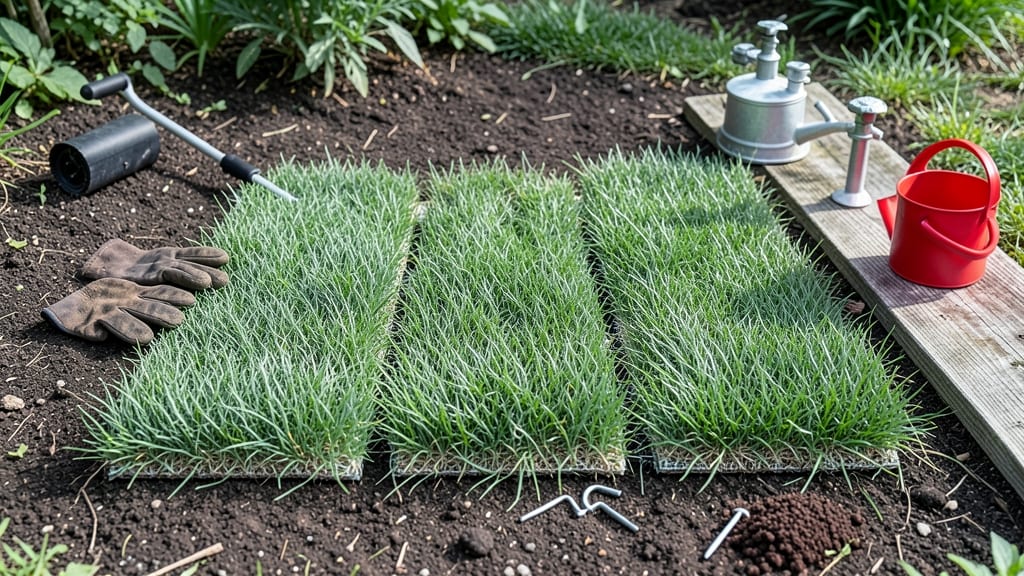
Transforming bare patches into lush grass in weeks instead of months starts with lawn seed rolls—a game-changer for erosion control and quick coverage. I’ve used them to repair sunken spots and restore lawns after construction, and the results are shockingly fast when done right.
The secret lies in the layered approach that mimics natural turf growth while preventing transplant shock.
You’ll need a few basic tools: a rake for soil prep, a garden roller (or heavy board) to press the rolls into place, and a light covering of straw to protect the seeds.
The real magic happens when you unroll the strips in a staggered pattern, just like laying sod, but with the added benefit of deeper root establishment. Most rolls come pre-seeded with a mix of grasses for durability, so you avoid the guesswork of loose seed blends.
After installation, the key is consistent watering—light but frequent for the first two weeks to keep the soil moist without washing away the seeds. Within 3-4 weeks, you’ll see vibrant green shoots filling in gaps that would take months with loose seed.
The rolls also hold soil better, reducing erosion on slopes or high-traffic areas.
For best results, time your project for spring or early fall when temperatures are mild and rain is predictable. If you’re working on a slope, anchor the rolls with temporary stakes until roots take hold.
This method cuts establishment time by half compared to loose seed, and the turf stays dense year after year.
📚 In This Guide
- What you need
- Instructions
- Tips and common mistakes
- Wrapping up and next steps
What you need
- ● Lawn seed rolls: 1–2 rolls (depending on lawn size; check coverage labels—typically 1 roll covers ~200–400 sq. ft.).
- ● Seed type: Choose cool-season (e.g., Kentucky bluegrass, fescue) or warm-season (e.g., Bermuda, Zoysia) based on your climate.
- ● Soil preparation tools: Rake (bow or stiff-bristle for detaching sod, if needed).
- ● Garden trowel or hand fork (for loosening compacted soil).
- ● Lawn roller (100–150 lbs, 12–16-inch width for even pressure).
- ● Watering supplies: Garden hose with adjustable nozzle (or sprinkler for large areas).
- ● Watering can (for spot hydration).
- ● Fertilizer: Starter fertilizer (high in phosphorus, e.g., 10-20-10 ratio).
- ● Soil test kit (to check pH and nutrient levels before seeding).
- ● Topsoil or compost (1–2 inches, if soil is poor or bare).
- ● Weed barrier fabric (for areas with persistent weeds).
- ● Lawn seed spreader (for even distribution if not using rolls).
- ● Mulch or straw (light layer to retain moisture).
Step-by-Step instructions for creating lawn seed rolls
This method builds strong roots before planting—no transplant shock, just lush growth.
Prepare the Base Layer
Start with a clean, level area free of debris or weeds. Use a rake to create a fine, even seedbed—think of it as your foundation. Spread 1 inch of high-quality topsoil evenly across the space. This layer provides nutrients and ensures good seed-to-soil contact, which is critical for germination.
Work the soil lightly with a rake or hoe to break up any clumps. You want it loose but not powdery—imagine fluffy cake batter. This texture lets roots penetrate easily while holding moisture. If your soil is heavy clay, mix in sand or compost to improve drainage before proceeding.
Apply Seed and Topsoil in Thin Layers
Sprinkle ½ pound of lawn seed per 100 square feet evenly across the prepared area. Use a broadcast spreader for consistency—hand-spreading leads to clumps and uneven coverage. Lightly rake the seeds into the soil just enough to cover them (about ¼ inch deep). Too-deep planting delays germination.
Now cover the seeds with a thin layer of topsoil—just ⅛ inch should do. This protects seeds from drying out and predatory birds while keeping them in contact with moisture. Water gently but thoroughly until the soil feels damp 1 inch deep. Avoid puddles; you want steady moisture, not soggy soil.
Roll and Water for Even Germination
Here’s where the magic happens: use a lawn roller (or a heavy board) to create 1-inch-deep furrows across the seeded area. Space furrows 6 inches apart in a grid pattern. This creates a textured surface that holds moisture and encourages even root growth. Press firmly but not so hard you compact the soil—think firm handshake, not crushing.
Water immediately after rolling to settle the soil into the furrows. Keep the area consistently moist (not soggy) for the first 14 days. You’ll see the first green shoots appear in 7-10 days—this is your cue that germination is working. If the soil dries out, seeds may fail to sprout or produce weak seedlings.
Maintain Moisture and Monitor Growth
Once seedlings reach 2 inches tall, reduce watering slightly but keep the soil moist to the touch. This prevents fungal diseases like brown patch, which thrives in overly wet conditions. Mow when grass reaches 3 inches high, setting your mower blade to 2 inches for the first cut—this strengthens roots without stressing the young plants.
After 4-6 weeks, the lawn will look lush and established. At this point, you can gradually reduce watering to 1-1.5 inches per week, letting the roots grow deeper. The layered approach means your turf handles foot traffic and heat better than traditional seeding methods. Watch for uniform growth—if some areas stay sparse, reseed lightly and water carefully.
Tips & tricks for perfect lawn seed rolls
These practical tips will help you avoid common pitfalls and create a thriving lawn with minimal effort.
Soil Preparation Secret: Before spreading that 1 inch of topsoil in Step 1, test your soil's moisture level by squeezing a handful—it should crumble easily but not fall apart. If it forms a tight ball, you need to add more sand or compost to improve drainage. This prevents waterlogging that can drown seeds during germination. Think of it as creating the perfect sponge texture for your grass roots.
Seed Spreading Technique: When applying the ½ pound of lawn seed per 100 square feet in Step 2, work in two perpendicular directions for complete coverage. Walk slowly and maintain a consistent distance from the area to avoid over-seeding in some spots and missing others. This ensures every square inch gets the same chance to grow. I've seen too many uneven lawns from hasty spreading!
Furrow Depth Matters: Those 1-inch-deep furrows in Step 3 should be consistent throughout your lawn. Use a straightedge or level to check depth periodically while rolling—variations can lead to uneven water absorption. The goal is to create tiny trenches that hold moisture like little reservoirs while still allowing air circulation. Too shallow, and you won't get the benefits; too deep, and you risk compacting the soil beneath.
Watering Watch: During the critical 14-day germination period, water in the morning to allow foliage to dry before evening. This simple habit prevents fungal diseases like brown patch that thrive in damp conditions overnight. Aim for about ½ inch of water per week during this period—enough to keep the top inch of soil consistently moist but not soggy. A rain gauge or tuna can helps measure accurately.
Pro Tips for Lawn Seed Rolls
- These practical tips will help you avoid common pitfalls and create a thriving lawn with minimal effort.
- Soil Preparation Secret: Before spreading that 1 inch of topsoil in Step 1, test your soil's moisture level by squeez...
- Seed Spreading Technique: When applying the ½ pound of lawn seed per 100 square feet in Step 2, work in two perpendic...
Frequently asked questions
Got questions about lawn seed rolls?
You’re not alone! Here are answers to the most common queries to help you grow a lush, shock-free lawn with ease.
What’s the best time of year to install lawn seed rolls?
For most regions, early fall (September–October) is ideal—cool temps and frequent rain boost germination. Spring (March–April) works too, but avoid summer heat or winter freezes. Check your local frost dates to time it right!
Can I use lawn seed rolls on an existing lawn?
Yes, but prep is key! Mow the old grass short, remove debris, and loosen soil with a rake or aerator. Overlap seed rolls slightly to ensure full coverage. Water thoroughly to help roots bond with the existing turf.
Why are my seed rolls drying out or failing to take root?
Common culprits: inconsistent watering (keep soil moist but not soggy), poor soil contact (unroll tightly), or extreme temps. Troubleshoot by checking moisture daily, adjusting watering schedules, and ensuring rolls stay snug to the ground.
Are lawn seed rolls cheaper than sod or grass plugs?
Generally, yes! Seed rolls cost $0.50–$2 per sq. ft., while sod runs $0.80–$2.50+ and plugs $1–$3+. They’re a budget-friendly upgrade over bare seed, with faster establishment than planting individual seeds.
How long until I can walk on my new seed roll lawn?
Wait 4–6 weeks for roots to stabilize. Light foot traffic is okay after 3 weeks, but avoid heavy use until the turf is fully anchored. A soil test can confirm readiness—look for 1–2 inches of root growth.
What’s the difference between seed rolls and hydroseed?
Seed rolls are pre-grown grass on a biodegradable mat, while hydroseed is a slurry of seed, mulch, and fertilizer sprayed on-site. Rolls establish faster (2–3 weeks vs. 4–6), but hydroseed covers slopes better. Choose based on your lawn’s size and terrain!
Wrapping up and next steps
Transforming your lawn with lawn seed rolls is a game-changer—no transplant shock, faster growth, and a lush finish! Whether you’re patching bare spots or reviving an entire yard, these layered rolls make the process effortless and effective. 🌱
Ready to see the results? Grab your supplies, follow the steps, and watch your lawn thrive in weeks! For extra tips, check out our FAQs or dive into maintenance guides to keep that green perfection going strong.