
Lawn
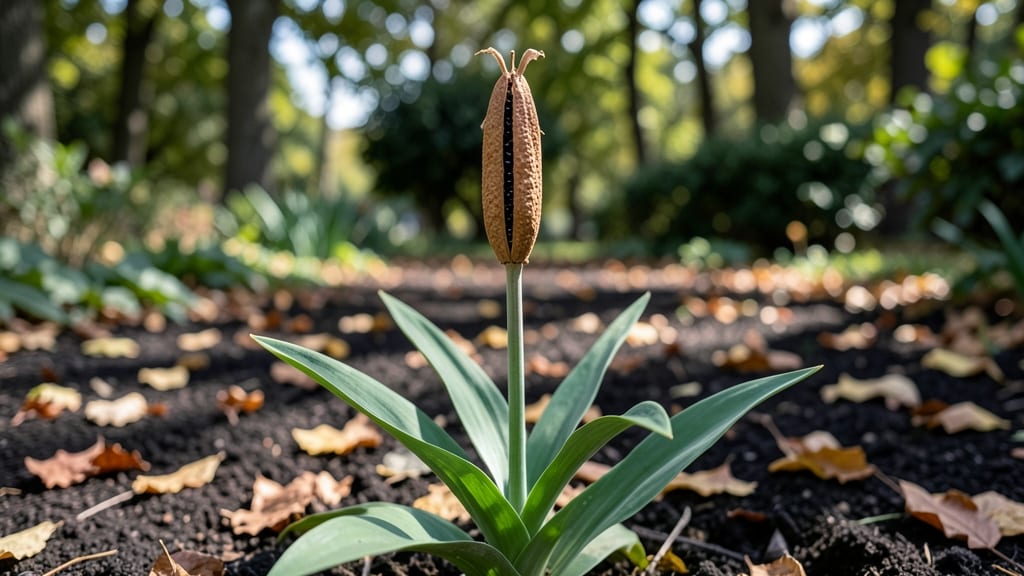
Harvesting lily seed pods turns your garden's spent blooms into free plants—no nurseries needed. 🌱 The trick is knowing when those dried pods are ready to crack open, and I'll walk you through the whole process from identification to planting your new lilies.
Start by spotting the pods—those long, papery cases that replace flowers after blooming. Most lilies produce viable seeds, though hybrids might surprise you. Once they turn completely brown and crispy (usually 6-8 weeks after flowering), gently twist them off the stem to avoid damaging the plant.
Inside each pod, you'll find flat black seeds that look like tiny beans. Store them in a cool, dry place until spring, and you'll have a head start on next season's garden. The best part? These homegrown lilies often outperform store-bought plants because they're perfectly adapted to your climate.
This method works for daylilies, Asiatic lilies, and even some tree lilies, though timing varies slightly by variety. With just a little patience, you'll turn last year's blooms into this year's showstoppers—completely free and zero-waste.
📚 In This Guide
- What you need
- Instructions
- Tips and common mistakes
- Wrapping up and next steps
What you need
- ● Lily bulbs or seed pods: Choose from Lilium varieties like Lilium asiaticum or Lilium candidum. Start with 3-5 healthy bulbs for a small harvest.
- ● Well-draining potting mix: A 10-gallon bag of a blend with perlite or sand (e.g., 60% peat moss, 20% perlite, 20% compost).
- ● Containers or garden bed: For pots: 5-6-inch diameter containers with drainage holes (1 per bulb).
- ● For in-ground planting: A sunny spot with loose, fertile soil (amend with compost if needed).
- ● Fertilizer: A balanced, slow-release granular fertilizer (e.g., 10-10-10) or organic options like worm castings.
- ● Watering can or hose with a gentle spray nozzle.
- ● Pruning shears or sharp scissors (for harvesting pods).
- ○ Garden twine or stakes (optional but helpful) to support tall stems.
- ● Gloves (to protect hands from sap and thorns).
- ● Label markers (to track varieties if experimenting).
- ● Paper bags or mesh sacks (for drying harvested pods).
- ○ Thermometer (optional) to monitor soil temperature (ideal: 60–70°F for germination).
- ● Mulch (straw or shredded leaves) to retain moisture and regulate soil temp.
- ● 🌡️ Soil temp matters: Lily bulbs need warm soil (60°F+) to sprout—wait until late spring or use a heat mat if starting indoors.
- ● ✨ Choose the right light: Full sun (6+ hours/day) ensures robust blooms and seed pods.
- ● 💧 Water wisely: Keep soil consistently moist but not soggy—overwatering can rot bulbs.
Step-by-step guide to harvesting and ripening lily seed pods
Turn your lily blooms into new plants with these simple tricks for zero-waste seed pod harvesting.
🌱 Step 1: Identify and Select Mature Lily Blooms
Wait until your lily flowers have fully bloomed and begun to fade before harvesting. The petals will droop and turn brown while the center pod remains upright—this is your signal it's ready. I like to harvest in the morning when the pods are still slightly damp from dew, which makes handling easier.
Gently twist the spent flower head at the base until the seed pod detaches cleanly. Avoid pulling or tugging, which can damage the stem. If the pod resists, let it stay on the plant for another day or two—it won't ripen properly if harvested too early. You'll know you've picked the right pods when they feel firm and slightly woody to the touch.
💧 Step 2: Store Pods for Ripening in a Cool, Dry Place
Place the harvested pods in a paper bag (not plastic) and tie it loosely with twine. The bag creates a slightly humid environment that encourages even ripening while allowing airflow. Store the bag in a cool, dark spot like a basement or pantry where temperatures stay between 50-60°F. This prevents premature drying or mold growth.
Check the pods every 5-7 days by gently squeezing one. When it feels dry and papery with a hollow sound when tapped, it's ready. If you open a pod too soon, the seeds will still be green and underdeveloped. Patience here is key—rushed ripening leads to poor germination rates.
☀️ Step 3: Open and Extract Seeds When Fully Dry
Once the pods are completely dry, lay them on a clean surface and gently squeeze them between your palms. The pods should split open easily, revealing small, flat seeds inside. I like to wear gloves for this step—lily seeds can irritate skin, and the pods sometimes release fine dust. Spread the seeds out on a tray to air-dry for another 24 hours to ensure any remaining moisture evaporates.
Discard any seeds that look shriveled, discolored, or empty. Healthy seeds will be plump and uniformly colored. Store the viable seeds in a small envelope labeled with the lily variety and date. Keep them in a cool, dark place until ready to plant—properly stored seeds remain viable for 1-2 years.
🌿 Step 4: Stratify Seeds for Better Germination (Optional but Recommended)
For higher germination rates, place the dried seeds in a sealed plastic bag with a slightly damp paper towel. Store the bag in your refrigerator's vegetable crisper for 4-6 weeks. This cold stratification mimics winter conditions and breaks seed dormancy. Check the towel weekly—it should stay lightly moist but not soggy.
After stratification, remove the seeds and let them sit at room temperature for 24 hours before planting. You'll notice the seeds look slightly plump and darker after this process. Plant them ½ inch deep in well-draining soil and keep the soil consistently moist until germination, which typically occurs in 4-8 weeks.
⏰ Step 5: Plant Stratified Seeds in Well-Draining Soil
Choose a sunny spot with at least 6 hours of direct sunlight for your lily seedlings. Prepare the soil by mixing in compost to improve drainage—lilies hate soggy roots. Plant the seeds in early spring after the last frost date, about ½ inch deep and 2 inches apart. Gently water the soil until it's moist but not waterlogged.
Keep the soil consistently moist during germination but avoid overwatering—lily seedlings are prone to rot if the soil stays too wet. Once the seedlings reach 3-4 inches tall, thin them to 6 inches apart to give each plant room to grow. You'll see the first true leaves emerge in 4-6 weeks, signaling healthy root development.
Tips & tricks for perfect lily seed pod ripening
These little-known tricks will help you maximize your harvest and ensure healthy lily seedlings every time.
Timing Secret: Harvest pods in the morning when they're still slightly damp from dew—this makes them easier to handle and prevents them from drying out prematurely. I've found that harvesting too late in the day can cause the pods to over-dry on the plant, making them brittle and prone to cracking when you try to open them later. The morning dew also helps keep the pods fresh during transport to your ripening location.
Storage Wisdom: That 50-60°F temperature range for ripening is critical—any warmer and you risk mold growth, any cooler and the pods may never fully dry. I keep mine in a basement corner where the temperature stays steady. If your basement is too warm, try a closet with good airflow or even the back of your refrigerator (not the veggie crisper) as a last resort. Just don't let them get below 50°F or the ripening process will stall completely.
Seed Quality Check: When testing pods every 5-7 days, listen for that hollow sound when you tap them—it's your best indicator of readiness. I've learned to also check the weight: ready pods feel surprisingly light, almost weightless in your hand. This is when the seeds inside have fully developed and the pod walls have become completely dry. If you open them too soon, you'll find green, underdeveloped seeds that won't germinate properly.
Stratification Hack: For the 4-6 week stratification period, I've found that using a small plastic container with holes in the lid works better than a bag—it allows for better airflow while keeping the moisture level consistent. Place a small piece of mesh or even a coffee filter over the holes to prevent seeds from escaping. This method gives you better control over moisture levels than a sealed bag, which can sometimes get too damp and cause mold.
Pro Tips for Lilly Seed Pod
- These little-known tricks will help you maximize your harvest and ensure healthy lily seedlings every time.
- Timing Secret: Harvest pods in the morning when they're still slightly damp from dew—this makes them easier to handle...
- Storage Wisdom: That 50-60°F temperature range for ripening is critical—any warmer and you risk mold growth, any cool...
Frequently asked questions
Got questions about growing and harvesting lilly seed pods? You’re not alone! Here are some of the most common queries—plus quick answers to keep your zero-waste garden thriving.
When do lilly seed pods fully ripen?
Lilly seed pods typically ripen 8–12 weeks after flowering, depending on the variety and climate. Look for pods that turn brown or papery and split open slightly—this means they’re ready for harvest! If left too long, seeds may scatter, so act fast.
What do I do if my pods rot before ripening?
Overwatering or high humidity can cause rot. Ensure pods get good airflow and moderate moisture (water at the base, not the pods). If rot starts, trim affected pods immediately and reduce watering. Fungicide sprays (like neem oil) can also help prevent future issues.
Can I grow lilly seed pods in containers?
Yes! Choose a large container (at least 12 inches deep) with drainage holes and well-draining soil. Dwarf varieties like Lilium regale work best. Just ensure the container gets 6+ hours of sunlight daily and rotate it occasionally for even growth.
How do I store harvested lilly seeds?
Once pods open, remove seeds and let them dry in a cool, dark place for 1–2 weeks. Store them in a paper envelope or breathable bag in the fridge for up to 1 year. Avoid plastic—it traps moisture and speeds up spoilage.
What’s an alternative if my lilly pods fail?
Try easy-to-grow seed pods like cornflower, dahlias, or sunflowers—they’re just as striking and often more forgiving. For a lilly-like look, daylilies (Hemerocallis) produce edible buds and seeds too!
Wrapping up and next steps
Growing lilly seed pods isn’t just rewarding—it’s a sustainable way to add beauty and texture to your garden while minimizing waste! 🌱 By mastering pod ripening tricks and zero-waste harvesting, you’ve unlocked a simple yet impactful gardening skill.
Whether you’re a seasoned green thumb or just starting, these techniques ensure you’ll enjoy lush blooms and healthy pods year after year.
Ready to take it further? Experiment with different varieties or share your harvest with fellow gardeners—your newfound knowledge could inspire others! Plant a few more pods today and watch your garden flourish.