
Lawn
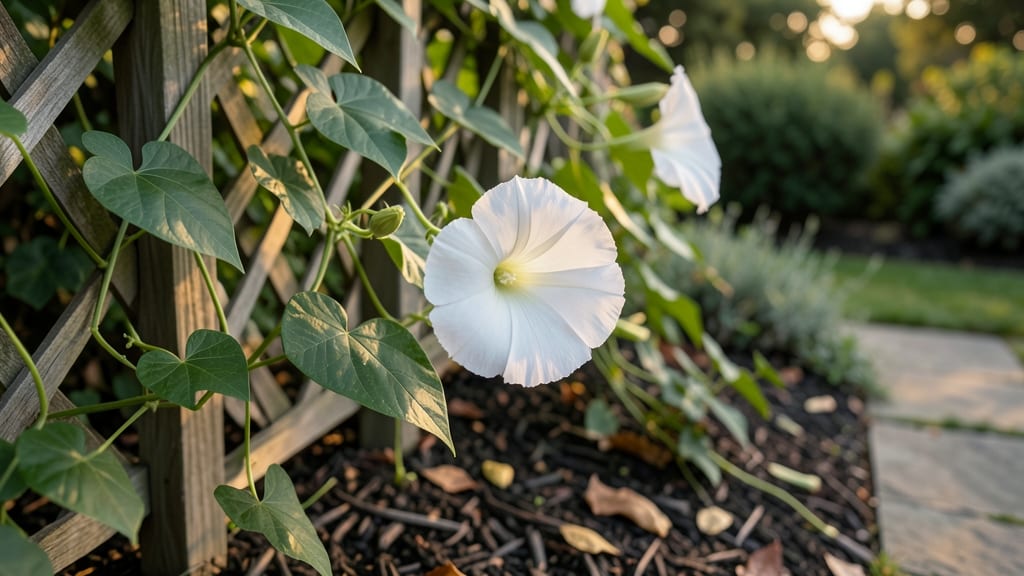
Moonflower bush seed pods hold the secret to next year’s garden—if you know how to check them right. 🌙 The twist-free viability test separates good seeds from duds before they even touch soil, saving you time and frustration.
Start by harvesting mature pods when they turn brown and start splitting open. Gently squeeze to feel the seeds inside—if they rattle like tiny marbles, they’re ready. Discard any pods that feel hollow or crunchy, as those seeds won’t sprout.
Once you’ve got viable seeds, plant them in well-draining soil about ¼ inch deep, keeping them moist but not soggy. With patience, you’ll see sprouts in 7-14 days, and those delicate moonflowers will reward you with stunning night-blooming whites by summer.
This zero-waste method means you’ll never buy seeds again—and your garden will keep growing bigger each year.
📚 In This Guide
- What you need
- Instructions
- Tips and common mistakes
- Wrapping up and next steps
What you need
- ● Moonflower seed pods: 5–10 mature, dried pods (harvested from your bush or sourced locally). Pro tip: Look for pods that are brown, crispy, and slightly papery—these are ready for testing!
- ● Paper towels or coffee filters: 2–3 sheets (unbleached and seed-safe if possible).
- ● Plastic bag or airtight container: A quart-sized ziplock bag or small Tupperware (to create humidity).
- ● Water: Distilled or tap water (room temperature).
- ○ Permanent marker or pencil: For labeling (optional but helpful!).
- ● Small bowl or cup: For soaking (if testing viability via water float test).
- ● Notebook or journal: To track results and germination progress.
- ● Spray bottle: For gentle moisture control if using the paper towel method.
- ● Grow lights or sunny windowsill: If you plan to germinate viable seeds immediately.
- ● Seed-starting mix: Lightweight, sterile potting soil for transplanting sprouted seeds.
- ● Pruning shears: For harvesting pods cleanly from the bush.
How to check moonflower seed pods for viability without twisting
Skip the guesswork—here’s how to tell which moonflower pods hold seeds worth saving.
🌱 Step 1: Harvest Pods at the Right Stage
Wait until the moonflower pods turn from green to a dry, papery brown—this signals seeds are mature but still viable. Harvest them in the morning when humidity is low, as damp pods rot faster. Use clean, sharp pruning shears to snip the entire pod from the stem, leaving a small stub to avoid damaging the plant.
If you harvest too early, seeds won’t be fully developed; too late, and they’ll scatter or shrivel. A good pod feels lightweight but firm—like a dried-out balloon. Tap it gently against your palm: if it makes a hollow thud, it’s ready. If it sounds solid or crumbles, it’s past its prime.
🌿 Step 2: Inspect Pods for Signs of Damage or Pests
Spread the pods on a clean, dry surface (like a baking sheet or newspaper) to examine them closely. Look for small holes, webbing, or sticky residue—these are red flags for pests like beetles or aphids. Discard any pods with visible damage, as contaminated seeds won’t grow well.
Also, check for mold or discoloration (black, gray, or fuzzy spots). Moonflower pods are sensitive to humidity, so even minor dampness can trigger rot. If a pod feels slimy or smells musty, toss it. Healthy pods should be uniformly brown and free of blemishes—no exceptions.
⏰ Step 3: Test Viability Without Opening the Pod
Here’s the twist-free trick: hold the pod up to a bright light source (a window or flashlight works). Gently shake it—if you hear tiny seeds rattling inside, they’re likely viable. Next, tap the pod firmly on a hard surface: if seeds pop out or leave a faint imprint when pressed, they’re ready for planting.
Skip the pod-opening step entirely—this method preserves seed quality and avoids cross-contamination. If a pod feels empty or makes no sound, it’s spent. Store only the pods that pass both the shake and tap tests in a cool, dry place (like a paper envelope) until you’re ready to plant.
💧 Step 4: Store Viable Pods Properly for Future Planting
Place the approved pods in a breathable container (like a mesh bag or folded paper towel) and store them in a dark, cool spot (50–60°F is ideal). Avoid plastic bags—they trap moisture and encourage mold. Label the container with the harvest date so you can track freshness.
Moonflower seeds stay viable for 1–2 years under these conditions, but germination rates drop after the first year. Check pods every few months: if they start to crack open or lose their papery texture, plant them immediately. The goal is to keep them dry and undisturbed until planting season.
Tips & tricks for perfect moonflower seed pod harvesting
Between us, these little tricks will save you from wasting perfectly good seeds—and hours of frustration.
Harvest Timing Secret: Morning harvests are non-negotiable. Dew or overnight dampness turns those papery pods into moldy messes in minutes. I’ve ruined batches by harvesting in the afternoon—don’t make my mistake. Also, wait until pods are completely dry and brown; green pods (even slightly) mean seeds aren’t ready. The "hollow thud" test in Step 1 is your best friend here.
Light Source Matters: That bright light test in Step 3 works best with natural sunlight or a flashlight—never a dim bulb. I learned this the hard way when my kitchen light made all my pods look viable (they weren't). If you're indoors, position the pod near a sunny window. The seeds should cast visible shadows through the pod walls when held up to light.
Storage Wisdom: That 50–60°F storage temp in Step 4 is critical—your fridge’s crisper drawer (not the freezer!) is perfect. I store mine in a small mesh bag with a silica gel packet (from new shoes) to absorb any lingering moisture. Label each bag with the harvest date and check pods every 3 months: if they start cracking, plant them immediately or they’ll lose viability.
Pest Prevention: If you find any pods with holes or webbing in Step 2, quarantine them immediately in a sealed bag—don’t toss them near your good pods. I’ve seen beetles hitchhike from damaged pods to healthy ones in just 24 hours. A quick spray of neem oil on your work surface before inspecting pods can also deter pests during your harvest session.
Pro Tips for Moonflower Bush Seed Pod
- Between us, these little tricks will save you from wasting perfectly good seeds—and hours of frustration.
- Harvest Timing Secret: Morning harvests are non-negotiable. Dew or overnight dampness turns those papery pods into mo...
- Light Source Matters: That bright light test in Step 3 works best with natural sunlight or a flashlight—never a dim b...
Frequently asked questions
Got questions about harvesting and using moonflower bush seed pods? You’re not alone! Here are some of the most common queries—plus clear, actionable answers to help you master zero-waste gardening with ease.
How do I know if a moonflower seed pod is ready for harvest?
A moonflower seed pod is ripe when it turns brown and feels dry to the touch—almost papery. Gently squeeze it: if seeds rattle inside, it’s ready! Avoid harvesting if the pod is still green or soft, as seeds may not be fully mature. Pro tip: Morning harvests yield the freshest pods before humidity sets in.
Can I save moonflower seeds from store-bought blooms?
Yes, but with a caveat! Store-bought moonflowers may be hybrids or treated with chemicals to prevent seed production. Check for seed pods first—if none appear, the plant likely won’t produce viable seeds. For guaranteed results, grow from open-pollinated seeds or save pods from your own garden.
What’s the best way to store moonflower seeds for planting?
Clean seeds thoroughly, let them dry for 1–2 days in a well-ventilated area, then store them in a paper envelope or airtight container with a silica gel packet to absorb moisture. Keep seeds in a cool, dark place (like a fridge) for up to 2 years. Label the container with the harvest date!
Why aren’t my moonflower seed pods opening naturally?
Moonflower pods may stay closed if they’re overly humid or underripe. Try these fixes:
- Dry them indoors: Place pods in a paper bag with a few holes for airflow for 3–5 days.
- Check for pests: Inspect for beetles or mites that might block seed release.
- Gently twist: Use a pair of tweezers to coax open stubborn pods (no force needed!).
Are moonflower seed pods edible or useful for anything else?
While the seeds are edible (raw or toasted), the pods themselves aren’t typically eaten. However, they’re fantastic for:
- Natural dyeing: Crushed pods yield a soft beige hue for fabric or paper.
- Compost: Dry pods break down quickly—add them to your compost pile for nutrient-rich soil.
- Crafts: Use whole pods in dried flower arrangements or as rustic decor.
Wrapping up and next steps
Growing a moonflower bush from seed pods is a rewarding way to embrace zero-waste gardening while enjoying its stunning nocturnal blooms! 🌙 By following the simple twist-free viability check, you’ve unlocked the secret to nurturing healthy seedlings with minimal effort.
Whether you’re a seasoned gardener or just starting out, this method proves that sustainability and beauty go hand in hand.
Now that you’re armed with the knowledge, why not take the next step? Share your moonflower journey with fellow green thumbs, experiment with companion plants, or even gift viable seed pods to friends.
Every twist-free pod you test brings you closer to a thriving, eco-friendly garden—one bloom at a time! 🌱