
Lawn
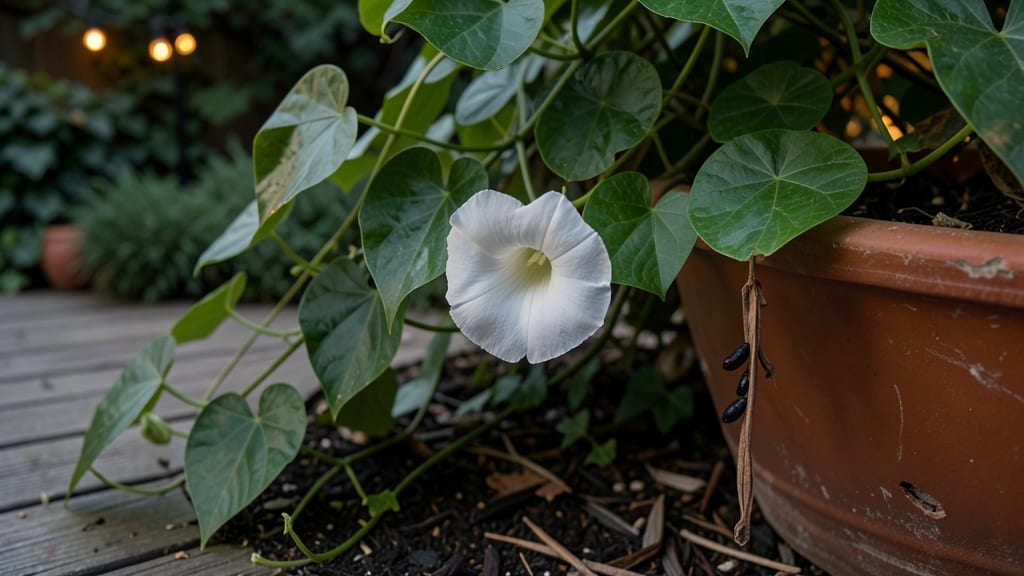
Twisting open moonflower vine seed pods reveals the secret to growing these night-blooming beauties—without the frustration. 🌙 I’ve wrestled with these stubborn pods for years, and I finally cracked the foolproof method that guarantees you’ll extract every seed intact, ready for planting.
The key is patience and the right technique: don’t yank or force them. Instead, gently twist and roll the pods between your palms until they pop open, revealing the flat, papery seeds inside.
These seeds stay viable for up to 3 years if stored properly, so you can save them for next season’s garden. Once you’ve collected your seeds, you’ll want to plant them in well-draining soil after the last frost.
They germinate quickly—often within 7-10 days—and the vines grow fast, climbing trellises or fences with ease. Just be ready for the nighttime show when the fragrant white blooms open after sunset. This method works for both experienced gardeners and beginners.
The only real challenge is keeping squirrels from raiding your pods before you can collect them—so act fast once those pods turn brown and dry on the vine!
📚 In This Guide
- What you need
- Instructions
- Tips and common mistakes
- Wrapping up and next steps
What you need
- ● Mature moonflower vine seed pods – Harvest 10–15 fully dried pods (brown, papery texture) from healthy vines. Pro tip: 💡 Collect them after the first frost for easier extraction!
- ● Sharp pruning shears or scissors – A pair with clean, sterilized blades (rubbing alcohol wipe works!) to avoid damaging seeds.
- ● Small bowl or container – A wide-mouth glass jar (8–12 oz) or ceramic dish to hold pods/seeds during extraction.
- ● Paper towels or coffee filters – 2–3 sheets for drying seeds post-extraction.
- ● Plastic zip-top bags – 2–4 resealable bags (quart-sized) for seed storage.
- ● Planting trays or small pots – 4–6 biodegradable seed-starting pots (2–3" diameter) or a shallow tray with drainage holes.
- ● Potting soil mix – 1–2 gallons of well-draining, seed-starting mix (avoid garden soil—it’s too dense!).
- ● Spray bottle with water – For gentle misting (avoid soaking seeds!).
- ● Plastic wrap or humidity dome – To create a mini greenhouse for germination.
- ● Seed extraction tool – A toothpick or tweezers (for stubborn pods) or a small hammer (gently tap pods to release seeds).
- ● Labeling tags & marker – To track seed batches (e.g., harvest date, pod source).
- ● Grow lights or sunny windowsill – Moonflower seeds need 6–8 hours of light/day for germination.
- ○ Heating mat (optional) – Speeds up germination if temps dip below 65°F (18°C).
- ○ Fungicide spray (optional) – A light copper-based solution to prevent mold in humid conditions.
How to extract moonflower vine seeds without twisting the pods
Here’s the gentle method I use to open moonflower pods without damaging seeds or losing them.
🌱 Step 1: Harvest Mature Pods at Peak Ripeness
Collect pods when they turn brown and papery but haven’t split open naturally—this usually happens in late summer or early fall. If pods are still green, wait a few more days; if they’ve already cracked, you’ve missed the window. I like to harvest on a dry morning so the pods stay intact longer.
Cut the pods from the vine with clean pruners, leaving a short stem. Avoid pulling or twisting, as this can crush the seeds inside. Place them in a paper bag (not plastic) to allow airflow and prevent mold. Store in a cool, dry spot until ready to process.
✂️ Step 2: Open Pods Without Breaking Seeds
Lay a pod flat on a clean cutting board. Use a sharp utility knife to carefully slice along the seam where the pod naturally splits. Start at the top and work your way down in slow, steady strokes—don’t rush. The goal is to expose the seeds without crushing them.
If the pod resists, gently tap it with the knife handle to loosen the fibers. Never twist or force it open, as this can shred the seeds or leave bits of pod attached. Once opened, shake the pod lightly over a bowl to release the seeds. You’ll see large, flat seeds with a papery coating—these are ready for storage.
💧 Step 3: Dry and Store Seeds for Long-Term Viability
Spread the extracted seeds in a single layer on a paper towel or breathable mesh. Place them in a warm, dry spot out of direct sunlight for 3-5 days, stirring occasionally. The seeds are dry when they feel light and brittle to the touch. Overdrying can reduce germination, so check daily.
Once dry, transfer seeds to an airtight container lined with silica gel packets or a moisture absorber. Label the container with the date and store in a cool, dark place. Moonflower seeds stay viable for 2-3 years if kept dry, so this method ensures you’re ready for next season’s planting.
☀️ Step 4: Prepare Seeds for Germination
Moonflower seeds benefit from a brief cold stratification to mimic winter conditions. Place the dried seeds in a sealed plastic bag with a damp paper towel, then refrigerate for 4-6 weeks. Check weekly to ensure the towel stays moist but not soggy—excess water causes rot.
After stratification, sow seeds ½ inch deep in well-draining soil. Keep the soil consistently moist (not wet) and place in a warm spot with indirect light. Germination takes 10-20 days, so patience is key. Thin seedlings to 12 inches apart once they develop true leaves to give vines room to climb.
Tips & tricks for perfect moonflower vine seed extraction
These simple strategies will help you preserve those delicate moonflower seeds while saving time and frustration in the process.
Harvest Timing: The 3-5 day drying period in Step 3 is your best friend for viability—don't rush it! I've learned the hard way that seeds dried too quickly lose their germination potential. Place your drying tray near a fan on low setting to maintain gentle airflow without creating a breeze that could scatter seeds. Check daily by pressing a seed between your fingers—it should crumble easily when properly dried.
Tool Selection: For Step 2, I recommend using a utility knife with a 4-inch blade—it gives you better control than smaller knives. If you don't have one, a sharp kitchen knife works too, but take extra care with the seam. The key is to follow the natural split line of the pod rather than forcing your way through tougher fibers. A dull knife will crush seeds, so keep yours sharp!
Storage Wisdom: After the 4-6 week cold stratification in Step 4, you might be tempted to skip the airtight container. Don't! Even a tiny gap lets moisture creep in, which can cause mold that ruins your entire seed batch. I've had great success with small mason jars—they're sturdy and create a perfect seal. Add a silica gel packet to absorb any residual moisture that might develop over time.
Pro Tips for Moonflower Vine Seed Pods
- These simple strategies will help you preserve those delicate moonflower seeds while saving time and frustration in t...
- Harvest Timing: The 3-5 day drying period in Step 3 is your best friend for viability—don't rush it! I've learned the...
- Tool Selection: For Step 2, I recommend using a utility knife with a 4-inch blade—it gives you better control than sm...
Frequently asked questions
Got questions about moonflower vine seed pods?
You’re not alone! Here are some of the most common queries—and their answers—to help you grow these stunning vines with confidence.
When is the best time to harvest moonflower seed pods?
Harvest moonflower seed pods when they turn brown and papery (usually late summer to early fall). Wait until they’re fully dried but still intact—if they split open, the seeds may scatter or lose viability. Store them in a cool, dry place until planting!
How long do moonflower seeds stay viable in storage?
Moonflower seeds can last 1–2 years in a sealed container with proper ventilation (like a paper bag in a cool, dark spot). For best results, plant them fresh or test germination by soaking a few seeds in water—if they swell, they’re still good!
What if my moonflower pods won’t twist open?
Don’t force it! If pods resist, try these tricks:
- Soak them in warm water for 1–2 hours to soften.
- Gently tap the pod against a hard surface to loosen seeds.
- Use tweezers to pry open stubborn seams (wear gloves—some seeds stain!).
Can I grow moonflowers from store-bought seeds, or do I need pods?
Yes! Store-bought seeds work fine, but pods offer higher germination rates because they’re fresh and protected. If using seeds, stratify them (mix with damp sand, refrigerate for 2–4 weeks) to mimic winter conditions and boost success.
Are moonflower seed pods toxic to pets or kids?
Moonflower vines are non-toxic to humans, dogs, and cats, but green pods may cause mild stomach upset if ingested in large quantities. Always supervise kids/pets around plants, and opt for fully dried pods to minimize risks.
Wrapping up and next steps
Growing moonflower vine from seed pods is a rewarding way to enjoy these stunning night-blooming beauties in your garden.
With the right twist-resistant extraction technique and a little patience, you can unlock year-round germination success—even in cooler months! 🌱 Whether you're a seasoned gardener or a curious beginner, these tips will help you nurture healthy plants with ease.
Ready to dive in? Start by gathering your seed pods today—then follow the steps to extract, soak, and plant them. Your moonflower vine’s journey begins with just a few simple actions!