
Propagation
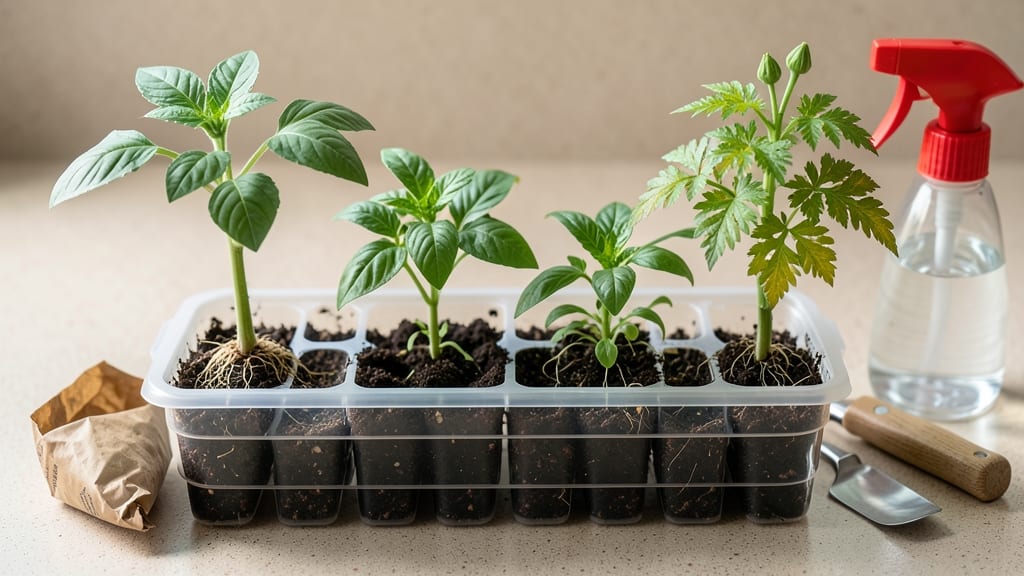
Plastic seed starting trays turn a chaotic seed-starting season into a foolproof system that saves time and space. 🌱 I've used them for years to jumpstart my garden—no more crowded windowsills or tangled roots when it's time to transplant.
The stackable cells keep everything organized, and the clear domes create the perfect humidity cocoon for seedlings to thrive. You'll need just three supplies: the trays themselves, a quality seed-starting mix, and a spray bottle for gentle watering.
Skip the fancy setups—these trays work with basic tools and cost less than $10 for a pack that lasts multiple seasons. The key is proper drainage and sterilization to prevent mold before your seeds even sprout.
By the time your seedlings hit 2-3 inches tall, they'll be ready for their first move to larger pots. The trays make this transition smooth, with roots that stay intact and no wasted space in your nursery setup.
Plus, you can reuse the trays for years, cutting down on waste. For those worried about plastic, I'll show you eco-friendly swaps that work just as well. Let's get those seeds growing the right way!
📚 In This Guide
- What you need
- Instructions
- Tips and common mistakes
- Wrapping up and next steps
What you need
- ● Plastic seed starting trays: Choose stackable trays with individual cells (e.g., 128-cell, 200-cell, or 720-cell trays). Opt for biodegradable or reusable options for sustainability.
- ● Seed starting mix: 1–2 bags (1–2 cubic feet) of high-quality, sterile potting mix (avoid garden soil—it’s too dense!).
- ● Seeds: Your chosen varieties (check seed packets for spacing requirements).
- ● Watering can or spray bottle: A gentle spray nozzle prevents soil erosion.
- ● Flat or tray base: To hold the trays steady and catch excess water.
- ○ Clear plastic dome or plastic wrap: For humidity (optional but helpful in dry climates).
- ● Grow lights or sunny windowsill: 6–8 hours of light daily (south-facing windows or LED grow lights work best).
- ● Heating mat: Speeds up germination for slow-starting seeds (e.g., peppers, tomatoes).
- ● Labels & markers: To track seed varieties and planting dates.
- ● Bottom watering tray: Keeps roots consistently moist without overwatering.
- ● Humidity tray: A shallow tray with pebbles to elevate trays and maintain moisture.
- ● Fertilizer (low-dose): A balanced, water-soluble fertilizer (e.g., 5-5-5 or 10-10-10) for later stages.
How to use plastic seed starting trays for fast, organized seedlings
Here’s my foolproof method for maximizing those stackable trays—no more overcrowded flats or weak seedlings.
🪴 Step 1: Prepare Trays and Moisten the Soil
Fill each cell of your plastic seed starting tray with seed-starting mix up to ½ inch below the rim. Press down lightly so the soil is firm but not compacted—this prevents air pockets that slow root growth. I like to use a small spoon or my finger to create a tiny depression in the center of each cell. This ensures seeds land at the ideal depth and won’t get buried too deep.
Water the soil evenly until it’s moist but not soggy. You’ll know it’s right when a handful of soil holds together without dripping. Avoid overwatering now—excess moisture can cause seeds to rot before they even sprout. Let any excess water drain completely before planting.
🌱 Step 2: Plant Seeds at the Correct Depth
Follow the seed packet’s instructions for depth, but a good rule of thumb is to plant seeds at a depth equal to 2-3 times their diameter. For tiny seeds like lettuce, press them gently into the soil with your fingertip. For larger seeds like beans, drop them in and cover lightly. I tap the tray gently on the table afterward to settle the soil and ensure good seed-to-soil contact.
Label each cell immediately with the seed variety and date—once those first sprouts appear, identical-looking seedlings will all blend together. A toothpick or small stick works perfectly for labels. Space seeds properly: if planting multiple seeds per cell, space them ¼ inch apart to avoid overcrowding later.
💧 Step 3: Cover and Provide Ideal Germination Conditions
Place the tray in a warm, humid environment to encourage fast germination. A seedling heat mat set to 70-75°F works wonders, especially for slow-germinating seeds like parsley or carrots. If you don’t have a heat mat, a sunny windowsill or a warm spot on top of the fridge will do. Cover the tray with a clear plastic dome or plastic wrap to retain moisture—this creates a mini greenhouse effect.
Check daily for condensation on the cover. If it’s foggy inside, your humidity is perfect. If it’s dry, mist the soil lightly with water. Avoid lifting the cover too often—temperature and humidity fluctuations can delay germination. Most seeds sprout within 5-14 days, depending on the variety.
☀️ Step 4: Uncover and Move to Bright Light
The moment you see the first green shoots, remove the cover immediately. This prevents damping-off disease, which thrives in humid conditions and can kill seedlings overnight. Place the tray under grow lights or a south-facing window where seedlings get 12-16 hours of light daily. If using a window, rotate the tray a quarter turn every few days so seedlings grow straight instead of leaning toward the light.
Keep the soil consistently moist but not waterlogged. Water from the bottom by placing the tray in a shallow dish of water for 10-15 minutes, then drain any excess. This method prevents disturbing delicate seedlings and ensures even moisture distribution. You’ll notice true leaves (the second set after the initial cotyledons) within 2-3 weeks—this is your cue to start thinning if needed.
✂️ Step 5: Thin and Prepare for Transplanting
When seedlings have 2-3 true leaves and are about 1-2 inches tall, it’s time to thin. Use scissors to snip unwanted seedlings at soil level—this prevents disturbing the roots of the ones you’re keeping. If you’re transplanting into larger pots, gently remove one seedling per cell, being careful not to damage the roots. For direct sowing, thin to one strong seedling per cell.
Hardening off begins 1-2 weeks before your last frost date. Start by moving the tray outside for 1-2 hours daily, gradually increasing exposure over 7-10 days
Tips & tricks for perfect seed starting trays
Here's what I've learned after years of growing seedlings—these tricks turn good starts into great ones.
Soil Depth Secret: When filling cells to ½ inch below the rim in Step 1, use a straight-edged tool like a butter knife to level the soil. This ensures consistent depth across all cells and prevents overcrowding. I find a ruler works perfectly for this—just drag it across the tray after filling. Uneven soil levels lead to uneven germination and weak seedlings.
Germination Temperature Tip: That 70-75°F heat mat range in Step 3 is critical for fast germination. If you don't have a heat mat, try placing the tray on top of your refrigerator—it's often that perfect temperature range. For seeds that need extra warmth (like tomatoes), I've even used a small space heater with a thermostat set to 75°F, keeping it about 6 inches away from the tray.
Light Rotation Hack: When rotating your tray every few days in Step 4, set a timer for every 48 hours instead of just every few days. This prevents seedlings from leaning toward the light source. I mark the tray with a small dot on one corner to track rotations—it's amazing how much straighter seedlings grow when you're consistent with this.
Thinning Technique: For Step 5, use clean, sharp scissors to thin seedlings at soil level. This prevents disturbing the roots of the seedlings you're keeping. I've found that thinning in the morning gives seedlings time to recover before evening temperatures drop. If you're nervous about damaging roots, you can also carefully pull seedlings rather than cut them—just be gentle!
Pro Tips for Plastic Seed Starting Trays
- Here's what I've learned after years of growing seedlings—these tricks turn good starts into great ones.
- Soil Depth Secret: When filling cells to ½ inch below the rim in Step 1, use a straight-edged tool like a butter knif...
- Germination Temperature Tip: That 70-75°F heat mat range in Step 3 is critical for fast germination. If you don't hav...
Frequently asked questions
Got questions about plastic seed starting trays?
You’re not alone! Here are some of the most common queries—plus quick, actionable answers to help you grow like a pro.
What’s the best material for seed starting trays?
Plastic trays are lightweight, durable, and stackable—perfect for seedling organization. They also retain moisture well and are reusable. For eco-friendly options, consider biodegradable trays or recycled plastic. Avoid thin plastic, as it can warp or crack under moisture.
How long can I keep seeds in plastic trays before transplanting?
Seedlings typically stay in trays for 4–8 weeks, depending on the plant type. Most veggies (like tomatoes or peppers) need 6–8 weeks, while fast growers (like lettuce) may only require 3–4 weeks. Watch for crowded roots or tall, leggy stems—signs it’s time to transplant!
Can I reuse plastic seed starting trays?
Yes! Clean them with soapy water and a disinfectant (like a 10% bleach solution) to kill bacteria or fungi. Rinse thoroughly and let dry completely. Avoid reusing trays with mold or persistent stains, as they can harbor pests or diseases.
What’s the best way to prevent damping-off in plastic trays?
Damping-off (a fungal disease) thrives in damp conditions. To prevent it:
- Use sterilized soil or a seed-starting mix.
- Avoid overwatering—keep soil moist but not soggy.
- Ensure trays have drainage holes.
- Space seedlings for good airflow.
Are there alternatives to plastic seed starting trays?
Try:
- Biodegradable peat or coconut coir pots—plant directly into the ground.
- Egg cartons (for small seeds like herbs or flowers).
- Paper towels or coffee filters (for rooting cuttings).
- Reusable fabric grow bags (great for larger plants).
Wrapping up and next steps
Plastic seed starting trays are a game-changer for gardeners—offering efficiency, space-saving design, and easy transplanting! 🌱 Whether you're a beginner or a seasoned pro, these stackable trays help you organize your sprouts while maximizing growth potential. With the right setup, you’ll enjoy healthier seedlings and a smoother gardening journey.
Ready to grow your green thumb? Start small—pick a tray, gather your seeds, and dive in! Soon, you’ll be reaping the rewards of neat, thriving seedlings all season long. Happy planting! 🌿