
Propagation
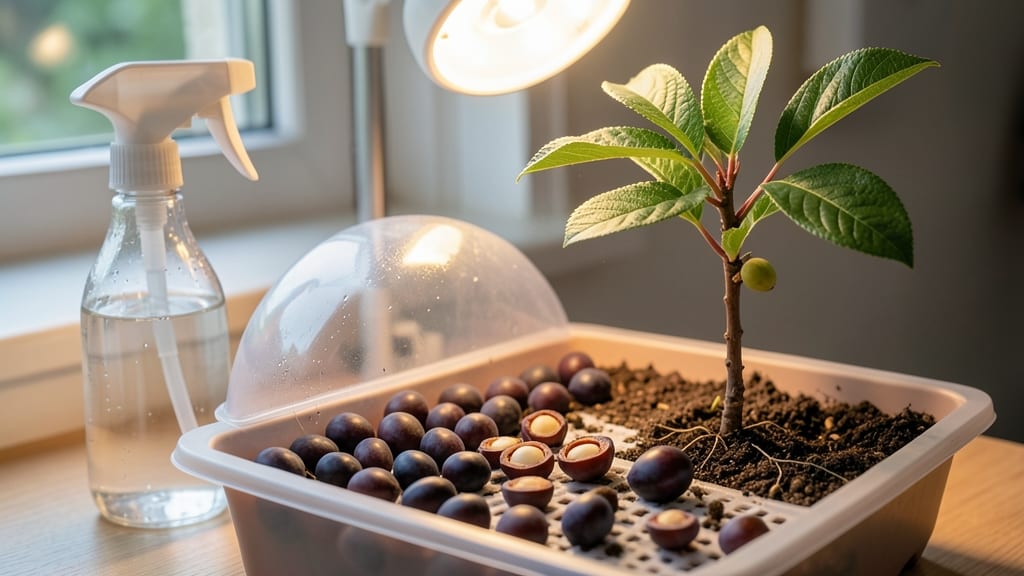
Mastering plum seed germination reliably starts with a 60-day cold stratification that mimics winter's natural process. 🌱 I learned the hard way—skipping this step left me staring at empty seed trays for months.
The secret isn't complicated: it's about recreating the conditions that would happen underground if you buried seeds in fall. You'll need fresh, plump seeds (no shriveled ones!), a mix of moist potting soil and perlite, and patience.
Place seeds 1 inch deep in containers, then refrigerate them for 2 months before transferring to warmth. Most seeds sprout within 2-4 weeks after stratification, but some stubborn ones take longer—don't give up just yet. What you end up with are sturdy little seedlings ready to transplant.
The first true leaves appear vibrant green and firm, signaling it's time to move them into pots. By late spring, you'll have strong enough plants to harden off and plant outdoors. This method works for stone fruits like peaches, cherries, and apricots too.
Just adjust the stratification time slightly based on your climate zone. Let's get those seeds sprouting!
📚 In This Guide
- What you need
- Instructions
- Tips and common mistakes
- Wrapping up and next steps
What you need
- ● Plum seeds: 5–10 fresh, plump seeds (harvested from ripe, organic plums for best results).
- ● Cold stratification setup: 1 small container (e.g., plastic bag, paper towel-lined tray, or a seedling pot with drainage).
- ○ 1 cup peat moss or coco coir (moistened but not soggy). Optional: Mix with perlite for aeration.
- ● OR 1 damp paper towel (for the "wet towel method").
- ● Refrigerator space: A standard fridge (34–40°F / 1–4°C) for 8–12 weeks.
- ○ Warmth for germination: A sunny windowsill (60–75°F / 15–24°C) or a seedling heat mat (optional).
- ● Planting medium: 1 small pot (4–6 inches) filled with well-draining potting mix (e.g., 50% peat moss + 50% perlite/sand).
- ● Basic tools: Spray bottle (for gentle moisture control).
- ● Small hand trowel or spoon (for seed placement).
- ○ Plastic wrap or clear lid (optional, to retain humidity during stratification).
- ○ Monitoring aids: Thermometer (optional, to track fridge temps).
- ● Notebook or calendar (to log stratification progress).
- ○ Post-germination care: Grow lights (optional, for 12–16 hours/day if natural light is weak).
- ● Fertilizer (balanced 10-10-10 or compost tea, after true leaves appear).
Step-by-step instructions for plum seed germination
Here's the foolproof cold stratification method I've used to break plum seed dormancy every season.
🌱 Step 1: Harvest and Prepare the Seeds
Collect fresh plums from healthy trees in late summer or early fall. Remove the fruit flesh and rinse the seeds thoroughly to eliminate any residual sugars that could attract mold. I like to soak them in lukewarm water for 24 hours first—this softens the outer seed coat and speeds up the stratification process later.
After soaking, place the seeds on a paper towel and let them air-dry for 2-3 days at room temperature. You'll notice the outer skin darkens slightly as it loses moisture. This drying step is crucial—it prevents rot during the cold stratification phase. Store them in a sealed container until you're ready to begin stratification.
❄️ Step 2: Cold Stratify for 8-12 Weeks
Fill a plastic bag with damp but not soggy peat moss or coconut coir (I use a 1:1 mix with perlite for better aeration). Place the seeds about 1 inch apart in the mix and seal the bag tightly. This creates a controlled humid environment that mimics winter conditions.
Store the bag in your refrigerator's crisper drawer, where temperatures stay consistently between 35-45°F. Check the seeds every 2 weeks—if the mix feels dry, mist it lightly with water. You'll see tiny cracks appear in the seed coats after 4-6 weeks, signaling the stratification process is working. This is when the seed's internal chemistry shifts to break dormancy.
🌱 Step 3: Sow Stratified Seeds in Pots
Fill 4-inch pots with a sterilized mix of 50% potting soil and 50% perlite. Plant each seed about ½ inch deep, spacing them 1 inch apart. Press the soil gently around each seed to ensure good contact—this helps the seedling anchor itself as it emerges. Water lightly until the surface feels damp but not wet.
Place the pots in a warm, bright location where temperatures stay between 65-75°F. I use a seedling heat mat set to 70°F for the first 2 weeks to encourage rapid germination. Keep the soil consistently moist but never soggy—you'll know it's right when the surface stays slightly damp to the touch without pooling water.
☀️ Step 4: Provide Optimal Growing Conditions
Once the first true leaves appear (usually within 2-4 weeks after sowing), move the seedlings to a south-facing window or under grow lights for 14-16 hours of light daily. You'll notice the seedlings grow taller and develop deeper green leaves as they receive adequate light—this is your signal they're thriving.
Rotate the pots a quarter turn weekly to prevent leggy growth toward the light source. When seedlings reach 3-4 inches tall, transplant them into individual 6-inch pots with fresh potting mix. This step reduces competition for nutrients and gives each seedling room to develop a strong root system.
⏰ Step 5: Harden Off and Transplant Outdoors
About 6 weeks after germination, begin hardening off the seedlings by placing them outside in a sheltered spot for 1-2 hours the first day. Gradually increase their outdoor time over 10-14 days, eventually leaving them out overnight. You'll see the seedlings develop a thicker stem and darker leaves as they adapt to outdoor conditions.
Transplant outdoors after the last frost date, when soil temperatures are consistently above 50°F. Choose a location with full sun and well-draining soil. Water deeply at the base of each plant to encourage root growth into the surrounding soil. Mulch around the base with 2 inches of organic mulch to retain moisture and regulate soil temperature.
Tips & tricks for perfect plum seed germination
Cold stratification might sound complex, but these key insights will help you achieve reliable germination every time—even if you're new to seed starting.
Soaking Strategy: That 24-hour lukewarm water soak in Step 1 isn't just about hydration—it's about breaking the seed's natural dormancy barrier. Use distilled or filtered water if your tap water has high chlorine levels, as this can stress the seeds. I've found that adding a tiny pinch of hydrogen peroxide (about 1/8 teaspoon per cup of water) during soaking helps prevent mold while keeping the water oxygenated. After soaking, pat the seeds dry thoroughly before the 2-3 day drying period; any residual moisture can trigger rot during stratification.
Stratification Medium Matters: While peat moss works well, I've had the most success with a 1:1 mix of coconut coir and perlite for better aeration. The medium should feel like a damp sponge—not dripping wet. If you're using a plastic bag, poke a few small holes in it to allow minimal airflow; complete airtight sealing can create anaerobic conditions that harm the seeds. During the 8-12 week period, those tiny cracks you'll see after 4-6 weeks are your best indicator of progress—don't be tempted to check more frequently than every 2 weeks, as temperature fluctuations can set back the process.
Temperature Consistency: The 35-45°F range in your refrigerator's crisper drawer is ideal, but some models have hot spots. I recommend placing a small thermometer inside the bag (not touching the seeds) to monitor temperatures. If your fridge runs cooler (below 35°F), you can extend the stratification period by 2-3 weeks—just be patient. The key is maintaining that consistent cold; dormancy breaking requires stable conditions that mimic winter's slow, steady chill. Once you see those cracks, resist the urge to move the seeds to warmth—they still need time to complete their internal biochemical changes.
Post-Stratification Care: When it's time to sow in Step 3, the 65-75°F warmth is crucial for germination. If your home tends to be cooler, that's where a seedling heat mat at 70°F becomes invaluable for the first 2 weeks. Keep the soil surface consistently damp (not wet) by misting lightly rather than pouring water—this prevents fungal issues. The 14-16 hours of light in Step 4 should come from a dedicated grow light if your south-facing window can't provide sufficient intensity; seedlings will grow leggy and weak without proper light exposure during this critical phase.
Pro Tips for Plum Seed Germination
- Cold stratification might sound complex, but these key insights will help you achieve reliable germination every time...
- Soaking Strategy: That 24-hour lukewarm water soak in Step 1 isn't just about hydration—it's about breaking the seed'...
- Stratification Medium Matters: While peat moss works well, I've had the most success with a 1:1 mix of coconut coir a...
Frequently asked questions
Got questions about germinating plum seeds? You’re not alone!
Here are the most common queries—and their straightforward answers—to help you navigate the process with confidence.
How long does cold stratification take for plum seeds?
Cold stratification typically requires 6 to 8 weeks in the fridge (or a cold, moist environment). Place seeds in a sealed container with damp peat moss or paper towels, then store them at 35–40°F (2–4°C). Patience is key—rushing this step often leads to poor germination rates. Monitor for mold (a red flag!) and refresh moisture if needed.
Can I speed up plum seed germination beyond cold stratification?
While cold stratification is non-negotiable for breaking dormancy, you can optimize timing by:
- Using sandpaper to lightly scratch the seed coat (mimics natural wear).
- Soaking seeds in lukewarm water for 24 hours before stratification.
- Choosing ripe, fresh seeds (older seeds germinate slower).
Why aren’t my plum seeds sprouting after stratification?
Troubleshoot with this checklist:
- Check for rot: If seeds smell foul or are mushy, they’ve over-moistened. Start fresh!
- Verify depth: Plant seeds ½ inch deep in warm, well-draining soil (60–70°F).
- Light exposure: Plum seeds need indirect light post-stratification. A sunny windowsill or grow light works.
- Patience: Germination can take 2–6 weeks after planting. Resist the urge to overwater!
Can I grow a plum tree from a store-bought plum?
Yes, but with a caveat: Store-bought plums are often hybrids bred for flavor, not propagation. Your seedling may not match the parent tree’s traits (e.g., fruit quality, size). For reliable results:
- Use seeds from heirloom or local plums (ask orchards or farmers!).
- Expect 5–10 years until the tree bears fruit.
- Consider grafting later if you want a specific variety.
Do plum seeds need a specific soil type to germinate?
Plum seeds thrive in light, airy soil with good drainage. A mix of:
- 50% peat moss or coco coir (holds moisture).
- 30% perlite or vermiculite (prevents compaction).
- 20% sand or compost (adds nutrients).
Wrapping up and next steps
Germinating plum seeds with cold stratification is a rewarding way to grow your own fruit tree—patience and precision are your best tools!
By following the steps outlined, you’ll boost your chances of success and enjoy the satisfaction of nurturing a seed into a thriving sapling. 🌱 Once your seeds sprout, transplant them carefully into pots or directly into the ground (if climate permits) and watch your little plum tree grow.
Ready to take the next step? Keep an eye on moisture levels, provide gentle sunlight, and soon you’ll be harvesting fresh plums from your very own tree. Happy growing! 🌳