
Lawn
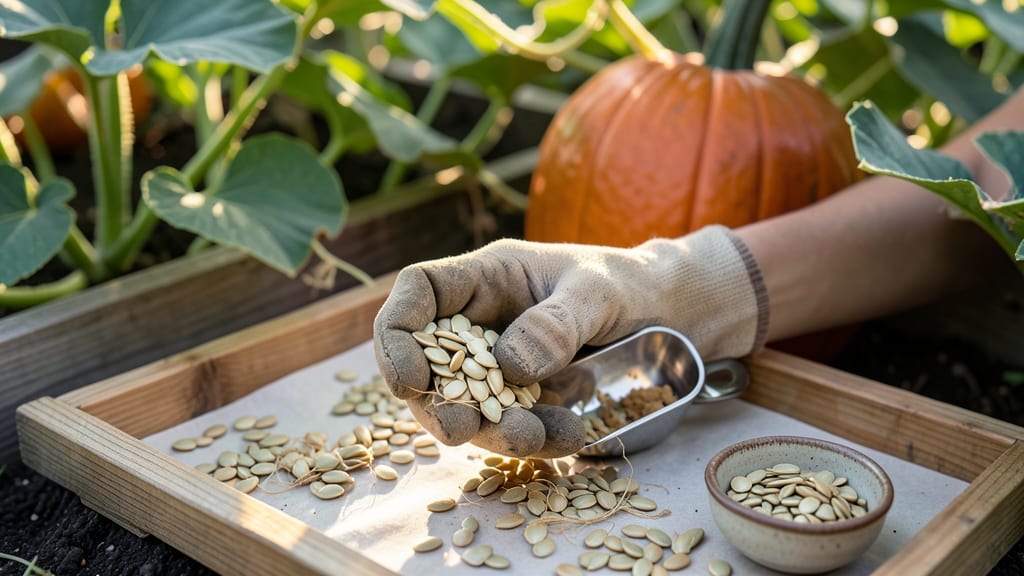
This pumpkin seed mix isn't just for carving—it's your ticket to next year's garden. 🌱 After saving seeds from my last harvest, I realized how easy it is to grow your own pumpkins from scratch, cutting costs and ensuring heirloom quality.
The process turns kitchen scraps into next season's stars, and the first green shoots appear within 7-10 days if done right.
Start with 3-5 healthy pumpkins from your last harvest, focusing on heirloom varieties for best results. You'll need a clean, dry space to separate seeds, a well-draining soil mix, and a sunny spot with at least 6-8 hours of sunlight daily.
The key is patience—seeds need 2-3 weeks of warm soil (70°F+) to germinate properly, so timing matters.
By midsummer, you'll watch vines spread and tiny pumpkins form, knowing every seed came from last year's harvest. The best part? These pumpkins grow 20-30% larger than store-bought varieties because they're adapted to your local climate. Plus, you can save seeds again next year—zero waste, all reward.
Works for both ornamental and edible varieties, though seed-saving rules differ slightly. For culinary pumpkins, focus on varieties like 'Sugar Pie' or 'New England Pie'; for decoration, 'Jack Be Little' or 'Cinderella' shine. Here's how to make it work for your garden!
📚 In This Guide
- What you need
- Instructions
- Tips and common mistakes
- Wrapping up and next steps
What you need
- ● Fresh pumpkin seeds: 1 large pumpkin (or 2 small) with seeds still attached to the stringy pulp (save seeds from organic, unsprayed pumpkins for best results).
- ● Paper towels or coffee filters: 2-3 sheets (for drying).
- ● Small bowl or container: 1 (for soaking).
- ● Water: Enough to cover seeds by 1 inch.
- ● Plastic bag (zip-top or breathable mesh bag): 1 (for stratification).
- ● Potting soil: 1 bag (well-draining, seed-starting mix).
- ● Small pots or seed trays: 4-6 (3-4 inches deep).
- ● Spray bottle: 1 (for misting).
- ● Grow lights or sunny windowsill: Access to 6-8 hours of light daily.
- ● Hydrogen peroxide (3% solution): 1 tbsp (for sterilizing seeds).
- ○ Seed starter fertilizer: 1 tsp (optional boost for seedlings).
- ● Labeling tags: 4-6 (to track varieties).
- ● Heating mat: 1 (speeds up germination in cold climates).
Step-by-step guide to harvesting and saving pumpkin seeds for next year
Here's how to turn this year's pumpkins into next year's garden stars with minimal effort.
🌱 Step 1: Select and Prepare the Pumpkin
Choose a healthy, mature pumpkin that's fully ripened—its skin should be hard and its stem dry. Cut the pumpkin open with a clean knife, exposing the seeds nestled in the fibrous stringy pulp. I like to work with pumpkins that have been curing for at least a week, as the seeds will be fully developed and easier to clean.
Scoop out the seeds and pulp into a bowl, leaving about an inch of flesh on each seed to protect it during cleaning. The more pulp you remove now, the easier the next steps will be. If you're working with a particularly large pumpkin, consider dividing the seeds into batches to streamline the process.
💧 Step 2: Clean and Dry the Seeds
Rinse the seeds and pulp under cool water to remove the stringy fibers, rubbing them gently between your fingers to dislodge any remaining pulp. Spread the cleaned seeds on a clean kitchen towel or paper towels in a single layer, ensuring they don't overlap. This prevents mold and ensures even drying.
Place the towel with seeds in a warm, dry location away from direct sunlight. I often use a sunny windowsill or a well-ventilated area in my kitchen. The seeds should dry completely in about 3-5 days. You'll know they're ready when they're hard to the touch and the towel beneath them is completely dry.
☀️ Step 3: Store the Seeds Properly
Once the seeds are fully dry, transfer them to a small paper envelope or airtight container. I label each container with the pumpkin variety and the year harvested—this prevents mix-ups and ensures you know exactly what you're planting next season. Store the seeds in a cool, dark place like a pantry or refrigerator.
For long-term storage, place the seeds in a sealed container with a packet of silica gel or a moisture absorber to keep them dry. Properly stored seeds can remain viable for up to 5 years, though they're best used within 2-3 years for optimal germination rates. Check the seeds periodically to ensure they remain dry and free from pests.
🌿 Step 4: Test Germination Before Planting
Before committing to planting, test a few seeds to ensure they're still viable. Place 5-10 seeds between two damp paper towels in a sealed plastic bag. Keep the bag in a warm location, like on top of the refrigerator, and check daily. You should see sprouts within 3-7 days.
If fewer than 50% of the seeds sprout, consider treating the remaining seeds with a seed germination enhancer or simply order fresh seeds for better results. Healthy seeds will sprout quickly and uniformly, giving you confidence that your next planting season will be successful.
⏰ Step 5: Plant the Seeds Next Season
When spring arrives, plant your saved seeds directly in the garden after the last frost date, when soil temperatures reach at least 60°F. Sow seeds 1 inch deep and 2-3 inches apart in rows spaced 3-4 feet apart. This spacing allows the pumpkin vines plenty of room to spread and grow.
Keep the soil consistently moist but not waterlogged, as pumpkin seeds require steady hydration to germinate and grow. Thin seedlings to 1 plant per 2-3 feet once they develop their first true leaves. Watch for strong, healthy vines—this is your sign that the seeds are thriving and ready for another zero-waste harvest next year.
Tips & tricks for perfect pumpkin seed preservation
Between us, saving pumpkin seeds for next year's garden is one of those simple yet transformative gardening hacks. Here's what I've learned after years of perfecting the process.
Pumpkin Selection Matters: The key to viable seeds starts with the right pumpkin. Look for ones that have cured for at least a week—they'll have fully developed seeds that clean easier. I've found that smaller pumpkin varieties often yield seeds that germinate more reliably than those from giant jack-o'-lanterns. The flesh should be dry and the stem completely withered when you cut into it.
Drying Strategy: Those critical 3-5 drying days can make or break your seed viability. I've had the best results using a food dehydrator set to 115°F when humidity is high. If you don't have one, place your seeds on a wire rack in a well-ventilated area with a small fan circulating air. The goal is to dry them evenly without creating moisture pockets that could lead to mold.
Storage Wisdom: The cool, dark pantry is your friend, but don't overlook the importance of proper containers. I've had success with both paper envelopes and glass jars with tight-sealing lids. The key is eliminating all moisture—place a small silica gel packet in the container if you're storing for more than 2 years. I also write the variety and harvest year directly on the container with a permanent marker to prevent mix-ups.
Germination Test: That 3-7 day germination window is your quality control check. I've learned to test seeds from multiple pumpkins separately if I'm saving from different varieties. If you're seeing inconsistent sprouting, it might indicate uneven drying or an older seed batch. The test is your last chance to catch any issues before planting season.
Pro Tips for Pumpkin Seed Mix
- Between us, saving pumpkin seeds for next year's garden is one of those simple yet transformative gardening hacks.
- Pumpkin Selection Matters: The key to viable seeds starts with the right pumpkin.
- Drying Strategy: Those critical 3-5 drying days can make or break your seed viability.
Frequently asked questions
Got questions about creating your own pumpkin seed mix for next year’s garden? You’re not alone! Here are answers to the most common queries to help you harvest and save seeds like a pro.
How do I know when pumpkin seeds are fully mature and ready to harvest?
Wait until the pumpkin’s skin hardens and turns a deep, solid color (orange, green, or white, depending on the variety). Slice it open when the flesh inside is dry and stringy—this usually happens 3–5 days after the pumpkin stops growing. Pro tip: If the seeds rattle when you shake the pumpkin, they’re ready!
Can I save seeds from store-bought pumpkins for planting?
Generally, no—unless it’s a heirloom variety labeled for seed saving. Store-bought pumpkins are often hybridized for size, shape, or shelf life, so saved seeds may not grow true. For reliable results, use seeds from organic, non-hybrid pumpkins grown in your region.
How long can I store pumpkin seeds before planting?
Properly dried and stored seeds stay viable for 3–5 years in a cool, dark place (like an airtight jar in the fridge). For best germination, plant them within 1–2 years. Troubleshooting: If seeds smell musty or sprout mold, toss them—they’ve lost potency!
What’s the best way to clean and dry pumpkin seeds for long-term storage?
Rinse seeds in cool water to remove pulp, then pat them dry with a towel. Spread them in a single layer on a baking sheet and bake at 170°F (77°C) for 1–2 hours or air-dry for 3–5 days. Once completely dry, store them in a paper envelope or glass jar with a silica packet to absorb moisture.
Can I mix pumpkin seeds with other garden seeds for planting?
Yes! Pumpkin seeds can be mixed with other large, slow-germinating seeds like squash, melons, or beans in the same planting hole. Just ensure they have enough space to spread (pumpkins need 50+ feet!). Alternative idea: Try layering seeds in a seed-saving jar with cat litter or sand for easy organization.
Wrapping up and next steps
Creating your own pumpkin seed mix isn’t just a zero-waste win—it’s a chance to nurture next year’s vibrant blooms while embracing sustainability. 🌱 With just a few simple steps, you’ll turn leftover seeds into a nutrient-rich treasure, ensuring your garden thrives without a single scrap wasted.
Ready to grow your green thumb even further?
Your next step? Plant those seeds and watch your garden flourish! Whether you’re saving seeds for next season or sharing your newfound knowledge, every action counts. Happy gardening! 🌻