
Lawn
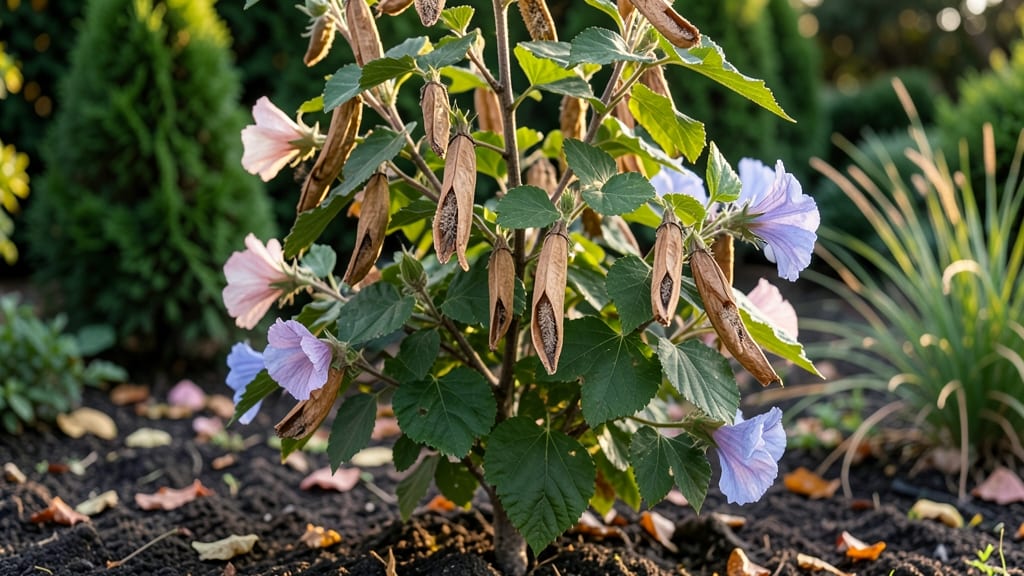
Extracting seeds from dried Rose of Sharon pods unlocks free plants for next summer’s blooms. 🌿 I’ve harvested these pods for years, and the process is simpler than it looks—once you know the right timing and techniques.
The key is patience: pods mature slowly, and rushing them means poor germination rates.
You’ll need just a few supplies: pruning shears, a bowl, paper towels, and a warm, sunny spot for starting seeds. The real magic happens in late fall or early winter, when pods turn brown and papery—this is when they’re ready to crack open.
Each pod holds dozens of tiny seeds, but only a fraction will sprout.
With the right setup—warmth, moisture, and bright light—you’ll see seedlings emerge in 4-6 weeks. They’re tough little plants, but they need consistent care to avoid legginess. Transplant them outdoors after the last frost, and you’ll have mature bushes blooming in 2-3 years.
This method works for any Hibiscus syriacus variety, and the payoff is worth the wait: lush, fragrant blooms that attract pollinators all summer. Just be patient—those first seeds take time, but the results are stunning. Here’s how to do it right.
📚 In This Guide
- What you need
- Instructions
- Tips and common mistakes
- Wrapping up and next steps
What you need
- ● Mature Rose of Sharon seed pods: Collect fully dried, brown pods (usually late fall/winter) from healthy plants. Aim for 10–20 pods for a small garden or 50+ pods for bulk storage.
- ● Sharp pruning shears or scissors: Clean, sterilized tools to snip pods without damaging stems.
- ● Paper bags or breathable mesh sacks: 2–3 medium-sized bags (12x16 inches) to air-dry pods indoors.
- ● Labeling tags & permanent marker: Label bags with the harvest date and plant variety (e.g., “Hibiscus syriacus ‘Blue Chiffon’ – 2024”).
- ○ Small fan or dehumidifier (optional but helpful): Speeds up drying in humid climates.
- ● Glass jars or airtight containers: 1–2 quart-sized jars with tight lids for long-term seed storage (sterilize jars with boiling water first!).
- ○ Paper towels or silica gel packets: 2–3 packets to absorb excess moisture in jars (optional but extends seed viability).
- ● Best timing: Harvest pods after they’ve fully dried and turned papery-brown (typically 4–6 weeks post-bloom). Avoid green or moist pods—they won’t store well! 🌡️
- ● Weather watch: Collect pods on a dry, sunny day to prevent mold. If rain is forecasted, delay harvesting by 1–2 days. ☔
- ● Plant health: Only harvest from disease-free plants. Discard any pods with signs of pests, rot, or discoloration.
- ● Storage location: Keep seeds in a cool (40–50°F), dark place (like a pantry or basement) for up to 2–3 years.
How to extract Rose of Sharon seeds from dried pods
Here's the simple method I use every fall to save seeds from my Rose of Sharon blooms.
🌿 Step 1: Harvest and Dry the Seed Pods
Wait until the seed pods turn a deep brown and begin to split open naturally—this usually happens in late fall after the first frost. Gently twist each pod to release the seeds inside. Place them in a single layer on a paper towel or mesh screen in a warm, dry location with good air circulation.
Leave them to dry completely for about 1-2 weeks. You'll know they're ready when the pods feel brittle and the seeds inside rattle when shaken. If you live in a humid climate, spread them out under a fan to speed up the drying process.
🌱 Step 2: Separate Seeds from Pod Debris
Once fully dry, place the pods in a clean bowl and gently crush them with your fingers or a rolling pin. The seeds will be small, flat, and dark brown with a slightly papery texture. Use a fine-mesh strainer or sifter to separate the seeds from the chaff and pod fragments.
I like to do this over a sheet of white paper so I can easily spot any remaining seeds that might fall through the cracks. Discard any seeds that look shriveled or discolored—they won't germinate well.
💧 Step 3: Clean and Store the Seeds
Rinse the seeds briefly under cool water to remove any remaining dust or debris, then let them air-dry completely on a clean paper towel. Spread them out in a single layer and leave them for 24-48 hours to ensure they're bone-dry before storage.
Store the clean seeds in a small, airtight container like a glass jar or envelope. Label it with the date and variety if you have multiple types. Keep the container in a cool, dark place—like a refrigerator or seed storage box—to maintain viability for up to 2 years.
☀️ Step 4: Prepare Seeds for Planting Next Season
Rose of Sharon seeds benefit from a cold stratification period to break dormancy. In late winter, place the seeds between two damp paper towels in a sealed plastic bag. Store them in the refrigerator for 4-6 weeks—this mimics the natural winter chill they'd experience outdoors.
After stratification, sow the seeds about ¼ inch deep in well-draining seed-starting mix. Keep the soil consistently moist but not soggy, and place the container in a warm spot with indirect light. Germination can take 3-6 weeks, so be patient.
⏰ Step 5: Transplant Seedlings When Ready
Once seedlings develop their first true leaves and are about 2-3 inches tall, they're ready to move into individual pots. Harden them off by gradually exposing them to outdoor conditions over 1-2 weeks before transplanting into the garden.
Choose a sunny location with well-draining soil, and space the young plants about 3-4 feet apart. With proper care, your homegrown Rose of Sharon will reward you with stunning blooms in just a couple of seasons.
Tips & tricks for perfect Rose of Sharon seed extraction
Real talk: Saving these seeds right takes patience, but these little tricks will make all the difference between viable seeds and wasted effort.
Timing Secret in Step 1: Those 1-2 weeks of drying are non-negotiable—especially in humid climates. I've learned the hard way that rushing this step leads to moldy seeds. Place a small fan nearby to maintain gentle airflow without creating a breeze that scatters seeds. The "rattle test" is foolproof: shake a pod and listen for that hollow sound when seeds are ready.
Separation Technique: For Step 2, I recommend using a mesh strainer with holes just slightly larger than your seeds. Tap the strainer gently against the bowl to dislodge stubborn seeds stuck in the chaff. A white paper background makes spotting missed seeds effortless—trust me, you'll find at least 10% more seeds you'd otherwise toss. Discard any seeds that float in water during your rinse (Step 3)—these are empty husks.
Storage Wisdom: The 24-48 hours of final drying before storage is crucial for preventing condensation in your container. I use small glass jars with desiccant packets to absorb any lingering moisture. Labeling with the date isn't just helpful—it's essential. Rose of Sharon seeds lose viability quickly, and tracking when you stored them ensures you don't accidentally plant old seeds that won't germinate.
Pro Tips for Rose Of Sharon Seed Pods
- Real talk: Saving these seeds right takes patience, but these little tricks will make all the difference between viab...
- Timing Secret in Step 1: Those 1-2 weeks of drying are non-negotiable—especially in humid climates. I've learned the ...
- Separation Technique: For Step 2, I recommend using a mesh strainer with holes just slightly larger than your seeds. ...
Frequently asked questions
Got questions about harvesting, storing, or growing Rose of Sharon seed pods? You’re in the right place! Here are answers to the most common queries—so you can confidently save seeds for stunning blooms next season.
When is the best time to harvest Rose of Sharon seed pods?
Harvest seed pods when they turn tan or light brown and begin to split open naturally—usually late fall to early winter (after frost). Avoid harvesting green pods, as seeds won’t be mature. If pods stay closed, gently twist them off the stem to release seeds.
Can I collect seed pods in winter or do I need to wait for spring?
Yes! Winter is actually the ideal time to harvest Rose of Sharon seed pods, as cold weather helps dry them out naturally. Store them in a cool, dry place (like a paper bag) until spring planting. If pods freeze, thaw them indoors before opening to avoid mold.
What should I do if my seed pods won’t open on their own?
If pods stay stubbornly closed, don’t force them—this can damage seeds. Instead, place them in a paper bag and store them in a warm, dry spot (like a sunny windowsill) for 1–2 weeks. The heat and airflow often trigger natural opening. If still sealed, gently crack them open with a butter knife.
Are there alternatives if my Rose of Sharon doesn’t produce seed pods?
If your plant skips seed production, try these fixes:
- Ensure it gets full sun (6+ hours/day)—shady spots reduce flowering.
- Fertilize lightly in early spring with a balanced 10-10-10 formula.
- Prune after blooming to encourage new growth for next season.
- Consider buying seeds from a nursery if propagation fails.
How long can I store Rose of Sharon seeds before planting?
Store seeds in a sealed envelope or airtight container with a desiccant packet (like silica gel) in a cool, dark place. Viability lasts 1–2 years, but germination rates drop after the first year. Label seeds with the harvest date to track freshness!
Wrapping up and next steps
Harvesting Rose of Sharon seed pods is a rewarding way to ensure next season’s vibrant blooms while adding a touch of nature’s magic to your garden.
By following the right steps—like drying, extracting, and storing seeds properly—you’ll set the stage for a flourishing landscape. Now’s your chance to become a seed-saving pro!
🌱 Your Next Step: Plant & Grow
Ready to put those seeds to work? Start by planting them in well-draining soil and watch as your garden transforms. Tag us in your blooming photos—we’d love to see your success! 🌸