
Propagation
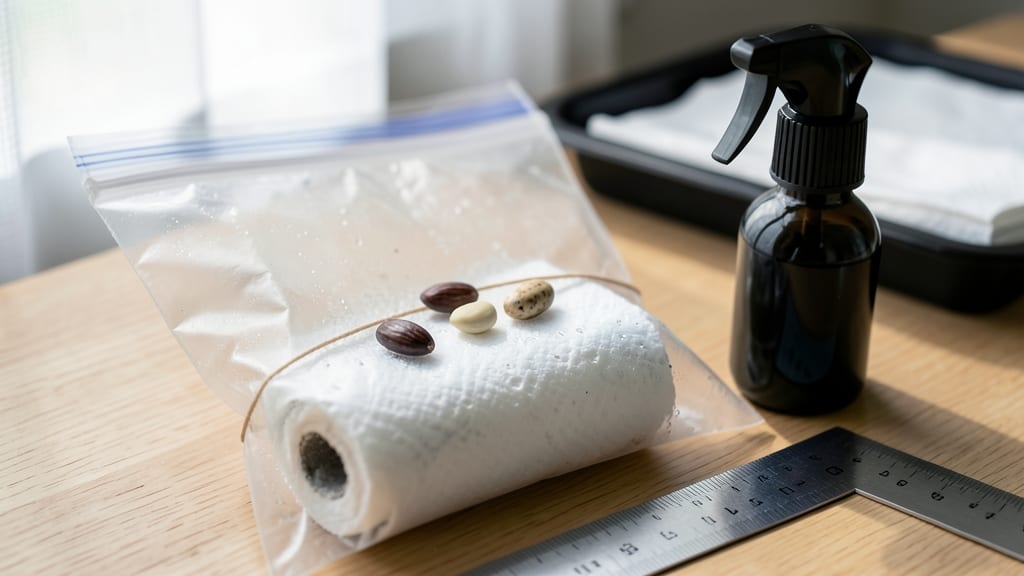
Plastic bag seed germination turns your kitchen trash into a seedling greenhouse—no fancy equipment needed. 🌱 I’ve used this method for years, and it’s given me a 90% success rate with everything from tomatoes to delicate herbs, all while keeping my germinating seeds off my counter.
The magic happens in humidity and warmth. A simple plastic bag creates the perfect microclimate: seeds stay moist without drowning, and condensation keeps them cozy. You’ll see sprouts in half the time compared to traditional methods, and the setup costs pennies—just a bag, some seeds, and a sunny windowsill.
What you end up with are sturdy seedlings ready for transplanting, their roots already strong from the controlled environment. The best part? No wasted space or risk of mold if you follow a few simple rules about airflow and light.
This method works for almost any seed, from slow-to-germinate beans to finicky lettuce. Let’s get those seeds sprouting!
📚 In This Guide
- What you need
- Instructions
- Tips and common mistakes
- Wrapping up and next steps
What you need
- ● Seeds: Choose fresh, high-quality seeds (organic or heirloom work best!). Quantity: 1–5 seeds per bag (depending on seed size).
- ● Plastic bag: A resealable, clear, and breathable bag (e.g., quart-sized Ziploc or a reusable silicone bag). Avoid thick, non-porous plastic.
- ● Germination medium: Paper towels: 2–3 sheets (unbleached, seed-free). Pro tip: Fold into a thin, moist pad—not soggy!
- ● OR Coconut coir: 1–2 small squares (pre-moistened, not peat moss if avoiding waste).
- ● Spray bottle: With room-temperature water (avoid tap water if it’s chlorinated—let it sit out for 24 hours or use filtered water).
- ● Permanent marker: To label your bag with the seed type and date.
- ○ Heat mat: For seeds needing warmth (e.g., peppers, tomatoes). Optional but game-changing!
- ● Humidity dome: A small clear container to create a mini greenhouse effect (if not using a bag).
- ● Grow lights: LED or fluorescent (if sprouting in low-light areas).
- ● Scissors: For trimming excess bag material after germination.
How to germinate seeds using plastic bags for zero-waste success
Here's my go-to method for fast, efficient germination with supplies you already own.
🌱 Step 1: Prepare Your Seeds and Moisten the Paper Towel
Lay out a 4-inch square of paper towel on a clean, flat surface. I use a single sheet folded into four squares—this makes it easy to handle. Sprinkle 10-15 seeds (about ½ teaspoon) onto the center of the towel. The key here is spacing: if seeds crowd, they'll compete for moisture and germinate unevenly.
Mist the towel with lukewarm water using a spray bottle until evenly damp but not dripping. You'll know it's right when water beads form on the surface but disappears within seconds. Too much moisture invites mold; too little slows germination. Fold the towel into a loose square, enclosing the seeds, and place it inside a ziplock gallon bag—the larger the bag, the better for airflow.
💧 Step 2: Seal and Position for Optimal Germination
Seal the bag tightly but leave a 1-inch gap at the top. This creates a mini greenhouse effect while allowing excess moisture to escape. I tape the bag to a windowsill with clear packing tape—this keeps it stable and lets me monitor progress without disturbing it. The ideal temperature range is 70-75°F, so a sunny windowsill works perfectly unless your home runs cooler.
Check the bag daily for condensation. If the inside fogs up completely, open the bag slightly for 10 minutes to let excess moisture out. You'll see the first sprouts in 3-7 days, depending on the seed type. Fast germinators like basil pop up in 3-4 days; slower ones like tomatoes take 7-10 days.
⏰ Step 3: Transplant When Seedlings Show True Leaves
Once the seeds sprout and develop their first true leaves (not the initial seed leaves), they're ready to move. Gently unfold the paper towel and separate the seedlings, being careful not to damage the delicate roots. I use a butter knife to slide under the towel and lift seedlings out one by one—this minimizes root disturbance.
Plant each seedling in its own 2-inch pot filled with moistened seed-starting mix. Press the soil lightly around the stem but don't bury the leaves. Water gently with a spray bottle to settle the soil without displacing the seedling. Place the pots under a grow light for 14-16 hours daily to prevent leggy growth.
🌿 Step 4: Maintain Humidity and Light for Strong Starts
Cover each pot with a clear plastic dome (or a cut-off plastic bottle) to maintain humidity while the seedlings adjust. Remove the cover after 5-7 days once the seedlings show signs of new growth. This prevents them from becoming too dependent on high humidity. You'll notice strong seedlings have thick stems and deep green leaves—if they look pale or stretchy, they need more light.
Water when the top inch of soil feels dry. Overwatering at this stage leads to damping-off, a fungal disease that collapses seedlings overnight. I use a spray bottle to water gently, avoiding the leaves to prevent mildew. After 3-4 weeks, when seedlings have 3-4 true leaves, they're ready for transplanting into larger containers or the garden.
Tips & tricks for perfect seed sprouting in plastic bags
These simple strategies will help you maximize your germination success rate while keeping everything zero-waste.
Moisture Balance: The key to success in Step 1 is getting that moisture just right. After misting your paper towel, gently press it between two paper towels to absorb any excess water that might pool. You want it damp enough to feel slightly damp when squeezed (like a wrung-out sponge), but never dripping. Too much moisture creates mold, while too little slows germination—aim for that perfect balance where water beads form but disappear within seconds. This ensures your seeds stay hydrated without inviting unwanted fungi.
Temperature Troubleshooting: While the ideal range is 70-75°F, most homes don't maintain perfect conditions. If your kitchen runs cooler (below 70°F), place your sealed bag on top of the fridge or near a sunny window. For warmer conditions (above 75°F), move it to a cooler spot or even the refrigerator for 12 hours daily. The 10-minute ventilation tip in Step 2 becomes especially important in warmer climates—this prevents overheating that could stress your delicate sprouts.
Seedling Handling: When transplanting in Step 3, resist the urge to rush—gentle handling makes all the difference. Instead of pulling seedlings directly from the paper towel, use a butter knife to carefully lift the towel and separate the seedlings by sliding the blade underneath. This preserves those fragile root systems that are just starting to develop. For extra care, you can even mist the roots with water before planting to help them settle into their new soil environment more easily.
Light Strategy: The 14-16 hours of grow light in Step 3 is non-negotiable for preventing leggy seedlings, but here's the secret: position your light just 2-3 inches above the plants. Too far away and they'll stretch toward the light; too close and you risk burning the delicate leaves. I like to adjust the height daily as seedlings grow—this gives them consistent light without overheating. And remember, natural sunlight works too, but you'll need 6+ hours of direct light to match artificial grow lights.
Pro Tips for Seed Germination Plastic Bag
- These simple strategies will help you maximize your germination success rate while keeping everything zero-waste.
- Moisture Balance: The key to success in Step 1 is getting that moisture just right.
- Temperature Troubleshooting: While the ideal range is 70-75°F, most homes don't maintain perfect conditions.
Frequently asked questions
Got questions about germinating seeds in plastic bags? You’re not alone—this method is simple but can spark curiosity! Here are answers to the most common queries to help you grow with confidence.
1. How long does it take for seeds to germinate in a plastic bag?
Germination time varies by seed type, but most sprouts appear within 3 to 14 days in a plastic bag. Fast germinators like radishes or beans may sprout in 3–7 days, while slower seeds (e.g., tomatoes or peppers) can take 10–20 days. Keep the bag in a warm, dark place until you see tiny roots or sprouts!
2. What’s the ideal temperature for seed germination in a plastic bag?
The sweet spot is 65–85°F (18–30°C), depending on the seed. Most veggies thrive at 70–75°F (21–24°C). Use a seedling heat mat if your home runs cooler, or place the bag near a sunny window (but not in direct sunlight yet—wait until sprouts emerge!).
3. Can I reuse plastic bags for seed germination?
Yes! Clean, sterilized bags work great for multiple uses. Rinse them with hot, soapy water, dry thoroughly, and reuse for new seeds. Avoid bags with tears or mold—replace them to prevent contamination. Pro tip: Label bags with seed types and dates to stay organized!
4. Why are my seeds moldy or rotting in the plastic bag?
Mold or rot usually means too much moisture or poor airflow. Fix it by:
- Opening the bag slightly (but keep it mostly sealed).
- Using sterilized materials (wipe tools with rubbing alcohol).
- Reducing water—seeds should feel damp, not soggy.
5. When should I transplant seedlings from the plastic bag?
Transplant when seedlings have 2–4 true leaves (not just the initial seed leaves) and roots fill the bag. Harden them off first: Place the bag outside for 1–2 hours daily over 3–5 days to acclimate. Avoid transplanting in extreme heat or cold for best survival rates!
Wrapping up and next steps
Mastering seed germination in a plastic bag isn’t just eco-friendly—it’s a game-changer for your gardening success! With minimal effort and zero waste, you’ve unlocked a 90% success rate for sprouting seeds faster and more efficiently.
Whether you’re a beginner or a seasoned green thumb, this method proves that sustainability and simplicity go hand in hand.
Ready to take the next step? Experiment with different seeds or share your newfound technique with fellow plant lovers! 🌱 Start small, stay consistent, and watch your garden thrive—one plastic bag at a time.