
Propagation
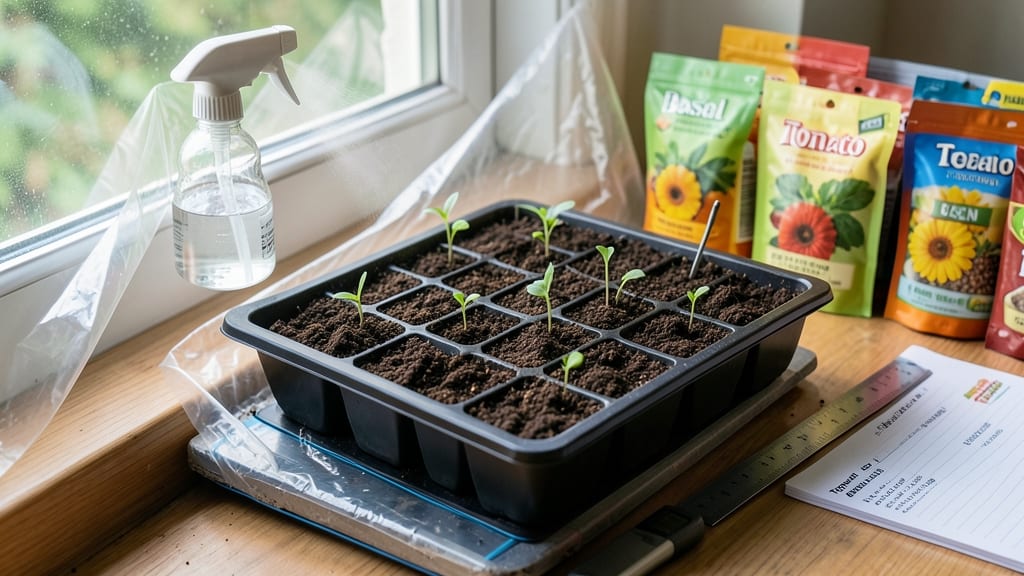
Understanding seed germination requirements is what separates a hopeful gardener from one who actually sees sprouts. 🌱 The right temperature, moisture, and light aren't just details—they're the difference between a tray of dirt and a thriving seedling.
I've learned this the hard way after watching seeds rot or dry out when I ignored these basics.
Most seeds need warmth—some like it hot (75-85°F for peppers), while others prefer cool (60-65°F for lettuce). Moisture is just as critical: too little and they dry out; too much and they rot. The soil mix matters too—light, airy potting soil beats dense garden soil for starting seeds.
And don't forget light: some seeds need darkness to germinate, while others crave sunlight as soon as they sprout.
When you nail these factors, you'll see those first green hooks in as little as 3-14 days, depending on the plant. My fastest germination? Radishes in just 4 days—nothing beats that rush of seeing life emerge from soil. The key is patience and precision, not guesswork.
This isn't just theory—it's how you avoid the heartbreak of failed starts. Whether you're growing tomatoes or marigolds, these science-backed steps will give you the confidence to germinate seeds reliably every time. Let's break it down so you can skip the trial-and-error phase.
📚 In This Guide
- What you need
- Instructions
- Tips and common mistakes
- Wrapping up and next steps
What you need
- ● Seeds: Choose fresh, high-quality seeds (check the packet for germination rates). Pro tip: Store seeds in a cool, dry place until use!
- ● Growing Medium: Seed-starting mix (sterile, well-draining) – 10-15 lbs (for a 10" tray)
- ● Alternative: Paper towels, dampened cotton balls, or peat pellets (for direct sowing)
- ● Containers: Seed trays with drainage holes (10" x 20")
- ○ Optional: Biodegradable pots, egg cartons, or plastic cups (for transplanting)
- ● Water: Room-temperature, filtered water (avoid tap water with chlorine)
- ● Spray Bottle: 8-16 oz with a fine mist nozzle (for gentle hydration)
- ○ Heat Mat (Optional): Electric seedling mat (70–85°F range) for faster germination
- ● Grow Lights or Sunny Window: LED grow lights (12–16 hrs/day) or a south-facing window
- ● Humidity Dome or Plastic Wrap: To retain moisture (remove once sprouts emerge)
- ● Trowel or Spoon: For gentle seed placement (avoid burying too deep!)
- ● Labels & Markers: To track seed varieties and planting dates
- ○ Fertilizer (Optional): Water-soluble seed starter (½-strength) – only after sprouts appear!
- ● pH Test Kit: To ensure soil pH is ideal (most seeds prefer 6.0–7.0)
- ○ Thermometer (Optional): For monitoring soil temperature (critical for some seeds like peppers or tomatoes)
Science-backed steps for reliable seed germination
Germination success starts with understanding the core conditions seeds demand—here's how to meet them.
🌱 Step 1: Select Seeds with Matching Conditions
Not all seeds germinate under the same conditions. Check the seed packet for three critical details: optimal temperature range, light requirements (light or dark), and days to germination. For example, tomatoes thrive at 75-85°F in darkness, while lettuce prefers 60-70°F with light exposure.
I always cross-reference seed packets with my local climate data to avoid mismatches. A seed that needs 90°F won't sprout in a 65°F basement—no matter how much you water it. Store seeds in a cool, dry place until ready to plant to maintain viability.
💧 Step 2: Prepare the Growing Medium and Environment
Use a sterile seed-starting mix (never garden soil) to prevent damping-off disease. Moisten the mix until it feels like a wrung-out sponge—damp but not soggy. Fill your containers to within ¼ inch of the rim, leaving space for seeds and moisture retention.
For temperature-sensitive seeds, place containers on a seedling heat mat set to the required range. Most seeds germinate best in darkness, so cover them with ½ inch of soil or place the container in a dark cabinet. Check daily for condensation—excess moisture signals overwatering.
☀️ Step 3: Maintain Consistent Moisture and Temperature
Germination hinges on two factors: consistent moisture and stable temperature. Water gently from below (using a tray) to avoid displacing seeds. The soil should stay evenly moist—never dry or waterlogged. Use a spray bottle for delicate seeds like snapdragons.
Monitor temperature with a thermometer. Fluctuations of more than 5°F can stall germination. If your home runs cooler than needed, place containers on top of the fridge or near a sunny window (without direct light). Most seeds sprout within 5-14 days—patience is key.
⏰ Step 4: Transition to Light at the Right Time
The moment seedlings emerge, remove any covering and move them to bright, indirect light. True leaves (the second set after the initial seed leaves) signal readiness for stronger light. Avoid direct sun at this stage—it can scorch tender seedlings.
If using grow lights, position them 2-4 inches above the seedlings and provide 14-16 hours of light daily. Leggy seedlings (stretched, pale stems) mean insufficient light. Adjust height or duration immediately to prevent irreversible damage.
🌿 Step 5: Thin and Harden Off for Transplant Success
Once seedlings have 2-3 true leaves, thin to the strongest plant per container. Use scissors to snip weak stems at soil level—pulling risks disturbing roots. This reduces competition and strengthens remaining plants.
Begin hardening off 10-14 days before transplanting. Place seedlings outside in a sheltered spot for 1 hour daily, gradually increasing exposure. Watch for wilting or leaf drop—these signs mean they're not ready. Acclimated seedlings transplant with minimal shock.
Tips & tricks for perfect seed germination
Took me years of trial-and-error to master these germination game-changers—here's how to avoid the most common pitfalls.
Temperature Precision: The 5°F fluctuation rule is non-negotiable. I use a small digital thermometer placed directly in the seed-starting mix to track real-time conditions. For seeds needing 75-85°F (like tomatoes), a simple DIY solution is placing containers on top of the fridge—it creates a warm microclimate without overheating. Pro tip: Never trust your home's general temperature—seedling environments can vary by 10°F in different spots.
Light Transition Strategy: The moment you see those first seed leaves (cotyledons), remove any covering immediately—but wait for true leaves before introducing full light. I mark the transition day on my calendar because this is where most gardeners go wrong. For the first 3-5 days after emergence, use a sheer curtain to diffuse sunlight if natural light is intense. This prevents the shock that causes seedlings to bolt or develop weak stems.
Moisture Management: The "wrung-out sponge" test is your best friend here. I fill a spray bottle with distilled water (tap water can contain chlorine) and mist the soil surface daily rather than watering from above. For delicate seeds like snapdragons, I even add a humidity dome made from a plastic bag with air holes—just remove it once germination begins. The key is maintaining moisture without creating anaerobic conditions that lead to rot.
Hardening Off Hack: That 10-14 day hardening period can feel like forever, but I've found a shortcut: start with just 20 minutes daily in a shaded spot, then increase by 10 minutes every 2 days. This gradual approach prevents transplant shock while still acclimating seedlings. Watch for leaf curl—not wilting—as your signal to slow down. I always do this in the late afternoon to avoid exposing tender plants to midday sun.
Pro Tips for Seed Germination Requirements
- Took me years of trial-and-error to master these germination game-changers—here's how to avoid the most common pitfalls.
- Temperature Precision: The 5°F fluctuation rule is non-negotiable. I use a small digital thermometer placed directly ...
- Light Transition Strategy: The moment you see those first seed leaves (cotyledons), remove any covering immediately—b...
Frequently asked questions
Got questions about seed germination?
You’re not alone! Here are answers to the most common concerns—from timing to troubleshooting—so you can grow with confidence.
How long does it take for seeds to germinate?
Germination time varies wildly by seed type. Fast growers like radishes or beans sprout in 3–7 days, while slowpokes (e.g., peppers, apples) can take 14–30+ days. Check your seed packet for specifics, and remember: consistent moisture and warmth speed up the process. Patience is key!
What if my seeds aren’t germinating? Troubleshooting tips?
Don’t panic! First, check these fixes:
- Moisture: Dry soil? Use a spray bottle to keep it damp (not soggy).
- Temperature: Too cold? Move trays to a warmer spot (70–90°F ideal for most seeds).
- Depth: Buried too deep? Dig up seeds—many need light to sprout.
- Age: Old seeds? Test viability by soaking in water (floaters = dead).
- Light: Some seeds (like lettuce) need light to germinate—cover trays with plastic wrap until sprouts appear.
Can I germinate seeds without soil?
Paper towel germination
is a great soil-free method:
- Moisten 2 paper towels, place seeds between them, and roll them up.
- Store in a sealed plastic bag or container.
- Keep in a warm, dark spot (like a cabinet) and check daily.
- Once sprouts have 1–2 inches of roots, transplant to soil.
Do all seeds need the same temperature to germinate?
Nope! Seeds have temperature preferences—some thrive in cool conditions, others need heat. Here’s a quick guide:
Cool-Seeking Seeds (60–70°F)
Warm-Seeking Seeds (70–90°F)
Lettuce, spinach, carrots, peas
Tomatoes, peppers, cucumbers, beans
Broccoli, cabbage, onions
Melons, squash, basil
What’s the best way to store seeds for next year?
Keep seeds viable longer with these simple steps:
- Cool & dry: Store in a sealed container (glass jars or airtight bags work) in a cool, dark place (like a fridge or basement).
- Avoid moisture: Use silica gel packets or a desiccant to prevent mold.
- Label everything: Write the seed type and date on the container—trust us, you’ll forget!
- Check annually: Seeds lose viability over time (most last 1–5 years). Test a few before committing to a full planting.
Wrapping up and next steps
Understanding seed germination requirements is your first step toward a thriving garden—whether you're a seasoned gardener or just starting out! 🌱 By mastering the science of moisture, temperature, light, and soil, you’ll unlock the potential for strong, healthy sprouts every time.
Don’t let hesitation hold you back: grab those seeds, follow the steps, and watch your green thumb grow!
Next up: Experiment with different seeds and conditions to discover what works best for your space. Happy planting!