
Flowers
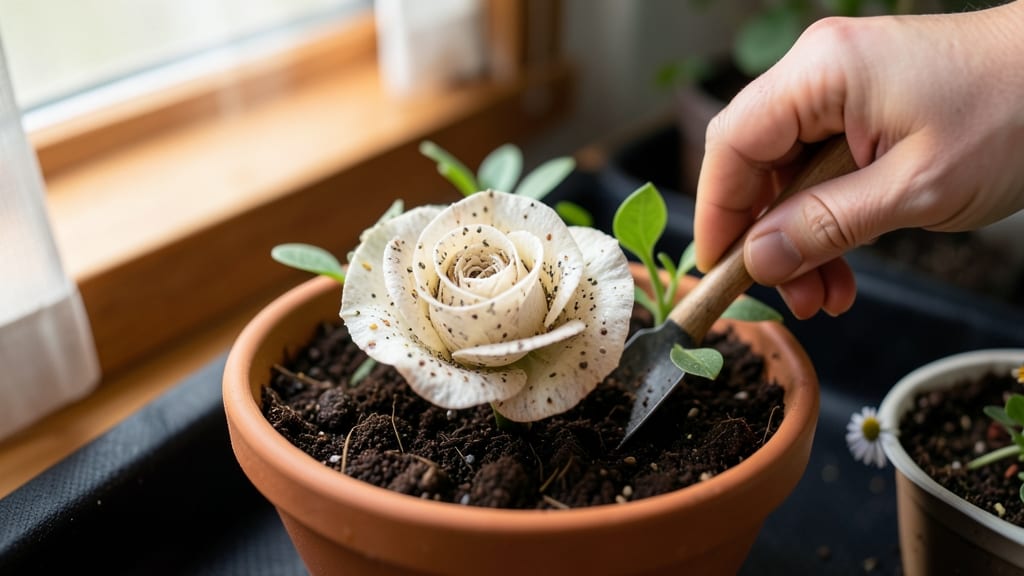
Creating seed paper flowers transforms discarded paper into living blooms that grow right from the page. 🌸 This zero-waste craft combines art and horticulture, letting you grow wildflowers, herbs, or vegetables from handmade paper—no soil required until they're ready to sprout. The best part?
Every piece you make becomes a seed bomb for pollinators or a biodegradable gift that keeps giving. The magic happens in three simple layers: a base of recycled paper, embedded seeds, and a natural glue like flour paste.
You'll need wildflower seeds, a blender for pulp, and a screen for shaping—no fancy equipment needed. Once dried, these delicate papers become both decoration and seed packets, perfect for weddings, scrapbooks, or eco-conscious home decor. When planting, place your seed paper directly on moist soil in spring or fall.
Keep it damp for the first 10-14 days while roots establish, then watch as tiny green shoots push through the paper. The original artwork dissolves into the earth, leaving only vibrant new growth behind.
Beyond gardens, use these as confetti for celebrations, bookmarks that grow into flowers, or favors that double as living gifts. Troubleshoot uneven sprouting by ensuring even moisture, and remember—thicker paper takes longer to break down but holds seeds better for storage.
📚 In This Guide
- What you need
- Instructions
- Tips and common mistakes
- Wrapping up and next steps
What you need
- ● Seed paper: 1–2 sheets (12"x12" or custom size; choose wildflower mixes for vibrant blooms). Pro tip: Look for 100% post-consumer waste paper with embedded seeds (e.g., clover, cosmos, or marigold).
- ● Water: Distilled or boiled (cooled) to prevent ink smudging.
- ● Acrylic paint: 1–2 colors (non-toxic, water-based; e.g., white, pink, or gold for accents).
- ● Paintbrushes: 2–3 sizes (fine-tip for details, medium for bases).
- ○ Glue (optional but helpful): White craft glue or a mod podge for extra durability.
- ● Scissors: Sharp pair for clean cuts (or a craft knife for intricate shapes).
- ● Bone folder or smooth object: A spoon or credit card to crisp edges.
- ○ Stencil set (optional): Pre-cut flower templates (e.g., daisies, roses) to guide designs.
- ● Rolling pin or smooth rock: Lightweight for pressing seeds into paper.
- ● Newspaper or parchment paper: To protect your workspace.
- ● Hairspray or spray bottle: Light mist to set paint (non-alcohol-based).
- ○ Twine or ribbon: For stems (optional, if making bouquets).
- ● Drying rack or books: To flatten flowers while drying (24–48 hours).
Step-by-step instructions for crafting seed paper flowers
Here's how to make beautiful, eco-friendly blooms that double as living gifts.
🌱 Step 1: Prepare the Flower Template
Start with a lightweight flower template—you can find free printable designs online or trace real flowers onto cardstock. Cut out 4 identical petal shapes (about 3-4 inches wide) for each flower, plus a small 1-inch circle for the center. These will become your flower layers. I like to use a bone folder for crisp edges, but scissors work too.
Lay your petals flat on a clean surface. You'll arrange them in a petal-by-petal spiral pattern, starting from the center outward. This creates a natural, layered bloom effect. Place the center circle at the base of your work area—this will anchor your flower as you build.
💧 Step 2: Mix the Seed Paper Paste
In a bowl, combine 1 cup water with ½ cup liquid starch (or flour paste if you prefer). Stir until smooth—it should have the consistency of thin pancake batter. This mixture binds the seeds and paper fibers while allowing roots to grow later. Add 1 tablespoon glycerin (optional) to make the paste slightly more flexible.
Dip a soft-bristle paintbrush into the paste, then gently brush a thin layer onto the back of your first petal. Cover only the non-print side—you want the design visible. Work quickly; the paste dries fast. Repeat for all 4 petals, then set them aside on a wire rack to dry for 10-15 minutes until slightly tacky but not stiff.
🌿 Step 3: Assemble the Flower Layers
Pick up the center circle and brush a thin paste line along one edge. Press the edge of your first petal onto the center, overlapping by ¼ inch. Hold for 5 seconds to bond, then repeat with the next petal, overlapping the first by ½ inch. Continue spiraling outward, alternating directions every other layer for a fuller look.
Once all petals are attached, let the flower dry completely for 24 hours in a low-humidity area (like a sunny windowsill). Avoid direct sunlight—it can cause the paste to dry too fast and crack. You'll know it's ready when the petals feel stiff and the center holds its shape when gently pressed.
⏰ Step 4: Plant and Care for Growth
When ready to plant, place the flower in a shallow tray or small pot filled with 1 inch of moist potting soil. Press the center lightly into the soil so it stands upright. Water gently from the bottom to avoid dislodging seeds. Keep the soil consistently moist (not soggy) for the first 2 weeks—this encourages seeds to germinate.
Set the tray in a location with bright, indirect light (like a north-facing window). You'll see first green sprouts in 7-14 days, depending on the seed mix. Once seedlings reach 1 inch tall, transplant them into individual pots or a garden bed. These flowers are tough—they’ll thrive in partial sun and survive light frosts.
🪴 Step 5: Display and Enjoy
After 4-6 weeks, your seed paper flowers will transform into lush, living blooms. Display them in hanging baskets, wall planters, or as table centerpieces. The original paper structure remains intact, creating a stunning contrast between dried petals and fresh growth. For longevity, mist the flowers every 2-3 days to keep them vibrant.
Real talk: These aren’t forever blooms, but they’ll last months longer than cut flowers. When the petals finally decompose, you’ll have a thriving garden in their place. I like to plant mine in community gardens—they’re a hit with kids and eco-conscious neighbors alike.
Tips & tricks for perfect seed paper flowers
These little tricks will help you create stunning, long-lasting blooms that actually grow—no gardening experience required.
Template Tip: For extra durability, use cardstock or thin cardboard instead of regular paper. I've found that 3-4 inch petals create the perfect balance between structure and flexibility. If you don't have a bone folder, a butter knife wrapped in parchment paper works just as well for crisp edges. The spiral pattern is key—it mimics how real flowers grow naturally, so don't be tempted to arrange them in a flat circle!
Paste Perfection: The 10-15 minute drying time for the paste-coated petals is crucial. If your kitchen is humid, reduce to 10 minutes—over-drying makes the paste brittle and harder to assemble. For a stronger bond, add 1 teaspoon honey (optional) to the paste mixture. This helps the seeds adhere better and makes the final flower more water-resistant. Remember to brush only the back of the petals—you want that beautiful design visible!
Assembly Secret: When attaching petals, press firmly for those 5 seconds—it makes all the difference in durability. I've learned the hard way that skipping this step leads to flowers that fall apart when planted. For a more natural look, alternate petal directions every other layer. And here's a pro move: Use a toothpick to gently tuck the edges of each petal under the next one as you go—this creates a hidden "stitch" that keeps everything secure.
Drying Wisdom: That 24-hour drying period in low humidity is non-negotiable. If you're in a hurry, place your flowers in a cool, dry place (like a closed cabinet with a fan on low) to speed things up slightly. Avoid direct sunlight—it can cause the paste to dry too quickly and crack. Test for readiness by gently bending a petal: if it holds its shape without breaking, it's ready to plant!
Pro Tips for Seed Paper Flowers
- These little tricks will help you create stunning, long-lasting blooms that actually grow—no gardening experience req...
- Template Tip: For extra durability, use cardstock or thin cardboard instead of regular paper. I've found that 3-4 inc...
- Paste Perfection: The 10-15 minute drying time for the paste-coated petals is crucial. If your kitchen is humid, redu...
Frequently asked questions
Got questions?
Here’s everything you need to know about crafting and caring for your seed paper flowers—plus troubleshooting tips to keep your zero-waste blooms thriving!
Can seed paper flowers survive rain or humidity?
Seed paper flowers are drought-resistant once fully dried, but they hate prolonged moisture. If planted outdoors, choose a sheltered spot (like a window box or under a tree). For indoor flowers, keep them away from bathrooms or kitchens. If caught in rain, let them dry completely in shade to prevent mold.
How long does it take for seeds to sprout in seed paper?
Sprouting time varies by seed type (wildflowers: 7–21 days; herbs: 5–14 days). Keep the paper moist (not soggy) by misting daily or placing it in a shallow tray of water. Pro tip: Place your flowers in a sunny windowsill or greenhouse to speed up germination.
What if my seed paper flowers don’t grow?
Common culprits: old seeds (use within 1–2 years), lack of moisture, or poor sunlight. Test a few seeds in soil first to confirm viability. If using wildflower blends, some seeds may need stratification (a cold period)—check the seed packet for specifics.
Can I use regular paper or recycled paper instead of seed paper?
Yes! You can DIY seed paper with thick, uncoated recycled paper (like cardstock) mixed with wildflower seeds and a natural glue (e.g., flour paste). Avoid glossy or coated paper—it repels water and blocks seed contact with soil. Bonus: Add a pinch of clay or compost for extra nutrients!
How long do seed paper flowers last as decorations?
Dried seed paper flowers can last months to years if stored in a cool, dry place (like a sealed box). For longevity, avoid direct sunlight or humidity. Once planted, the paper biodegrades in 4–6 weeks, leaving only vibrant blooms behind.
What’s the best way to dispose of old seed paper?
No waste here! Plant it in soil or compost it—it’ll break down naturally. If too brittle, tear it into smaller pieces and bury it where you want flowers to grow. Zero landfill impact!
Wrapping up and next steps
Creating seed paper flowers is more than just a craft—it’s a small but meaningful step toward a greener planet! 🌱 These eco-friendly blooms bring beauty to your space while helping future gardens grow. Whether you’re a DIY enthusiast or an eco-warrior, your effort makes a difference.
Ready to turn your passion into action? Start small: try making a single flower today, then expand your collection. Share your creations with friends or donate them to community gardens. Every seed paper bloom is a seed of change—literally and figuratively!