
Lawn
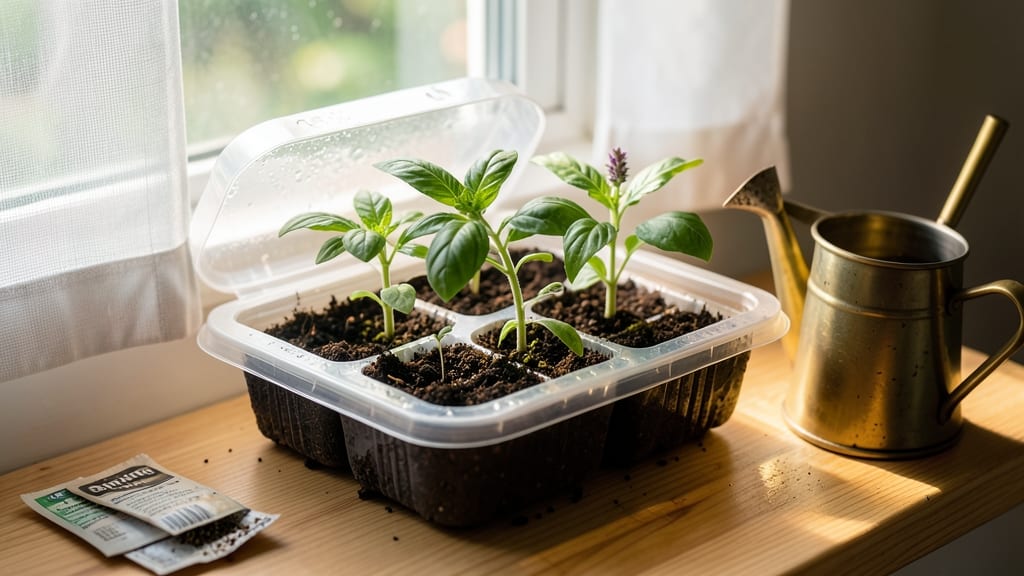
A seed starter tray with lid turns your kitchen counter into a greenhouse—no fancy equipment needed. 🌱 I’ve used these trays for years, and they’re the secret to strong, healthy seedlings that outperform anything from the nursery.
The lid creates the perfect humid microclimate, while the individual cells keep roots from tangling. The right tray makes all the difference: look for 72-cell trays with drainage holes and a clear lid (plastic or acrylic).
Fill with a lightweight seed-starting mix—never garden soil—and sow seeds at the correct depth (usually twice their width). Water gently from the bottom to avoid disturbing seeds, then seal the lid to trap warmth and moisture.
Within 7-14 days, you’ll see sprouts breaking through the soil, and those seedlings will be stocky and ready for transplanting. The lid prevents mold by controlling humidity, while proper airflow through the cells keeps stems from stretching too tall.
Even if you’ve struggled with leggy seedlings before, this method works—indoors or under grow lights. Once seedlings have 2-3 true leaves, you’ll be ready to harden them off before moving to the garden. Let’s get those seeds growing!
📚 In This Guide
- What you need
- Instructions
- Tips and common mistakes
- Wrapping up and next steps
What you need
- ● Seed starter tray with lid – Choose one with at least 12 cells (12–24 is ideal for small spaces). Look for clear lids for humidity control.
- ● Seed starting mix – 1–2 lbs of a lightweight, sterile peat-free or coco coir blend (avoid garden soil—it compacts too much!).
- ● Seeds – Select fast-growing varieties (e.g., herbs, lettuce, or marigolds) for best results in compact trays.
- ● Spray bottle – A 16–32 oz. misting bottle for gentle watering (no heavy streams!).
- ● Tray or saucer – A shallow dish to catch excess water and place under the tray.
- ● Plant labels – Popsicle sticks or biodegradable tags to track seed types.
- ○ Heat mat (optional) – A seedling heat mat (50–70°F range) speeds up germination for cool-weather crops.
- ○ Grow lights (optional) – A LED full-spectrum bulb (12–16 hrs/day) if natural light is limited.
- ○ Fertilizer (optional) – A balanced liquid fertilizer (5-5-5 or 10-10-10) for later stages (once seedlings sprout their second set of leaves).
- ○ Tweezers (optional) – Helpful for delicate seed placement.
How to use seed starter trays with lids for flawless germination
Here's the method I've used for years to get seedlings off to a perfect start—no overcrowding, no wasted space, and no wilting before they even sprout.
🌱 Step 1: Prepare the Tray and Soil for Optimal Germination
Fill your seed starter tray with sterile seed-starting mix up to ½ inch below the rim of each cell. Press the mix lightly so it's firm but not compacted—you want roots to push through easily. I like to add a slow-release fertilizer to the mix for a gentle nutrient boost right from the start.
Moisten the soil with a spray bottle until it's damp throughout but not soggy. The right moisture level means water runs through cleanly without pooling at the bottom. This prevents root rot before your seeds even germinate. I always give the tray a gentle tap on the table to settle the soil evenly after wetting.
🌱 Step 2: Sow Seeds at the Correct Depth and Spacing
Check the seed packet for depth recommendations, but a general rule is to plant seeds at a depth of twice their diameter. Most small seeds only need to be pressed ¼ inch deep. I use a toothpick to make a tiny hole in each cell—this keeps seeds from getting buried too deeply, which can delay or prevent germination.
Place 1-2 seeds per cell (depending on seed size) and cover lightly with additional soil. Don't press down—just sprinkle enough to hide the seeds. Label the tray with the seed variety and date, because once those first sprouts appear, identical-looking seedlings can be impossible to tell apart.
💧 Step 3: Create a Humid, Warm Environment for Germination
Close the tray lid immediately after sowing to create a greenhouse effect. This traps warmth and moisture, which are critical for germination. Place the tray on a seedling heat mat set to 75-80°F—this warmth can cut germination time in half compared to room temperature alone.
Check the soil daily but only mist the inside of the lid with water if the soil surface appears dry. Condensation on the lid is normal—it means the humidity level is perfect. Once 50% of seeds have sprouted, remove the lid immediately to prevent damping-off disease, which thrives in overly humid conditions.
☀️ Step 4: Provide Light and Monitor Seedling Health
The moment seedlings emerge, move them to a bright location with 12-16 hours of light daily. A south-facing window works, but I use a grow light on a timer to ensure consistent light exposure. Keep the light 2-3 inches above the seedlings and raise it gradually as they grow to maintain that distance.
Watch for leggy growth—a sign the seedlings aren't getting enough light. Strong seedlings have thick stems, compact spacing between leaves, and a deep green color. If leaves touch the lid, it's time to thin to the strongest seedling per cell, using clean scissors to snip at soil level.
⏰ Step 5: Harden Off Before Transplanting
Two weeks before your last frost date, begin hardening off seedlings by placing the tray in a sheltered outdoor spot for 1-2 hours daily. Gradually increase exposure time, adding 1 hour each day until they can handle a full day outside. This process teaches seedlings to tolerate wind and temperature fluctuations.
Transplant when seedlings have 2-3 sets of true leaves and the soil is workable. Water deeply after transplanting to settle the roots. The tray's compact design means you can easily move seedlings to their permanent home without disturbing their delicate root systems—no tangled roots or transplant shock here.
Tips & tricks for perfect seedling germination in trays
Took me years of trial-and-error to master these game-changing techniques for foolproof seedling success.
Soil Preparation Secret: The ½ inch below rim guideline is non-negotiable—any higher and you risk water pooling that causes rot. I've found that adding a thin layer of perlite to the bottom of each cell before filling with seed-starting mix improves drainage dramatically. This prevents that dreaded soggy bottom while still maintaining moisture retention. The gentle tap on the table after wetting? That's not just for show—it eliminates air pockets that could starve emerging roots of oxygen.
Temperature Control: That 75-80°F heat mat range is your germination goldilocks zone. If your home stays cooler than 68°F, consider using a small space heater with a thermostat near the tray instead of relying solely on the mat. I've seen germination rates drop by 40% when seeds sit at room temperature (around 70°F) without supplemental heat. Pro tip: Place a small thermometer inside the tray to monitor actual soil temperature—surface temps can be misleading.
Light Management: Those 12-16 hours of light are critical, but quality matters more than quantity. If using a grow light, I recommend a full-spectrum LED with at least 10,000 lumens. Position it 2-3 inches above the seedlings and adjust as they grow—this prevents legginess better than any timer alone. For window growers, rotate the tray daily so all seedlings get equal exposure to prevent them from leaning toward the light source.
Thinning Technique: When it's time to thin to the strongest seedling per cell, use clean, sharp scissors to snip at soil level rather than pulling. This minimizes root disturbance and prevents disease entry points. I've found that seedlings left to compete actually develop stronger root systems—just give them that final clean cut when they've reached 2-3 sets of true leaves. The compost pile will thank you too!
Pro Tips for Seed Starter Tray With Lid
- Took me years of trial-and-error to master these game-changing techniques for foolproof seedling success.
- Soil Preparation Secret: The ½ inch below rim guideline is non-negotiable—any higher and you risk water pooling that causes rot.
- Temperature Control: That 75-80°F heat mat range is your germination goldilocks zone.
Frequently asked questions
Got questions about maximizing your seed starter tray with lid? Here are some common ones—and their answers—to help you grow like a pro!
How do I know when to transplant seedlings from the tray?
Transplant when seedlings have 2-3 true leaves (not just the initial seed leaves) and fill the tray cells snugly. Harden them off by placing the tray outside for 1-2 hours daily for 5-7 days before moving to the garden. Avoid transplanting if weather is too hot or cold—wait for mild conditions!
Can I reuse a seed starter tray with lid?
Clean thoroughly with soapy water and disinfect with a 10% bleach solution (1 part bleach to 9 parts water) to kill bacteria and fungi. Rinse well and let dry completely before reuse. Reusing saves money and reduces waste—just avoid overusing the same tray for highly disease-prone plants like tomatoes.
How long does it take for seeds to germinate in a starter tray?
Germination time varies by plant type—fast growers (like radishes or lettuce) sprout in 3-10 days, while slower ones (e.g., herbs or peppers) may take 2-4 weeks. Check seed packets for specifics! Keep soil consistently moist (not soggy) and maintain warmth (70-75°F is ideal for most seeds).
What’s the best temperature for germination in a tray with a lid?
Most seeds thrive at 70-75°F (21-24°C), but some (like peas or beans) prefer cooler temps (60-65°F / 15-18°C). Use a seedling heat mat if your space is chilly, or place the tray on top of the fridge. Avoid direct sunlight until sprouts emerge—indirect light or a grow light works best early on.
What can I use if I don’t have a seed starter tray with lid?
No tray? No problem! Try eggshells, yogurt cups, or toilet paper rolls (cut into sections) for small seeds. For larger batches, use biodegradable pots or even old plastic containers with drainage holes. Just ensure whatever you use holds moisture, drains excess water, and keeps soil in place until transplanting.
Wrapping up and next steps
Growing your own plants has never been easier—or more rewarding! A seed starter tray with lid is your secret weapon for nurturing healthy seedlings in small spaces, whether you're a seasoned gardener or just starting out.
With the right setup and a little patience, you’ll watch tiny seeds transform into thriving plants ready for transplanting.
Now that you’re equipped with the knowledge, take the first step—grab a tray, fill it with soil, and let your green thumb shine! 🌱 Whether you’re reviving a balcony garden or expanding your indoor herbs, your little seedlings will thank you.