
Propagation
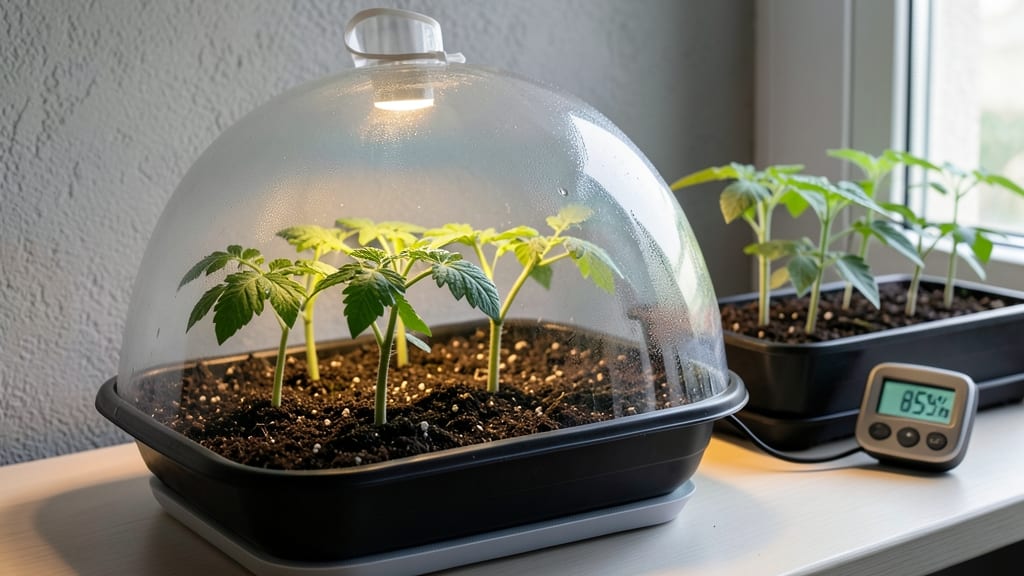
A seed starting humidity dome creates the perfect cozy environment for seeds to wake up and grow—fast. 🌱 I’ve watched seeds pop up in half the time using this simple trick, and the seedlings come out stockier and healthier than anything from a nursery. The secret?
Locking in moisture while keeping the air just right. You don’t need fancy equipment—plastic wrap, a clear container, or even a DIY cloche works. The goal is to mimic a greenhouse effect without overheating, so placement matters.
A sunny windowsill or under grow lights keeps things ideal, but avoid direct midday sun that can turn your dome into a sauna. With the right setup, you’ll see sprouts in 3-7 days (depending on the seed), and those first leaves will be strong and vibrant.
No more waiting weeks for germination or dealing with leggy, weak seedlings—just moist, speedy growth from the start. Troubleshooting is easy: if you spot mold, crack the dome for better airflow. If seeds stay dry, add a spritz of water. The key is balance—humidity without rot, warmth without heat stress.
Once the first true leaves appear, remove the dome to harden off seedlings for transplanting.
📚 In This Guide
- What you need
- Instructions
- Tips and common mistakes
- Wrapping up and next steps
What you need
- ● Clear plastic dome or lid: Must fit snugly over your seed-starting container (e.g., 10" x 20" plastic tray with lid, or a DIY dome made from a plastic bottle or cling film).
- ● Seed-starting tray or container: With drainage holes (e.g., 1020 plastic tray, 28-cell seedling plug tray, or a repurposed takeout container).
- ● Seed-starting mix: Lightweight, sterile potting soil (avoid garden soil—it’s too dense!). Aim for 2-3 cubic feet per tray.
- ● Seeds: Your chosen variety (check seed packets for depth and spacing guidelines).
- ● Spray bottle: With water (or a fine-mist setting on a hose for larger setups).
- ○ Tweezers or small tool: For gently pressing seeds into soil (optional but helpful!).
- ● Humidity gauge: To monitor moisture levels (aim for 70-90% humidity inside the dome).
- ● Ventilation tool: A toothpick or small stick to prop open the dome slightly as seedlings grow (prevents mold!).
- ● Grow lights: LED or fluorescent (12-16 hours/day) to supplement natural light.
- ● Label markers: For tracking seed varieties and planting dates.
- ○ Heat mat: (Optional) For warm-season seeds like peppers or tomatoes (70–85°F is ideal).
How to use a seed starting humidity dome for faster germination
Here’s how to create the perfect moist environment for seeds to pop through soil in record time.
🌱 Step 1: Prep Your Seeds and Soil for Optimal Moisture
Fill your seed trays with moistened seed-starting mix—it should feel like a damp sponge, not dripping. I press the soil down lightly with my fingers to remove air pockets, then use a spray bottle to mist the surface until it’s evenly damp. This ensures seeds stay hydrated without becoming waterlogged, which can suffocate them.
If your seeds need soaking (like chard or peas), I let them sit in lukewarm water for 12 hours first. This softens the seed coat and speeds up germination. After soaking, I plant them at the correct depth—usually twice the seed’s diameter—and gently press them into the soil to ensure good contact.
💧 Step 2: Cover Trays with the Humidity Dome
Place your seed trays under the humidity dome immediately after planting. The dome should sit snugly over the trays to trap warmth and moisture. I like to use clear plastic domes because they let me monitor seed progress without disturbing the setup. If your dome isn’t airtight, you can secure it with a rubber band or tape to prevent drafts from drying out the soil.
This trapped moisture mimics the humid conditions seeds crave to break dormancy. You’ll see condensation forming on the inside of the dome—this is a good sign! Just avoid lifting the dome for the first few days, even to check on seeds. Disturbing it too soon can drop humidity levels and delay germination.
☀️ Step 3: Provide Warmth and Indirect Light
Seeds germinate fastest in warmth, so I place my trays on a seedling heat mat set to 75-85°F. Without one, I’ll prop them on top of my fridge, which stays warm. The dome traps heat from the mat, creating the ideal environment. Keep trays in a spot with bright, indirect light—direct sun can overheat the dome and dry out the soil too quickly.
Watch for the first signs of germination: tiny green sprouts pushing through the soil. Once 50% of your seeds have sprouted, remove the dome immediately. Leaving it on too long can cause fungal issues like damping-off, where seedlings rot at the base overnight. You’ll know it’s time when you see a few strong sprouts with their first true leaves.
⏰ Step 4: Transition to Normal Care After Germination
After removing the dome, I move the trays to a well-lit area with 14-16 hours of light daily. This prevents leggy seedlings, which happen when plants stretch toward light. I use a grow light if natural light isn’t strong enough. Water from the bottom by placing trays in a shallow dish of water for 10-15 minutes, then drain excess.
Keep the soil consistently moist but not soggy—you’ll know it’s right when the top inch feels damp to the touch. Overwatering now can lead to root rot, so I check daily and adjust as needed. Within a week, you’ll see strong, compact seedlings ready for their next growth phase.
Tips & tricks for perfect seed starting with a humidity dome
These simple strategies will help you maximize germination speed and seedling health while avoiding common pitfalls.
Soil Moisture Check: After misting your seed-starting mix in Step 1, press it gently with your finger—it should hold together when squeezed but not crumble. If it feels too dry, add a light spray; if it’s too wet, let it sit uncovered for 10 minutes to evaporate excess moisture. The right balance prevents both suffocation and fungal growth, which can kill seeds before they sprout.
Dome Placement: In Step 2, position your dome slightly off-center if possible. This creates a tiny gap for air circulation while still trapping humidity. I’ve found that seeds under the dome’s edge often germinate first, giving you an early visual cue to remove it. Just avoid moving the dome once seeds are planted—even a slight shift can disrupt the moisture gradient.
Warmth Hack: For Step 3’s 75-85°F requirement, if you don’t have a heat mat, try placing your trays on top of your refrigerator’s top shelf. The warm air rising from the fridge’s condenser coils creates the perfect microclimate. Just monitor closely—some fridges can get too hot, so check soil temperature with a small thermometer if possible.
Germination Timeline: Most seeds will show signs of germination within 3-7 days under these conditions, but some varieties (like lettuce) can take up to 14 days. The 50% sprout threshold in Step 3 is your best guide—waiting until half your seeds have sprouted ensures you’re not leaving seedlings vulnerable too long. If nothing appears after 10 days, gently lift one seed to check for rot or mold.
Pro Tips for Seed Starting Humidity Dome
- These simple strategies will help you maximize germination speed and seedling health while avoiding common pitfalls.
- Soil Moisture Check: After misting your seed-starting mix in Step 1, press it gently with your finger—it should hold together when squeezed but not crumble.
- Dome Placement: In Step 2, position your dome slightly off-center if possible.
Frequently asked questions
Got questions about maximizing your seed-starting success with a humidity dome? You’re not alone! Here are some of the most common concerns—and their solutions—to help you grow with confidence.
How often should I open the humidity dome after planting?
Open the dome for just 5–10 minutes daily to prevent mold () and allow airflow. Once seeds sprout, remove it entirely to avoid leggy seedlings. Monitor humidity—if condensation isn’t visible, increase ventilation. Pro tip: Use a hygrometer to aim for 70–80% humidity!
When is the best time to remove the humidity dome?
Remove it as soon as seedlings emerge (usually 3–14 days, depending on the plant). Leaving it on too long can suffocate tender sprouts. Watch for tiny leaves breaking through soil—that’s your cue! For finicky seeds (like peppers), lift it gradually over 2–3 days to avoid shock.
Can I reuse a humidity dome for multiple seed batches?
Yes! Clean it thoroughly with soapy water and a 10% bleach solution between uses to kill fungi or bacteria. Avoid plastic food containers (like yogurt cups) if they’ve held dairy—residue can harm seeds. For long-term reuse, opt for sterilizable glass or acrylic domes.
What if my seeds aren’t germinating under the dome?
Check these first:
- Temperature: Most seeds need 65–85°F (use a seedling heat mat if needed).
- Moisture: Bottom-water trays (not top!) to keep soil damp, not soggy.
- Light: Place near a bright window or under grow lights after sprouting.
- Seed viability: Test old seeds with a float test—sinkers sprout!
What’s a good alternative if I don’t have a humidity dome?
No dome? No problem! Try these:
- Plastic wrap: Stretch it over trays, poke holes for airflow.
- Glass jar: Cover individual pots (like a mini greenhouse).
- Misting bottle: Keep soil moist daily (but less effective for bulk starts).
- Peat pellets: Pre-moistened pellets retain humidity naturally.
Wrapping up and next steps
A seed starting humidity dome is your secret weapon for faster, healthier germination—keeping seeds cozy, hydrated, and stress-free! 🌱 Whether you’re growing delicate herbs, hearty veggies, or exotic blooms, this simple setup transforms patience into progress.
Now that you’re equipped with the right materials and answers to common questions, it’s time to roll up your sleeves and start sowing.
Your next logical step? Experiment with different seeds and tweak your dome setup to find what works best for your green thumb. Happy planting—your future plants will thank you! 🌿