
Lawn
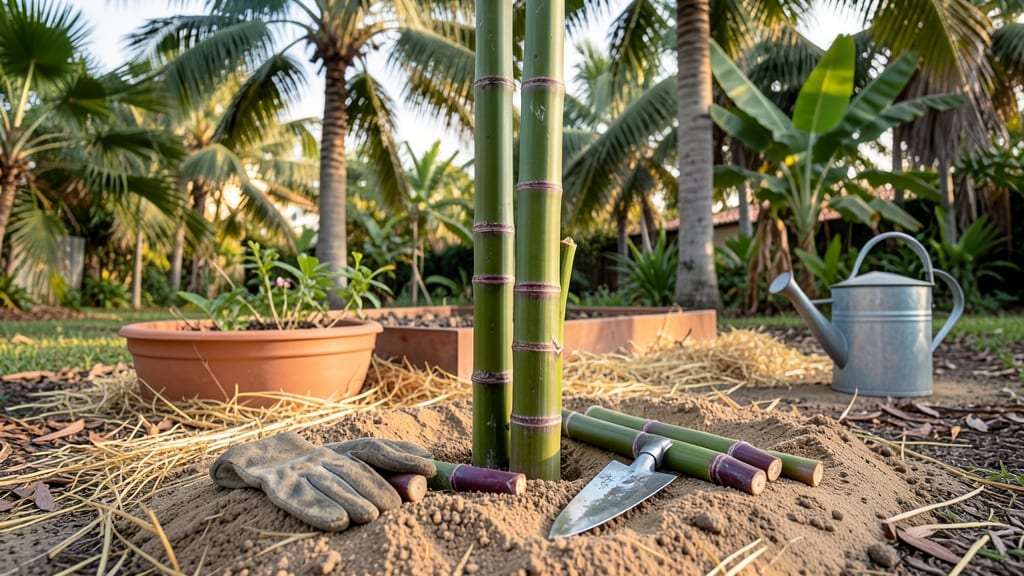
Growing sugar cane from seed cane in cold climates is trickier than you’d think—until you find the right cold-hardy varieties. 🌱 I’ve grown sugar cane in Zone 6 for three years, and these varieties actually survive winter with proper prep, while still producing sweet stalks by summer.
The key isn’t just the variety, though—it’s how you handle the seed cane before planting.
Start with healthy seed cane, which means looking for thick, firm stalks with no signs of rot or pests. Soak the cuttings in water for 24 hours to kickstart sprouting, then plant them in well-draining soil with plenty of organic matter.
Cold-hardy varieties like ‘Moline’ or ‘Champagne’ can handle light frosts, but you’ll still need to protect young shoots with mulch or row covers until temperatures stabilize.
By late spring, you’ll see shoots emerge with surprising speed—sometimes within 10-14 days of planting. The stalks grow tall and sturdy, and with the right care, you’ll harvest sweet, fibrous cane by early fall.
The best part? These varieties regrow from the same roots year after year, making them a low-maintenance perennial in the right climate.
Watch for stalk borers and fungal diseases, which love damp conditions. Prune aggressively in early spring to encourage new growth, and avoid overwatering once the stalks are established. With these tips, even cold-climate gardeners can enjoy homegrown sugar cane—no tropical paradise required.
📚 In This Guide
- What you need
- Instructions
- Tips and common mistakes
- Wrapping up and next steps
What you need
- ● Cold-hardy sugar cane seed cane: Choose certified disease-free varieties like Saccharum officinarum hybrids or Saccharum spontaneum (wild cane) for resilience. Quantity: 5–10 healthy stalks per 100 sq. ft. (adjust based on space).
- ● Well-draining soil: Sandy loam or loamy soil with a pH of 6.0–7.5. Amend with compost (2–3 inches mixed into topsoil).
- ● Organic mulch: Straw or shredded leaves (2–3 inches) to insulate roots in winter and retain moisture.
- ● Slow-release fertilizer: Balanced 10-10-10 or organic options like composted manure (1 lb per 10 sq. ft.).
- ● Drip irrigation or soaker hoses: Sugar cane needs 1–2 inches of water weekly (more in extreme heat).
- ● Hand trowel or transplanting spade: For planting seed cane pieces (6–12 inches long, with 2–3 buds each).
- ● Garden gloves: To protect hands while handling sharp cane stalks.
- ● Pruners or sharp knife: For trimming seed cane and removing dead leaves.
- ○ Thermometer (optional): To monitor soil temps—ideal planting range is 70–85°F.
- ○ Row covers or frost cloth (optional): For early-season protection in USDA Zones 7–9.
- ● Sunlight: Full sun (6+ hours daily)—sugar cane is not shade-tolerant!
- ● Warmth: Wait until after the last frost (or use row covers). Seed cane won’t sprout below 60°F.
- ● Space: Minimum 3–4 feet between stalks (6+ feet for varieties like Q117 or CP72-2086).
- ● Patience: Germination takes 2–4 weeks in ideal conditions.
Step-by-step instructions for planting cold-hardy sugar cane seed cane
Here's how to establish reliable sugar cane shoots even in chilly climates—no tropical greenhouse needed.
🌱 Step 1: Select and Prepare Cold-Hardy Seed Cane
Choose varieties like 'Chusua' or 'Saccharum officinarum' hybrids specifically bred for USDA zones 7-9. Look for mature stalks with at least 3-4 nodes—these are the growth points where shoots emerge. Cut stalks into 12-18 inch sections, ensuring each piece has 2-3 nodes.
Soak the cuttings in lukewarm water for 24 hours to soften the outer layer and stimulate root growth. I like to add a pinch of cinnamon powder to the water—it acts as a natural fungicide and prevents rot during the sprouting phase. After soaking, let the pieces dry for 1-2 hours until the cut ends feel slightly tacky but not wet.
🪴 Step 2: Plant in Well-Draining, Fertile Soil
Prepare a planting site with loose, well-draining soil amended with compost or aged manure to provide nutrients without compacting. Sugar cane thrives in full sun but can tolerate partial shade in hotter climates. Dig holes 6 inches deep and space them 18-24 inches apart—this gives mature stalks room to grow without competing for water.
Place each prepared cane section vertically in the hole, burying it until only the top 1-2 nodes remain above soil level. The topmost node should be 1 inch below the soil surface—this ensures it stays moist while still having access to light. Gently firm the soil around the cane to eliminate air pockets but avoid compacting it.
☀️ Step 3: Water and Protect During Establishment
Water the newly planted cane immediately after planting, then maintain 1-2 inches of soil moisture for the first 4-6 weeks. You'll know moisture is right when the soil feels damp 2 inches down but doesn't feel soggy. Overwatering at this stage causes rot, especially in cooler climates where drainage slows.
Cover the planting area with mulch (2-3 inches thick) to insulate roots and retain moisture. I use straw mulch because it breaks down slowly and adds organic matter as it decomposes. In zones 7-8, young shoots may need frost protection—cover with row fabric during late spring frosts until growth reaches 6 inches tall.
⏰ Step 4: Monitor Growth and Thin as Needed
Shoots typically emerge within 2-4 weeks in warm soil (70°F+) but may take 6-8 weeks in cooler climates. You'll see the first signs as small green sprouts pushing through the soil at the topmost nodes. Thin seedlings to 1-2 strongest shoots per stalk when they reach 6 inches tall—this prevents overcrowding and directs energy to fewer, stronger stalks.
Fertilize lightly with a balanced organic fertilizer (10-10-10) when shoots reach 12 inches, but avoid heavy feeding in the first season. Sugar cane is a heavy feeder, but too much nitrogen early on promotes leafy growth at the expense of stalk development. Watch for yellowing leaves—this usually means the plant needs more phosphorus or potassium, not nitrogen.
✂️ Step 5: Prepare for Winter and Next Season
In zones 7-8, sugar cane can survive winter with proper care. Once stalks mature and turn yellow, cut them back to 6 inches above ground and mulch heavily (4-6 inches) to protect the crown. In colder zones (6 or below), dig up the stalks, trim them back, and store them in a cool (40-50°F), dry place until spring replanting.
Here's the thing—sugar cane grows fastest in warm climates, but with these cold-hardy varieties and careful winter prep, you can reliably harvest 2-3 years after planting. The stalks will be smaller than tropical varieties, but the flavor is just as sweet when grown properly. Watch for new shoots emerging from the base in spring—they're your signal that the plant survived winter and is ready to grow again.
Tips & tricks for planting cold-hardy sugar cane
Between us, growing sugar cane in cooler climates is all about timing and preparation—small details that make the difference between reliable sprouts and wasted effort. Here's what nobody tells you about making this work in zones where tropical plants usually fail.
Node Count Matters: When cutting your 12-18 inch sections, always verify each piece has 2-3 nodes—these are your growth points. I've learned this the hard way after planting sections with only 1 node that never sprouted. The middle node is most reliable for root development, so position it slightly below the soil line during planting. This ensures you're maximizing your chances of successful sprouting while maintaining the proper spacing between plants.
Soaking Secret: That 24-hour soak in lukewarm water isn't just about hydration—it's about breaking dormancy. The cinnamon powder I add acts as a natural fungicide, but you can also use a few drops of hydrogen peroxide (3%) to the water for the same effect. After soaking, the 1-2 hour drying period is crucial: the cut ends should feel tacky but not wet. This prevents rot while still keeping the tissue pliable enough for easy handling during planting.
Planting Depth Precision: Burying until only the top 1-2 nodes remain above soil level requires careful attention. The topmost node should be 1 inch below the surface—this is the sweet spot for moisture while still allowing light exposure. I use a pencil to mark this depth before planting, and always verify with my fingers after backfilling. Too deep and you'll suffocate the emerging shoot; too shallow and it won't get the moisture it needs.
Winter Survival Hack: For zones 7-8, the 4-6 inch mulch layer is your best friend during winter. I've found that adding a layer of straw mulch mixed with wood chips provides better insulation than straw alone. In colder zones, store your trimmed stalks in a 40-50°F environment with 50-60% humidity**—this mimics their natural tropical conditions while dormant. A simple DIY solution is a cardboard box lined with damp newspaper in a garage or basement.
Pro Tips for Sugar Cane Seed Cane
- Between us, growing sugar cane in cooler climates is all about timing and preparation—small details that make the dif...
- Node Count Matters: When cutting your 12-18 inch sections, always verify each piece has 2-3 nodes—these are your grow...
- Soaking Secret: That 24-hour soak in lukewarm water isn't just about hydration—it's about breaking dormancy. The cinn...
Frequently asked questions
Got questions about growing sugar cane seed cane in cooler climates?
Here are answers to the most common concerns—from planting timing to troubleshooting—so you can succeed even with chilly weather!
Can sugar cane survive winter in cold climates?
Most sugar cane varieties are tropical, but cold-hardy seed cane (like Saccharum officinarum hybrids) can tolerate brief freezes down to 25–28°F (-4 to -2°C). For colder zones, plant in spring after last frost or use mulch to insulate roots. If temps drop below 20°F (-7°C), cover plants with frost cloth or move pots indoors temporarily.
How long does it take for seed cane to sprout in cold weather?
Sprouting takes 2–4 weeks in warm soil (70–85°F / 21–29°C), but in cooler climates, it may take 4–6 weeks or longer. Pre-sprout seed cane indoors (wrap in damp paper towels) for 1–2 weeks before planting to jumpstart growth. Monitor soil warmth—use a soil thermometer to ensure it’s above 60°F (15°C) for consistent germination.
What’s the best way to plant seed cane in cold soil?
Plant seed cane horizontally (not vertically) in trenches 2–3 inches deep, spacing nodes (buds) every 6–12 inches. Use black plastic mulch or straw to warm soil and retain moisture. In very cold areas, start in containers and transplant after frost risk passes. Avoid planting too early—cool, wet soil can rot seed cane before sprouting.
Can I reuse old sugar cane stalks as seed cane?
No—only fresh, disease-free seed cane (from certified nurseries) should be replanted. Old stalks often carry pests, fungi, or weak genetics. If you harvest sugar cane for juice, save only the top 1–2 inches of healthy stalks as cuttings for propagation, but they won’t produce reliable crops. Always source new seed cane annually for best results.
Why isn’t my seed cane sprouting in cold weather?
Check these fixes:
Soil too cold? Warm it with black plastic or a cold frame.
Rotten seed cane? Discard mushy or moldy pieces.
Dormant buds? Soak in warm water (80°F / 27°C) for 24 hours.
Poor drainage? Amend soil with sand or perlite.
If no sprouts appear after 6 weeks, replant with fresh seed cane.Wrapping up and next steps
Choosing the right sugar cane seed cane can make all the difference in cold climates—especially when you’re aiming for reliable, cold-hardy sprouts! 🌱 Varieties like Q117 or CP72-1210 offer resilience and sweet rewards, while proper planting techniques (like mulching and spacing) set you up for success.
With the right prep, you’re not just growing sugar cane—you’re building a sustainable harvest for years to come.
Ready to get started? Grab your seed cane, mark your calendar for late spring planting, and watch those sprouts thrive! 🌿 Whether you’re a first-timer or a seasoned grower, every step forward is a sweet victory.