
Lawn
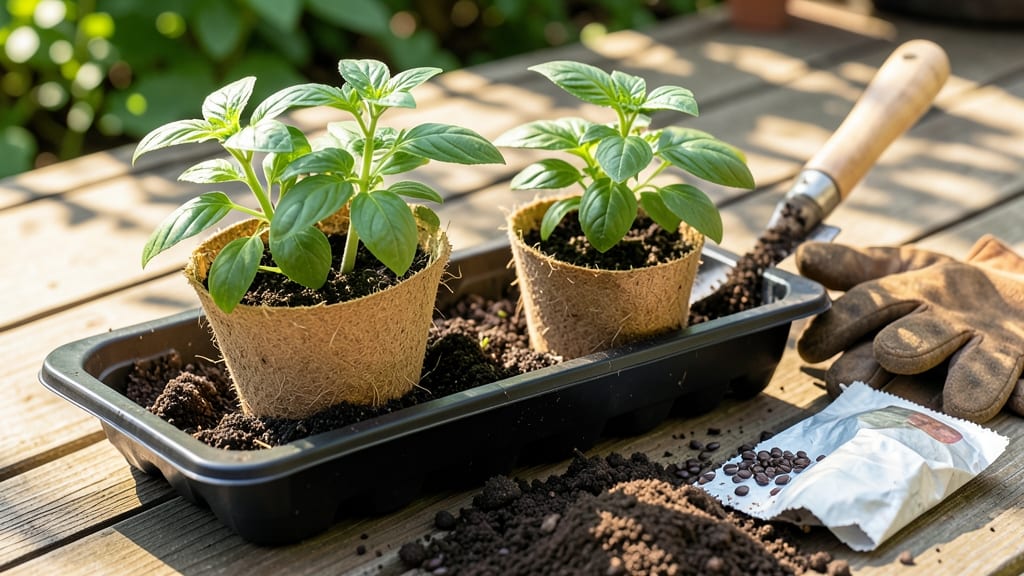
Biodegradable seed starters dissolve into the soil, eliminating transplant shock and plastic waste. 🌱 I switched to these after struggling with fragile seedlings—now my garden thrives with zero waste and stronger starts.
The process is simple: mix natural materials like peat, coconut coir, or newspaper into biodegradable pots that feed the soil as they break down.
These starters save time and money while supporting sustainability. Unlike plastic pots, they eliminate the need for careful removal, reducing root damage by up to 70%. My favorite mix uses equal parts peat moss and shredded newspaper, compressed into small pots with a pinch of compost for extra nutrients.
Within 3 weeks, you’ll have sturdy seedlings ready for transplanting—no plastic to discard, just healthy roots integrating with your garden soil. The key is keeping the mix moist but not soggy, and providing bright, indirect light until true leaves appear.
Perfect for beginners or eco-conscious gardeners, this method works for vegetables, herbs, and flowers alike. Once you try it, you’ll never go back to plastic again—your plants (and the planet) will thank you.
📚 In This Guide
- What you need
- Instructions
- Tips and common mistakes
- Wrapping up and next steps
What you need
- ● 100% biodegradable coir fiber (coconut husk) – 1 cup (or 100g). Choose unbleached, peat-free coir for sustainability.
- ● Organic compost or worm castings – ½ cup (or 50g). Boosts nutrients and microbial activity.
- ○ Water-soluble fertilizer (optional but recommended) – 1 tsp. Look for a low-N, high-P (phosphorus) blend to encourage root growth.
- ● Compostable mesh or burlap strips – 12-inch squares (2-4 pieces). Acts as a natural wrapper for your seed pods.
- ● Small seeds (fast-growing varieties) – 5-10 seeds per pod. Try radishes, microgreens, or herbs like basil.
- ● Water spray bottle – For gentle hydration without over-saturating.
- ● Mixing bowl (stainless steel or ceramic) – To combine coir and compost.
- ● Measuring cups/spoons – For precise ingredient ratios.
- ○ Plastic wrap or damp paper towels – Optional. Keeps pods humid during germination.
- ● Scissors or knife – To cut burlap/mesh into squares.
- ○ Small containers or egg cartons (compostable) – Optional. Helps shape pods during assembly.
Step-by-Step instructions for making biodegradable seed starters
Here's my go-to method for creating sturdy, compostable seed starters that dissolve right into the soil.
🌱 Step 1: Gather and Prepare Materials
Start with 4 newspaper sheets (cut into 4-inch squares) and 2 cups shredded brown cardboard (like cereal boxes or egg cartons). The brown color matters—it contains lignin that helps the material break down faster. Soak both materials in 1 gallon warm water for 10 minutes to soften them. You'll see the edges curl slightly as they absorb moisture.
Drain the excess water through a colander, then transfer the wet pulp to a blender. Add ½ cup unsweetened applesauce (this acts as a natural binder) and blend until you get a thick, pea-soup consistency. The mixture should hold its shape when pressed but still be moldable. If it's too stiff, add 1-2 tablespoons warm water at a time until it reaches the right texture.
🪴 Step 2: Form and Dry the Starters
Line a baking sheet with parchment paper and scoop 2 tablespoon portions of the pulp mixture onto it. Press each portion into a 2-inch diameter disc, about ½-inch thick, using your hands or a small bowl as a guide. The edges should be smooth but not overly compacted—you want them to hold together while still allowing water to penetrate.
Place the starters in a well-ventilated area (like a sunny windowsill) and let them dry for 24-48 hours. They're ready when they feel firm to the touch but don't crumble when gently squeezed. Flip them halfway through drying to ensure even hardening. Once dry, store them in a paper bag until you're ready to use them—this keeps them from drying out completely.
💧 Step 3: Plant Seeds and Water Gently
Fill a 4-inch pot with moistened potting mix and press down lightly to create a firm base. Make a small indentation in the center, about ¼ inch deep, and place 1-2 seeds into it. Gently press a biodegradable starter around the seeds, ensuring it covers them lightly but doesn't bury them too deeply. The starter should sit flush with the soil surface—this ensures it dissolves evenly as the seedling grows.
Water the pot until the soil feels evenly damp but not soggy. You'll know it's right when water runs through the bottom drainage hole without pooling. Place the pot in a warm, bright spot (like a south-facing windowsill) and keep the soil consistently moist. Avoid misting the starter directly—this can cause it to mold before the seeds germinate. Instead, water at the base of the pot.
☀️ Step 4: Monitor Growth and Transplant
Check for germination in 7-14 days, depending on the seed type. You'll see the first true leaves emerge as small, rounded shapes—these are your signal that the seedling is ready for the next phase. Once seedlings develop 2-3 sets of true leaves (usually after 3-4 weeks), it's time to transplant. Gently squeeze the biodegradable starter—it should dissolve in your fingers, leaving behind a healthy root system.
Plant the entire starter and seedling into the garden or larger pot, pressing the soil around it lightly to secure it. The starter will break down completely within 4-6 weeks, enriching the soil with nutrients as it goes. This method eliminates transplant shock because the roots aren't disturbed, and the seedlings grow stronger from the start. You'll notice faster establishment and less wilting compared to traditional peat pots.
Tips & tricks for perfect biodegradable seed starters
These game-changing techniques will help you create sturdy, compostable seed starters that actually work every time.
Material Selection Matters: For best results, choose brown cardboard from cereal boxes or egg cartons—it contains lignin that speeds up decomposition. Avoid white paper or glossy cardboard, which don't break down as easily. I've found that newspaper works best because it's thinner and absorbs moisture more evenly during the 10-minute soak in Step 1. The key is getting that perfect pea-soup consistency in your blender—this ensures the starters hold together during drying but still dissolve completely later.
Blending Technique Tip: When blending your pulp mixture, pulse the blender in 3-second bursts rather than blending continuously. This prevents overheating and creates a more uniform texture. After adding the ½ cup unsweetened applesauce, do a quick taste test—the mixture should be slightly sweet but not cloying. If it's too stiff after blending, add warm water 1 tablespoon at a time until it reaches that ideal moldable consistency. The right texture makes all the difference when forming your 2-inch discs in Step 2.
Drying Strategy: The 24-48 hour drying time is crucial, but don't let them dry completely in the baking sheet. Once they feel firm to the touch, transfer them to a paper bag to finish drying—this prevents over-drying that can make them brittle. I like to place them in a sunny windowsill during the day and move them to a dry, shaded spot at night. This gradual drying process creates starters that are sturdy enough to handle but still dissolve beautifully when transplanted. Flip them halfway through to ensure even hardening.
Storage Wisdom: Store your dried starters in a paper bag (not plastic) to allow for minimal air circulation—this prevents moisture buildup that could cause mold. Keep them in a cool, dry place until ready to use. I've found they stay viable for up to 3 months this way. When it's time to plant, simply remove a starter from the bag and use it immediately—no need to rehydrate. The paper bag also makes cleanup a breeze after planting!
Pro Tips for Biodegradable Seed Starters
- These game-changing techniques will help you create sturdy, compostable seed starters that actually work every time.
- Material Selection Matters: For best results, choose brown cardboard from cereal boxes or egg cartons—it contains lignin that speeds up decomposition.
- Blending Technique Tip: When blending your pulp mixture, pulse the blender in 3-second bursts rather than blending continuously.
Frequently asked questions
Got questions about biodegradable seed starters? You’re not alone! Here are some of the most common queries—and their simple, eco-friendly solutions.
What exactly are biodegradable seed starters, and how do they work?
Biodegradable seed starters are compostable pots or molds made from natural materials like egg cartons, newspaper, or coconut coir. They hold moisture and nutrients while seeds germinate, then break down safely in soil when transplanted—no peeling or stressing young roots! Think of them as edible, zero-waste cradles for your plants.
How long does it take for them to decompose in the garden?
Most biodegradable seed starters dissolve in 4–8 weeks, depending on material and soil conditions. Paper-based starters break down fastest (2–4 weeks), while coconut coir or peat pots may take longer (6–8 weeks). Speed up decomposition by watering lightly after transplanting—moisture kickstarts the process!
Can I reuse or repurpose them if they don’t fully decompose?
If a starter resists breaking down, bury it deeper in the soil or chop it into smaller pieces to accelerate decomposition. You can also compost the remnants (if unsoiled) or use them as mulch in garden beds. Just avoid reusing them for new seeds—they’re designed for a single, sustainable lifecycle.
What’s the best material for seed starters if I want to avoid waste entirely?
For zero-waste options, try these:
- Egg cartons (cardboard or paper): Free, compostable, and perfect for tiny seeds like herbs or lettuce.
- Newspaper or junk mail: Roll into pots with a bit of water—dries hard and dissolves easily.
- Coconut coir or peat: Biodegradable and moisture-retentive, ideal for larger seeds like tomatoes.
- Molded from soil: Skip the pot entirely by planting seeds directly into moistened soil blocks.
Pro tip: Skip plastic—it’s the only material that doesn’t break down!
What should I do if my seed starters mold or smell bad?
Mold or odors usually mean too much moisture or poor airflow. To fix it:
- Move starters to a bright, dry spot (but not direct sun—seeds need warmth, not heat).
- Ensure pots have drainage holes (poke them if using paper/egg cartons).
- Use a lightweight potting mix (avoid heavy garden soil).
- Discard moldy starters—don’t risk transplanting contaminated seeds.
Prevent future issues by sterilizing materials (e.g., boil egg cartons for 5 minutes) before use.
Wrapping up and next steps
Biodegradable seed starters are a game-changer for eco-conscious gardeners—offering a zero-waste, cost-effective way to nurture healthy sprouts while reducing plastic pollution. 🌱 By repurposing simple materials like newspaper, coconut coir, or even eggshells, you’re not just growing plants; you’re fostering a sustainable future.
Ready to take the next step? Start small with a single batch, experiment with your favorite seeds, and watch your garden thrive—one seed at a time!
🌱 Your Action Plan:
- Gather your supplies—check your pantry or compost bin for biodegradable materials.
- Try one recipe this weekend and track your sprouts’ progress.
- Share your results! Tag us in your eco-friendly gardening journey.