
Propagation
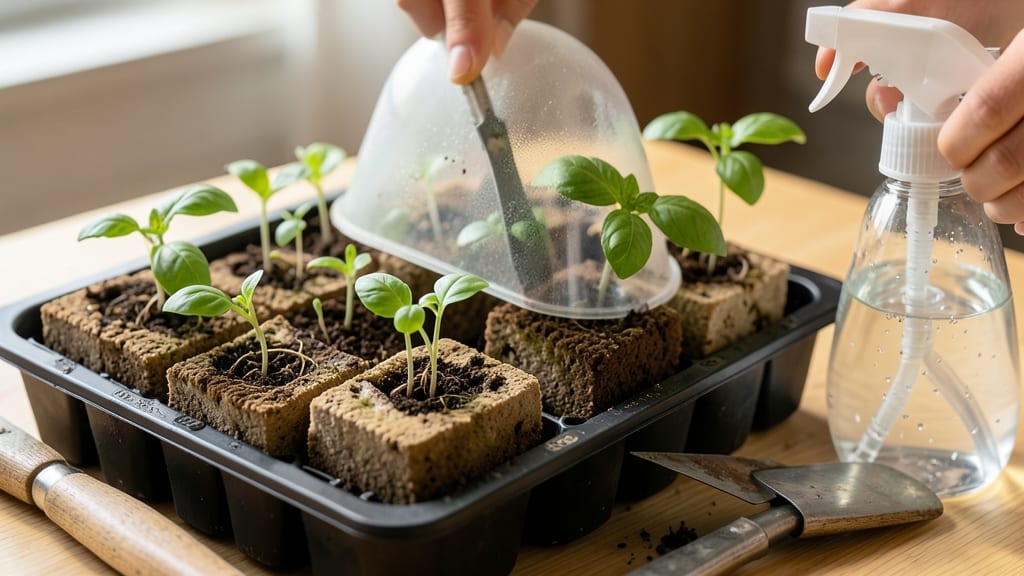
My soil block seed starting mix transforms fluffy soil into lightweight cubes that hold moisture perfectly—no more drying out or root-bound seedlings. 🌱 After three failed batches with regular mixes, I finally nailed this recipe that keeps roots aerated while locking in just the right dampness.
The secret lies in the balance of coco coir, perlite, and compost that mimics nature's perfect seed-starting conditions. This mix beats traditional seed-starting soil in every way: no compaction, better drainage, and gentler transplanting when you pop those blocks right into the ground.
Unlike heavy potting mixes that suffocate roots, these blocks create an airy environment where seedlings grow strong from day one. Plus, the blocks break down naturally, so you're not disturbing roots when it's time to move them outside.
What you'll end up with is stocky, vibrant seedlings that outperform anything from a store-bought tray. The blocks stay moist for days without drowning roots, and you can even reuse the leftover mix for cuttings or small transplants.
My basil and tomato seedlings now reach transplant size in half the time with this method. Perfect for small spaces, organic gardeners, or anyone tired of seedling failures. Here's exactly how to mix it and use it—no more guesswork, just reliable results every season.
📚 In This Guide
- What you need
- Instructions
- Tips and common mistakes
- Wrapping up and next steps
What you need
- ● Coco coir (coconut coir): 50% of the mix (by volume). Choose pearl or brick coir for best aeration and moisture retention.
- ● Compost: 30% of the mix. Use well-aged, sifted compost (¼-inch or finer) to avoid large chunks.
- ● Perlite or vermiculite: 20% of the mix. Perlite adds lightweight fluffiness, while vermiculite holds moisture better—pick based on your climate!
- ○ Worm castings (optional but recommended): 1–2 cups per 5 gallons of mix. Boosts nutrients and microbial activity!
- ○ Lime (optional, for acid-loving plants): ½ cup per 5 gallons if your compost is acidic (test with a pH kit).
- ● Mixing container: A large plastic tub, wheelbarrow, or clean trash can (at least 5-gallon capacity).
- ● Gloves and dust mask: Protect your hands and lungs from fine particles!
- ● Soil block maker: A handheld or electric press (e.g., Soil Block Maker by Soil Block Solutions).
- ○ Scale (optional): For precise measurements if you’re experimenting with ratios.
- ● Spray bottle: To mist the mix before pressing for even moisture.
- ● Hydrate your coir first! Soak coco coir in water for 10–15 minutes before mixing to activate its moisture-holding properties. 💦
- ● Sterilize tools: Wash containers and tools with a 10% bleach solution (or boiling water) to prevent mold or pests.
- ● Adjust ratios for texture: Need a firmer block? Reduce perlite by 5%. Prefer extra fluff? Add 5% more.
How to create a perfect soil block mix for seed starting
Here's the lightweight, moisture-retaining formula I've perfected after years of battling damping-off and leggy seedlings.
🌱 Step 1: Combine Base Materials for Optimal Structure
Start with 50% coco coir—this holds moisture like a sponge while preventing compaction. Add 25% perlite for that essential air space, which prevents fungal gunk from taking hold. I measure these by volume in a large mixing bin, giving each component equal attention. The coco coir should feel slightly damp but not dripping before mixing.
For the remaining 25%, blend 1 part peat moss with 1 part vermiculite. This combo gives you the perfect balance: peat holds water while vermiculite adds that critical mineral retention. Don't skip the vermiculite—it's what keeps your blocks from cracking as they dry. Mix everything thoroughly until you can't see any distinct clumps of any single material.
💧 Step 2: Hydrate the Mix to Ideal Moisture Content
Gradually add warm water while mixing until the blend reaches the consistency of a damp sponge. You're aiming for moist but not wet—squeeze a handful and it should hold together without crumbling, but water shouldn't drip from your fingers. Too much water now means soggy blocks that won't hold their shape, and you'll be fighting damping-off from day one.
Here's the trick: Let the mix sit for 10-15 minutes after adding water. Then test again by forming a small handful into a block. If it holds shape but doesn't feel sticky, you're golden. If it feels dry, add a splash more water. If it's sticky, mix in a handful of dry perlite to absorb excess moisture.
☀️ Step 3: Form Blocks with Proper Technique
Use a soil block maker or DIY mold to compress the mix into 2-inch cubes. Press firmly but evenly—you want them to hold together when lifted, but not so hard they become dense. The blocks should feel light yet sturdy, like a well-made brick. I like to tap the mold gently on the work surface to eliminate air pockets before removing each block.
Place completed blocks on a wire rack to dry slightly before seeding. They should feel cool to the touch but not damp. Overly wet blocks will collapse when you try to plant seeds, and you'll lose your entire batch. If they feel too moist, spread them out in a single layer and let them air-dry for 30-60 minutes before proceeding.
🌿 Step 4: Plant Seeds with Precision
Create a small indentation in the top of each block—just enough to cradle your seed. For tiny seeds like lettuce, I use a toothpick to make a shallow well. Larger seeds like beans get a slightly deeper dimple. Place 1-2 seeds per block (depending on seed size) and cover with a sprinkle of the same mix, pressing lightly to ensure contact.
Mist the surface with a spray bottle until evenly moist but not soaked. The blocks should feel damp to the touch but not dripping. This is where the magic happens: the block's natural structure wicks moisture exactly where the seed needs it, preventing both overwatering and drought stress. Keep blocks in a humidity dome or under plastic wrap until germination.
⏰ Step 5: Maintain Consistent Moisture Without Overwatering
Once seeds sprout, remove any cover immediately to prevent fungal growth. Water only when the blocks feel dry to the touch—typically every 2-3 days depending on your climate. I use a spray bottle for gentle application, directing water at the base of the seedlings rather than overhead. This prevents disturbing tender stems and ensures roots get the moisture they need.
Here's the beauty of soil blocks: they self-irrigate. The natural capillary action draws water upward exactly where the roots are growing. You'll know your moisture balance is perfect when the blocks maintain their structure but feel slightly cool to the touch. Too much water? Blocks will feel heavy and mushy. Too little? They'll crack and seedlings will wilt. Find that sweet spot, and your seedlings will thrive.
Tips & tricks for perfect soil block mixes
These game-changing techniques will help you create soil blocks that prevent damping-off and leggy seedlings every time.
Moisture Balance is Everything: The 10-15 minute resting period after adding water is non-negotiable—this lets the coco coir and peat moss properly absorb moisture without becoming waterlogged. I've ruined batches by skipping this step, so trust the process! For extra insurance, use a spray bottle to add water gradually rather than pouring all at once, which helps distribute moisture evenly throughout the mix.
Ingredient Quality Matters: Don't cut corners on your coco coir—cheap brands can contain contaminants that harm seedlings. Look for 100% organic coco coir with no additives. The same goes for perlite: use fresh, sterile perlite to prevent fungal spores from hitching a ride in your blocks. I always rinse my perlite before using it to remove any dust or debris.
Block Formation Technique: When pressing your 2-inch cubes, aim for consistency—each block should have the same density. I use a small rubber mallet to gently tap the mold after filling it, which helps eliminate air pockets and creates a more uniform texture. If your blocks feel too dense, they'll crack when drying; if they feel too loose, they'll fall apart when handling.
Drying Strategy: The 30-60 minute air-drying period before seeding is your safety net against soggy blocks. Place them on a wire rack in a well-ventilated area away from direct sunlight. You'll know they're ready when the surface feels cool to the touch and no longer leaves a damp print when pressed gently. This step prevents the classic "block collapse" disaster that wastes hours of work.
Pro Tips for Seed Starting Mix For Soil Blocks
- These game-changing techniques will help you create soil blocks that prevent damping-off and leggy seedlings every time.
- Moisture Balance is Everything: The 10-15 minute resting period after adding water is non-negotiable—this lets the coco coir and peat moss properly absorb moisture without becoming waterlogged.
- Ingredient Quality Matters: Don't cut corners on your coco coir—cheap brands can contain contaminants that harm seedlings.
Frequently asked questions
Got questions about creating the perfect seed starting mix for soil blocks? You’re not alone! Here are some of the most common concerns—and their easy solutions—to help you master this lightweight, moisture-locking method.
What’s the best ratio of materials for soil blocks?
A balanced mix typically uses 60% coconut coir, 20% perlite or vermiculite, and 20% compost or worm castings. Adjust perlite/vermiculite for drainage (more = lighter blocks). For heavier soils, add 10% sand to prevent compaction.
How long do soil blocks take to dry before planting?
Blocks should dry until they’re lightweight but not brittle—usually 24–48 hours in warm conditions (70°F+). Test by squeezing gently; they should hold shape but feel dry to the touch. Avoid direct sun to prevent cracking.
Can I reuse soil blocks for multiple plantings?
Yes! Sterilize used blocks by baking at 200°F for 30 minutes to kill pathogens. Refresh with a light top-dressing of compost or mycorrhizal fungi. Avoid reusing blocks for the same plant family (e.g., tomatoes) consecutively to prevent disease buildup.
Why are my soil blocks cracking or crumbling?
Cracking often happens from uneven drying or too much perlite. Fix it by:
- Mixing less perlite (try 10–15%) for stickier blocks.
- Using a humidifier or plastic tent during drying.
- Adding 1–2% clay or biochar to improve cohesion.
What’s a quick alternative if I don’t have all the materials?
Start with 50% peat moss or coir + 50% compost for a basic mix. Skip perlite? Use chopped peat or shredded newspaper for bulk, but monitor moisture closely. For extra fluffiness, crush egg cartons into the mix (sterilized first!).
Still stumped? Drop your specific challenge below—we’re happy to troubleshoot!
Wrapping up and next steps
Mastering the art of a seed starting mix for soil blocks unlocks a world of effortless propagation—lightweight, moisture-retentive blocks that give your seedlings the perfect foundation to thrive. Whether you're a seasoned gardener or just starting out, this method simplifies the process while boosting success rates.
Now that you’re equipped with the right mix and tips, it’s time to get your hands dirty!
🌱 Next step: Grab your materials, follow the steps, and watch your seeds transform into sturdy seedlings. Happy growing—your future plants will thank you! 🌿