
Transplanting
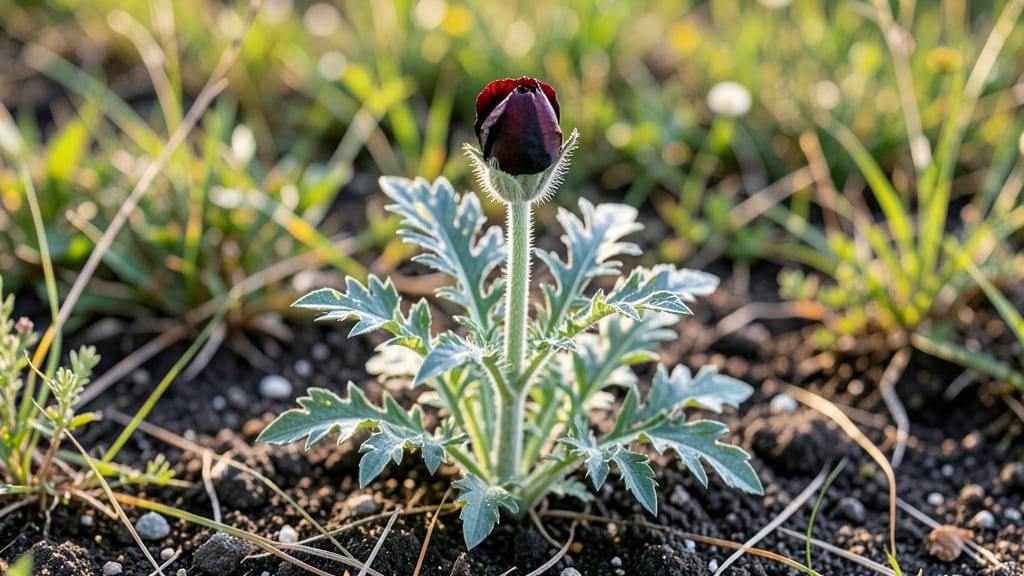
Transplanting breadseed poppy seedlings transforms flimsy little sprouts into sturdy, vibrant plants that thrive in your garden. 🌱 I’ve learned the hard way—poppies hate being moved, but with the right timing and technique, you’ll get a stand of tall, papery blooms that last all summer.
The key? A gentle touch and patience.
Start by hardening off seedlings for 7-10 days before transplanting—just place them outside in shade for a few hours daily. Poppies prefer well-draining soil and full sun, so choose a spot with at least 6 hours of sunlight and avoid heavy clay.
Water lightly before transplanting to reduce stress on delicate roots.
Once in the ground, keep soil moist but not soggy for the first two weeks—poppies despise soggy roots. After that, water only when the soil feels dry an inch down.
You’ll see those first deep green leaves signal they’re settling in, and soon, you’ll have a sea of poppies swaying in the breeze.
Timing matters too: transplant in early spring or late summer to avoid extreme heat. If you rush, seedlings may bolt (flower too early) or struggle. But when done right? You’ll have a garden that feels like a wildflower meadow—effortless and stunning.
📚 In This Guide
- What you need
- Instructions
- Tips and common mistakes
- Wrapping up and next steps
What you need
- ● Breadseed poppy seedlings: 10–20 healthy, sturdy seedlings (depending on desired yield). Look for Papaver somniferum varieties.
- ● Transplanting pots or containers: 3–4 inch pots (1–2 seedlings per pot) or biodegradable peat pots to minimize root disturbance.
- ● Well-draining potting mix: A blend of 60% compost, 30% perlite or vermiculite, and 10% sand (or a high-quality seed-starting mix). Avoid heavy clay soil.
- ● Slow-release fertilizer: A balanced 10-10-10 or 5-10-10 granular fertilizer (1 tbsp per gallon of mix) to support early growth.
- ● Watering can or spray bottle: With a gentle nozzle to avoid damaging delicate seedlings.
- ● Garden twine or plant markers: To label varieties and track progress.
- ● Hand trowel: For careful digging around roots.
- ● Pruning shears: To trim leggy seedlings if needed.
- ● Grow lights or sunny windowsill: If seedlings aren’t hardened off yet (12+ hours of light daily).
- ○ Aspirin or hydrogen peroxide (1:10 dilution): Optional root dip to boost transplant shock recovery.
- ● Mulch (straw or shredded leaves): To retain moisture and protect young plants post-transplant.
Step-by-Step instructions for transplanting breadseed poppy seedlings
Here's how I ensure these delicate seedlings thrive after transplanting—no more leggy, floppy stems.
🌱 Step 1: Harden Off Seedlings Gradually
Start hardening off your breadseed poppy seedlings 7-10 days before transplanting. Move them to a sheltered outdoor spot for 1-2 hours on the first day, then gradually increase exposure by 1 hour daily. These poppies are tough once established, but sudden wind or sun will shock them.
Watch for first true leaves turning slightly paler—this means they're adjusting. If you see wilting or curling, they're getting too much sun too soon. Bring them back inside and extend the process by a day or two. I like to place them under a dappled shade cloth during the final 2-3 days to mimic their future growing conditions.
🪴 Step 2: Choose the Right Transplant Location
Breadseed poppies thrive in full sun to partial shade, but they’ll bolt faster in intense heat. Pick a spot with at least 6 hours of sunlight but some afternoon shade if your climate runs hot. The soil should be well-draining—poppies hate soggy roots, which lead to rot.
Loosen the soil to a depth of 12 inches before transplanting. Poppies have delicate taproots, so avoid compacted ground. If your soil is heavy clay, mix in 2-3 inches of compost to improve drainage. I always test moisture by squeezing a handful—it should crumble easily, not stick together.
☀️ Step 3: Transplant at the Correct Depth and Spacing
Poppy seedlings should go into the ground at the same depth they were in their containers. Dig holes 1-2 inches deep, just enough to cover the root ball without burying the stem. Space seedlings 12-18 inches apart—closer spacing leads to weak stems and fewer seed pods.
Gently remove each seedling from its container, keeping the root ball intact. Poppies resent root disturbance, so I use a small trowel to loosen the edges if the roots are circling. Water the hole before placing the seedling in to eliminate air pockets. Press soil lightly around the base, but don’t pack it down—this can suffocate the roots.
💧 Step 4: Water and Mulch for Stability
Water deeply immediately after transplanting to settle the soil and encourage root contact. Use a slow watering can or hose with a gentle spray to avoid dislodging seedlings. Aim for 1 inch of water per week, but check the soil—poppies prefer dryer conditions once established.
Apply a 1-inch layer of mulch (like straw or shredded leaves) around each plant, keeping it 2 inches away from the stem to prevent rot. This retains moisture, regulates soil temperature, and suppresses weeds. I avoid synthetic mulches—they can smother poppies, which need air around their stems.
✂️ Step 5: Monitor and Support Growth
Watch for new growth in 7-10 days—this signals successful transplanting. If stems look weak, insert small stakes (like bamboo skewers) at planting to support them as they grow. Poppies are self-sufficient once mature, but early support prevents them from flopping over in wind or rain.
Fertilize lightly 4-6 weeks after transplanting with a balanced, low-nitrogen fertilizer (like 5-5-5). Too much nitrogen encourages leafy growth at the expense of seed pods. I skip fertilizing entirely in the first year if the soil was amended well at planting—poppies are low-maintenance once settled.
Tips & tricks for transplanting breadseed poppy seedlings
These practical insights will help you avoid common pitfalls and give your poppies the best start in their new home.
Gradual Exposure is Key: During the 7-10 day hardening off period in Step 1, pay close attention to the seedlings' response to increasing sunlight. I've found that placing them under a dappled shade cloth during the final 2-3 days mimics their future growing conditions perfectly. This gradual transition helps prevent the shock that causes wilting or curling—signs they're getting too much sun too soon.
Soil Preparation Matters: When preparing your transplant location in Step 2, focus on creating an ideal environment for those delicate taproots. The 12-inch soil depth should be loose and well-draining—poppies absolutely hate soggy conditions. For heavy clay soil, mix in 2-3 inches of compost to improve drainage. My trick is to squeeze a handful of soil: if it crumbles easily, it's ready for planting.
Transplanting Technique: In Step 3, when removing seedlings from their containers, be gentle to avoid damaging the root ball. I use a small trowel to carefully loosen any circling roots—this prevents the plant from growing in a spiral pattern underground. Watering the hole before placing the seedling in eliminates air pockets that could prevent proper root contact with the soil.
Post-Transplant Care: After transplanting, the 1-inch layer of mulch in Step 4 is crucial for moisture retention and temperature regulation. Keep it 2 inches away from the stem to prevent rot—this is especially important in hot climates where poppies might bolt faster. I've noticed that using straw or shredded leaves allows air to circulate around the stems while still suppressing weeds effectively.
Pro Tips for Breadseed Poppy Seedlings
- These practical insights will help you avoid common pitfalls and give your poppies the best start in their new home.
- Gradual Exposure is Key: During the 7-10 day hardening off period in Step 1, pay close attention to the seedlings' response to increasing sunlight.
- Soil Preparation Matters: When preparing your transplant location in Step 2, focus on creating an ideal environment for those delicate taproots.
Frequently asked questions
Got questions about nurturing your breadseed poppy seedlings? You’re in the right place! Whether you’re a first-time gardener or a seasoned green thumb, these answers will help you avoid common pitfalls and ensure your poppies thrive. Let’s dive in:
When is the best time to transplant breadseed poppy seedlings outdoors?
Transplant your seedlings after the last frost date in your region, when soil temperatures reach at least 50°F (10°C). Breadseed poppies are cold-hardy but prefer warm soil to establish roots quickly. Aim for early spring or late summer—just avoid extreme heat, which can stress young plants. Pro tip: Harden off seedlings for 7–10 days before transplanting to reduce shock!
How deep should I plant breadseed poppy seedlings?
Poppy seedlings have delicate stems, so plant them just below the soil line—no deeper than their original container level. Press the soil gently around the base to secure them, leaving the leaves exposed to sunlight. Over-deepening can cause rot, while planting too shallowly may expose roots to drying winds. Remember: Poppies hate disturbance, so handle them like fragile glass!
Why are my breadseed poppy seedlings wilting after transplanting?
Wilting is often due to transplant shock or underwatering. Ensure the soil stays consistently moist (not soggy) for the first 2 weeks post-transplant. If wilting persists, check for root damage or pests like aphids. A light mulch can retain moisture and protect tender stems. Quick fix: Give them a gentle drink of water in the early morning to revive them!
Can I grow breadseed poppies from seed instead of seedlings?
Breadseed poppies are self-seeding and thrive when sown directly in the garden. Scatter seeds on well-drained soil in early spring or fall, press lightly, and water gently. They germinate quickly (7–14 days) and don’t need thinning if you’re okay with a natural, wildflower look. Bonus: Direct sowing saves time and reduces transplant stress!
What’s the best way to protect seedlings from pests like slugs or rabbits?
Poppy seedlings are tender targets for slugs and rabbits. Use organic barriers like copper tape (for slugs) or chicken wire (for rabbits). Diatomaceous earth is another slug deterrent. For rabbits, plant seedlings in well-lit, open areas where they’re less likely to browse. Pro move: Interplant with garlic or onions—their scent repels pests naturally!
Still stumped? Drop your question in the comments—we’re happy to help your poppies grow into stunning, hardy plants!
Wrapping up and next steps
Growing breadseed poppy seedlings into hardy, thriving plants is a rewarding journey—one that starts with the right transplanting techniques! 🌱 By now, you’ve got the tools, timing, and tips to ensure your seedlings take root confidently.
Remember, patience and gentle care are key, whether you’re hardening them off or choosing the perfect spot in your garden.
Ready to watch your poppies bloom? Start by monitoring their progress and giving them the love they deserve. Next up: watch for those vibrant buds and prepare to enjoy a garden bursting with color and natural beauty! 🌸