
Propagation
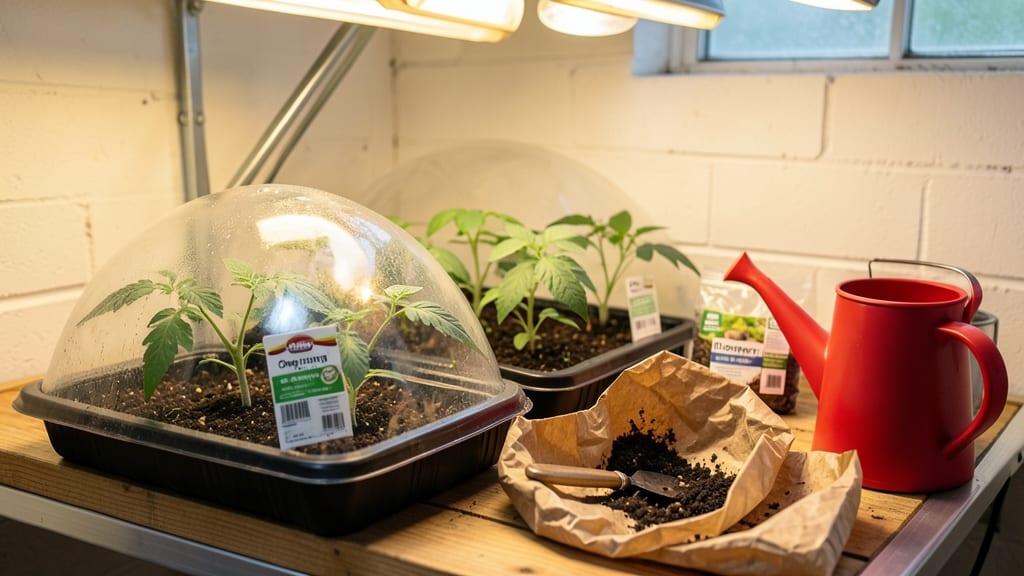
Starting seeds in a greenhouse turns my winter into a growing season. 🌱 The warm, controlled environment means seedlings pop up faster, stronger, and with fewer diseases than my old windowsill attempts. No more leggy, weak plants—just thick stems and vibrant leaves ready for transplanting.
The magic happens with the right setup: consistent 70-75°F soil temperatures, bright 12-16 hours of light daily, and humidity that keeps seeds cozy without drowning them. I use a simple heat mat, LED grow lights, and a clear plastic lid to trap moisture—no fancy equipment needed.
By week three, you’ll see tiny sprouts reaching for the light, and by week six, they’ll be ready to harden off. The greenhouse keeps pests at bay while giving you a head start on spring planting or even winter harvests for cold-hardy crops.
Perfect for beginners who’ve struggled with slow germination or intermediate gardeners wanting to extend their season. Here’s how to make it work without the guesswork.
📚 In This Guide
- What you need
- Instructions
- Tips and common mistakes
- Wrapping up and next steps
What you need
- ● Seeds: Choose high-quality, non-hybrid (heirloom) seeds for best results. Start with easy-to-grow varieties like lettuce, tomatoes, or basil (50–100 seeds per tray, depending on size).
- ● Seed Starting Trays: 1–2 trays (1020-cell or 72-cell) with drainage holes (biodegradable options are eco-friendly!).
- ● Seed Starting Mix: 1–2 bags of sterile, lightweight potting mix (avoid garden soil—it’s too dense!).
- ● Greenhouse: A 4’x8’ or larger greenhouse with clear polycarbonate or glass panels for optimal light. Ensure it has: Ventilation (roof vents or side panels)
- ● Shelving or benches (adjustable height preferred)
- ● Thermometer/hygrometer (to monitor 60–75°F day / 50–60°F night temps)
- ○ Grow Lights (Optional but Helpful): 1–2 full-spectrum LED grow lights (12–16 hours/day) if natural light is limited.
- ● Misting Bottle or Sprayer: For gentle watering without disturbing seeds.
- ○ Heat Mat (Optional): A seedling heat mat (70–75°F) to speed up germination for cool-season crops.
- ● Humidity Dome or Plastic Wrap: To retain moisture while seeds germinate.
- ● Fertilizer: A balanced, water-soluble fertilizer (5-10-5 or 10-10-10) for seedlings (dilute to half-strength!).
- ● Labels & Markers: To track seed varieties and planting dates.
- ● pH Meter: To test soil pH (ideal range: 5.8–6.5 for most plants).
- ● Fan: A small oscillating fan (on low) to strengthen seedlings.
- ● Automatic Watering System: Drip irrigation or self-watering trays for hands-off care.
- ● Reflective Mulch: Aluminum foil or reflective bubble wrap to boost light for seedlings.
- ● Insect Nets: To protect seedlings from pests like fungus gnats or aphids.
Step-by-Step instructions for maximizing seed germination in a greenhouse
Here's the greenhouse method I've refined over years to turn fragile seeds into robust, disease-resistant plants.
🌱 Step 1: Prepare Seed Trays and Sowing Medium
Start with clean, 4-inch deep seed trays filled with sterile seed-starting mix—never garden soil, which carries pathogens. I like to blend my own using 50% peat moss, 30% perlite, and 20% vermiculite for perfect drainage and aeration. Moisten the mix until it reaches the consistency of a damp sponge, then let it settle for 24 hours to eliminate air pockets.
Use a sterilized flat-bottom tray to press the mix firmly but evenly into the cells. The surface should be level—any dips will trap water and cause rot. I run a wooden dowel across the tray to create uniform ridges for seeds, which helps prevent overcrowding. This is where precision matters most: uneven soil leads to weak seedlings.
🌱 Step 2: Sow Seeds at Optimal Depth and Spacing
Follow each seed packet's depth guidelines—typically twice the seed diameter—but never exceed ½ inch. Deep planting forces seedlings to struggle upward, exhausting their energy reserves. I use a fine-mist spray bottle to dampen the soil surface before sowing, which helps seeds adhere and prevents them from washing away.
Space seeds ¼ inch apart within cells, tapping the tray gently to ensure good soil contact. For larger seeds like beans, I plant one per cell to avoid thinning later. Label each tray immediately with the variety and sow date—greenhouse seedlings grow fast, and you'll forget which is which after a week.
💧 Step 3: Maintain Ideal Moisture and Temperature
Cover the trays with a clear plastic dome or greenhouse propagation mat to retain 90% humidity—critical for germination. Place them on a seedling heat mat set to 75-85°F, which speeds up germination by 30-50%. Most seeds sprout within 5-14 days, but watch for mold—if it appears, remove the cover immediately and increase airflow.
Water only from the bottom by placing trays in a shallow tray of lukewarm water for 10-15 minutes. This prevents soil disturbance and ensures even moisture. Check daily: the surface should feel damp but not soggy. Overwatering here is the #1 killer of young seedlings.
☀️ Step 4: Transition to Light and Ventilation
Once 50% of seeds germinate, remove the dome and introduce 12 hours of bright, indirect light immediately. A T5 grow light on a 14-hour timer works best—position it 3-4 inches above the seedlings. Without enough light, they'll grow leggy and weak, with stems stretching toward any available source.
Start ventilating for 10 minutes daily after germination, increasing to 2 hours by week 3. This hardens off seedlings and prevents powdery mildew, a common greenhouse nemesis. You'll see strong, stocky plants with deep green leaves—the sign of healthy growth.
✂️ Step 5: Thin and Transplant for Maximum Growth
When seedlings reach 2 inches tall, thin to the strongest plant per cell using clean scissors to avoid disturbing roots. Snip at soil level, leaving no stubs—this prevents disease. For 4-inch trays, I transplant into 6-inch pots when seedlings have 3-4 true leaves, using the same sterile mix for consistency.
Hardening off begins 2 weeks before outdoor transplanting: move trays to a shaded, breezy greenhouse corner for 1 hour daily, increasing exposure gradually. Watch for wilting—a sign they're not ready. Once they tolerate full greenhouse conditions, they're ready for the garden or larger containers.
Tips & tricks for perfect greenhouse seed germination
The secret to turning fragile seeds into thriving plants lies in these precision techniques that prevent common pitfalls.
Sterilization is Non-Negotiable: After the 24-hour settling period in Step 1, I recommend sterilizing your seed trays and tools with a 10% bleach solution (1 part bleach to 9 parts water) to eliminate any lingering pathogens. Rinse thoroughly before use—this prevents damping-off disease that can wipe out entire trays. I also sterilize my wooden dowel by boiling it for 10 minutes between batches, which keeps it ready for creating those crucial uniform ridges.
Seed Depth Matters More Than You Think: In Step 2, when planting seeds no deeper than ½ inch, I use a toothpick to create precise planting holes—this prevents overcrowding while maintaining the exact depth. For tiny seeds like lettuce, I press them gently into the surface rather than covering them at all. The key is to mimic their natural environment: most seeds need light to germinate, so burying them too deep starves them of what they need to sprout.
Humidity and Temperature Balance: The 75-85°F range on your seedling heat mat in Step 3 is your sweet spot—any cooler and germination slows dramatically, any hotter and you risk seed damage. I monitor humidity by placing a small hygrometer near the trays. If condensation forms on the dome within 10-15 minutes of watering, you're at perfect 90% humidity. Too much condensation means you need to ventilate immediately to prevent mold.
Light Transition Strategy: When you remove the dome after 50% germination in Step 4, I recommend doing it gradually over 2-3 days rather than all at once. Start with just 2 hours of dome removal daily, then increase to full exposure. This prevents the shock of sudden light exposure that causes seedlings to bolt or become leggy. The 12 hours of bright light should come from all directions—rotate your trays daily so seedlings grow straight rather than leaning toward one light source.
Pro Tips for Growing From Seed In A Greenhouse
- The secret to turning fragile seeds into thriving plants lies in these precision techniques that prevent common pitfalls.
- Rinse thoroughly before use—this prevents damping-off disease that can wipe out entire trays.
- Seed Depth Matters More Than You Think: In Step 2, when planting seeds no deeper than ½ inch, I use a toothpick to create precise planting holes—this prevents overcrowding while maintaining the exact depth.
Frequently asked questions
Got questions about growing from seed in a greenhouse?
You’re not alone! Here are some of the most common queries—and their straightforward answers—to help you get started with confidence.
What’s the best time of year to start seeds in a greenhouse?
Greenhouses extend your growing season, but timing still matters! For most vegetables and flowers, start seeds 6–8 weeks before your last frost date. Leafy greens and herbs can go in earlier (even in winter), while heat-lovers like peppers and tomatoes need warmer soil—aim for late winter or early spring.
Do I need special lighting for seed germination in a greenhouse?
Natural light works for many seeds, but supplemental grow lights (LED or fluorescent) are a game-changer for slow starters or winter growing. Place lights 2–4 inches above seedlings for 12–16 hours daily. Skip lights if your greenhouse gets plenty of sun—just monitor seedling health!
How often should I water seeds in a greenhouse?
Keep soil consistently moist but not soggy—overwatering drowns seeds! Mist lightly daily (or use a spray bottle) until sprouts appear, then water gently at the base. Greenhouses trap humidity, so check soil moisture with your finger before watering. A humidity dome or tray helps retain moisture early on.
What’s the fastest way to fix damping-off or moldy seedlings?
Damping-off (a fungal disease) is a greenhouse nemesis, but you can prevent and treat it! Improve airflow with fans, avoid overcrowding, and use sterile potting mix. If mold appears, remove affected seedlings, water less frequently, and apply a hydrogen peroxide spray (1 tsp per cup of water) or copper fungicide.
Can I reuse greenhouse soil for starting new seeds?
Reusing soil isn’t recommended unless it’s sterilized (bake at 180°F for 30+ minutes or solarize it). Old soil harbors pathogens and depleted nutrients. Mix in compost or fresh potting mix instead. For seed-starting, sterile, seed-specific mix is your best bet!
Still stumped? Drop your question in the comments—we’re happy to help!
Wrapping up and next steps
Growing from seed in a greenhouse is a rewarding journey that unlocks year-round gardening magic—whether you're nurturing delicate herbs, hardy vegetables, or vibrant flowers.
With the right setup, patience, and a dash of care, you’ll transform tiny seeds into thriving plants that outshine store-bought seedlings. Now’s the perfect time to start!
Ready to dive deeper? Pick your next seed packet, sketch a planting schedule, and let your greenhouse become the heart of your garden’s success. 🌱✨