
Propagation
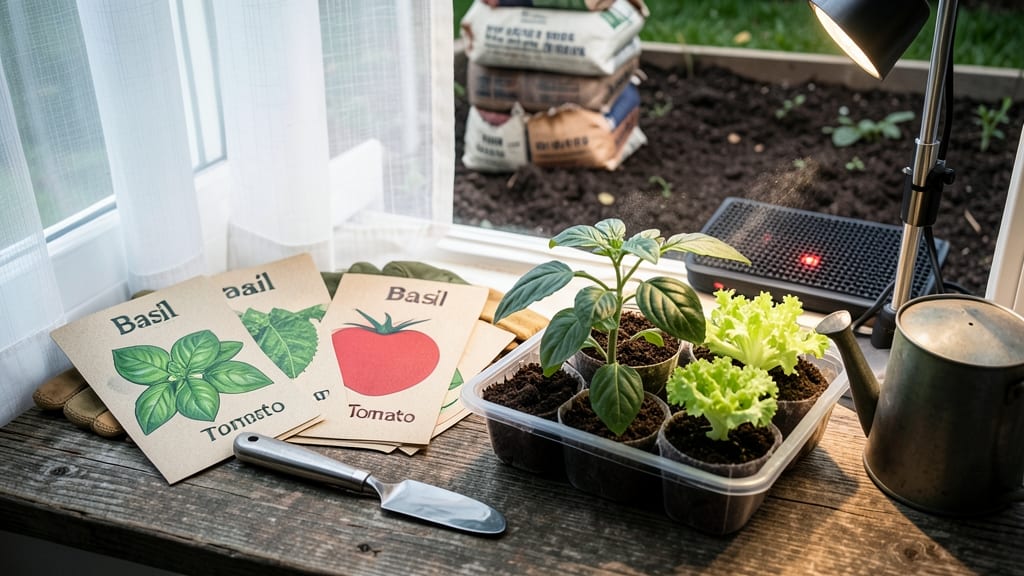
My first batch of seeds sat in damp soil for weeks—nothing happened. 🌱 Then I discovered these growing from seed tips that transformed my germination rates from 50% to over 90% without fancy equipment. The secret isn't complicated: it's about matching the right conditions to what each seed actually needs.
You'll need just four essentials—light, warmth, moisture, and patience—and I'll show you exactly how to dial each one in. Most beginners overwater or bury seeds too deep, but these small adjustments make all the difference.
Even finicky seeds like tomatoes and peppers will sprout reliably when you follow the right timing. By the end, you'll have strong, healthy seedlings ready for transplanting—no more weak, leggy sprouts. The best part?
These tricks work for herbs, vegetables, and flowers, whether you're starting indoors or direct-sowing in the garden. Here's where it gets interesting: some seeds need light to germinate, while others rot if exposed.
I'll walk you through the exact conditions for common beginner plants so you can skip the guesswork.
📚 In This Guide
- What you need
- Instructions
- Tips and common mistakes
- Wrapping up and next steps
What you need
- ● Seeds: High-quality, fresh seeds (check the packet for germination rates and planting depth). Pro tip: Store-bought or heirloom varieties work—just avoid seeds older than 1 year unless specified otherwise!
- ● Seed-starting mix: Lightweight, sterile potting soil (avoid garden soil—it’s too dense!). Quantity: Enough to fill your containers to ~1 inch below the rim.
- ● Containers: Seed trays or pots: 2–4 inches deep with drainage holes. Quantity: 1–2 per seed type (or a shared tray with dividers).
- ○ Optional: Biodegradable pots or peat pellets for easy transplanting.
- ● Watering can or spray bottle: Fine mist setting to avoid disturbing seeds.
- ● Clear plastic dome or plastic wrap: To create a humidity tent (if using a seed tray).
- ● Gloves: Protect your hands from dirt and prickly seeds.
- ● Small hand trowel or spoon: For gently pressing seeds into soil.
- ● Labels & marker: Write seed names/dates to avoid mix-ups!
- ● Grow lights or sunny windowsill: 12–16 hours of light daily (south-facing windows or LED grow lights work best).
- ○ Heat mat (optional): For seeds needing warmth (e.g., peppers, tomatoes). Specs: 70–85°F range.
- ● Fertilizer: Balanced, water-soluble fertilizer (5-5-5 or 10-10-10). Use: Only after sprouts appear!
- ● Know your last frost date: Check local averages to time planting (or use a frost calculator 🌍).
- ● Seed packet instructions: Always double-check depth, spacing, and light needs—every plant is unique!
- ● Patience & consistency: Seeds need warmth, moisture, and time (most sprout in 7–14 days).
Step-by-step instructions for maximizing seed germination success
Here’s the method I swear by to turn flimsy seeds into thriving seedlings—no more wilting disappointment.
🌱 Step 1: Pre-Treat Seeds for Faster, Stronger Starts
Seeds need a head start, and the right prep makes all the difference. For hard-coated seeds like beans or peas, soak them in warm water for 12-24 hours—this softens the shell so roots can break through faster. I use a shallow dish and let them sit until they plump up noticeably. For delicate seeds like lettuce, skip soaking entirely; they germinate best when dry.
After soaking, pat the seeds dry with a paper towel to remove excess moisture. This prevents mold and ensures they don’t stick to your fingers when planting. If you’re dealing with tiny seeds like basil, mix them with a little sand first—it makes spacing them evenly in the soil much easier. Here’s the thing: don’t rush this step. A well-prepped seed is half the battle won.
💧 Step 2: Create the Ideal Germination Environment
Temperature and moisture are the dynamic duo of germination. Most seeds thrive at 70-75°F, but check your seed packet—some, like snapdragons, need 60°F to avoid rot. Use a seedling heat mat if your home runs cooler, and place a humidity dome or plastic wrap over the tray to trap warmth. You’ll see condensation on the inside—that’s perfect.
Keep the soil consistently moist but never soggy. Stick your finger ½ inch deep into the mix; it should feel damp like a wrung-out sponge. Overwatering here is the fastest way to invite damping-off, a fungal disease that collapses seedlings overnight. I water from the bottom by placing trays in a shallow dish of water for 10 minutes, then drain excess. This method keeps roots happy without disturbing the seeds.
☀️ Step 3: Monitor and Adjust Light Immediately After Sprouting
The moment you see first true leaves (not the initial seed leaves), move seedlings to bright, indirect light. A south-facing window works, but most homes don’t provide enough intensity. I use a grow light on a 14-hour timer—no need for fancy equipment, just a basic LED bulb. Position it 2-3 inches above the tallest seedling and raise it as they grow to prevent leggy stems.
Watch for etiolation—those stretched, pale stems reaching desperately for light. If you see this, your light is too far away or too weak. Strong seedlings have bold green leaves and sturdy stems that don’t flop over. Rotate trays quarter-turn daily so plants grow straight, not lopsided. This is where most beginners go wrong: light is non-negotiable after germination.
✂️ Step 4: Thin and Harden Off for Transplant-Ready Seedlings
Once seedlings have 2-3 sets of true leaves, thin them to the strongest one per cell. Use scissors to snip at soil level—pulling risks disturbing roots of neighbors. I save the thinned seedlings for microgreens if they’re leafy enough. Space remaining plants 1-2 inches apart in their final containers if you’re not transplanting yet. This prevents overcrowding and gives roots room to expand.
Two weeks before your last frost, start hardening off. Begin with 1-2 hours of shade outside, then gradually increase time and sun exposure over 7-10 days. You’ll know they’re ready when they bounce back from a full day outdoors without wilting. Real talk: skipping this step is a recipe for transplant shock. Seedlings that go straight from cozy trays to harsh sun often bolt or wilt permanently.
🌿 Step 5: Troubleshoot Like a Pro (Before It’s Too Late)
Yellowing leaves? Overwatering or nutrient burn—check your soil moisture and fertilizer strength. Mold on the soil surface? Poor air circulation—remove the humidity dome immediately and space trays apart. Leggy seedlings? Light deficiency—move them closer to your grow light or supplement with a reflector. I keep a small notebook by my setup to track issues: date, symptom, fix. It’s the only way to spot patterns before they ruin a batch.
If you’re still struggling, try direct sowing for stubborn seeds like carrots—they hate transplanting. Or switch to peat pellets for better drainage and root protection. The key is adjusting, not giving up. Every failed batch teaches you what to tweak next time. And trust me, that 90% germination rate is totally within reach—it just takes patience and these small, intentional steps.
Tips & tricks for perfect seed germination
Common mistakes can turn your seed-starting dreams into a soggy mess—but these tricks will help you hit that 90% germination rate every time.
Soaking Strategy: For hard-coated seeds like beans or peas, the 12-24 hour soak in warm water is non-negotiable. Use a shallow dish and change the water halfway through to prevent bacterial buildup. I've ruined batches by leaving seeds in stagnant water—don't make my mistake! After soaking, pat them dry thoroughly with paper towels. This step prevents mold and ensures seeds don't stick to your fingers when planting. For tiny seeds like basil, mix them with a little sand first—it creates perfect spacing without the guesswork.
Temperature Precision: Most seeds thrive at 70-75°F, but snapdragons need 60°F to avoid rot. I use a seedling heat mat under my trays during cooler months, and it's a game-changer. Watch for condensation on the humidity dome—this is your visual cue that the environment is perfectly moist. If your kitchen runs hot, reduce the dome time slightly to prevent over-saturation. The key is consistency: sudden temperature swings can shock seeds into dormancy.
Light Transition: The moment you see first true leaves (not those initial seed leaves), move seedlings to bright, indirect light. I position my grow light 2-3 inches above the tallest seedling and raise it gradually as they grow. Watch for etiolation—those stretched, pale stems reaching desperately for light. This is your body telling you to bring the light closer or increase intensity. Rotate trays quarter-turn daily so plants grow straight, not lopsided. I've learned this the hard way after watching seedlings grow toward the light source and become permanently misshapen.
Hardening Off Hack: Two weeks before your last frost, start hardening off with just 1-2 hours of shade outside. Gradually increase time and sun exposure over 7-10 days. I keep a small notebook by my setup to track each plant's progress. The goal is to let them adjust to wind, temperature fluctuations, and direct sunlight. Seedlings that skip this step often wilt permanently when transplanted—it's worth the extra week of patience for long-term success.
Pro Tips for Growing From Seed Tips
- Common mistakes can turn your seed-starting dreams into a soggy mess—but these tricks will help you hit that 90% germination rate every time.
- Soaking Strategy: For hard-coated seeds like beans or peas, the 12-24 hour soak in warm water is non-negotiable.
- Temperature Precision: Most seeds thrive at 70-75°F, but snapdragons need 60°F to avoid rot.
Frequently asked questions
about growing from seed—because even pros need a little help sometimes! Here are answers to the most common queries to keep your germination journey smooth.How long does it take for seeds to germinate?
Germination time varies by plant type—fast growers like radishes sprout in 3–5 days, while slowpokes (e.g., tomatoes) may take 7–14 days. Check seed packets for specifics, and keep soil consistently moist (not soggy) to speed things up. Patience is key!
Why aren’t my seeds sprouting? Troubleshooting tips
No sprouts? First, verify your seeds aren’t expired (test-float a few in water—sinkers are viable). Next, check:
- Temperature: Too cold? Use a heat mat (65–75°F ideal for most seeds).
- Moisture: Dry soil = dormant seeds. Mist lightly daily or use a humidity dome.
- Light: Some seeds (like lettuce) need light to germinate; others (e.g., peppers) prefer darkness.
- Depth: Plant too deep? Tiny seeds (e.g., petunias) should barely be covered.
Can I speed up germination with any tricks?
Yes! Try these proven shortcuts:
- Soak seeds overnight in warm water (great for beans or lentils—rinse before planting).
- Use a paper towel: Sandwich seeds between damp towels in a sealed bag; check daily for sprouts.
- Bottom heat: Place trays on a seedling mat or near a sunny window (avoid direct heat sources).
What’s the best soil mix for starting seeds?
Skip garden soil—it’s too dense! Use a sterile, lightweight mix like:
- 50% peat moss or coco coir (for moisture retention).
- 30% perlite or vermiculite (for aeration).
- 20% compost or worm castings (for nutrients).
Are there affordable alternatives to fancy seed-starting kits?
No budget for trays or domes? Get creative:
- Egg cartons: Poke drainage holes, fill with soil, and pop seedlings out later.
- Toilet paper rolls: Cut into 3-inch sections, fill with soil, and remove the tube as plants grow.
- Plastic containers: Yogurt cups, takeout boxes, or even clean milk jugs (with holes!) work great.
- Plastic wrap: Cover trays with it to trap humidity—no dome needed!
Wrapping up and next steps
Growing from seed is a rewarding journey that combines patience, care, and a little know-how—and you’ve got the proven tricks to make it thrive! 🌱 From selecting the right seeds to mastering light, moisture, and warmth, these tips will help you achieve those impressive 90% germination rates you’ve been dreaming of.
Every tiny sprout is a victory, so don’t hesitate to experiment and refine your process.
Ready to turn your green thumb into a legendary one? Start small—pick one seed type and practice the techniques you’ve learned. Before you know it, you’ll be sharing your lush, homegrown bounty with pride (or trading cuttings with fellow plant enthusiasts!). Happy growing! 🌟