
Propagation
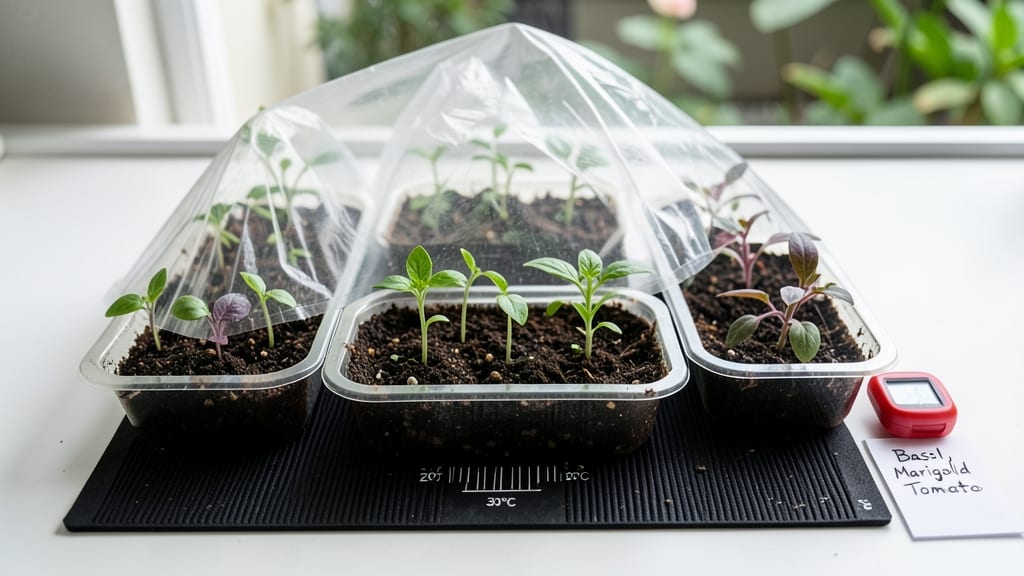
A heat mat for seed germination cuts your waiting time in half. 🌱 I’ve used them for slow-starting seeds like peppers and tomatoes, and the difference is night and day—sprouts appear in days instead of weeks.
The secret lies in mimicking the warm soil conditions these tropical plants crave, but without the guesswork of DIY setups.
You’ll need a heat mat (100–150 watts for most setups), a seed tray with a clear lid, and your chosen seeds. Place the mat under the tray, plug it in, and set your thermostat to 75–85°F—the sweet spot for most heat-loving seeds.
A simple digital thermometer ensures you’re not overdoing it, which can fry delicate roots.
Within 3–7 days, you’ll see those first green hooks breaking through the soil—faster than any store-bought seedling. The payoff? Stronger, more uniform seedlings that transplant like champs. Just avoid overcrowding and keep humidity steady with a humidity dome or plastic wrap.
Works for peppers, eggplants, tomatoes, and even some herbs. For cool-season crops like lettuce, skip the mat—they’ll germinate just fine at room temperature. Safety tip: Always unplug when not in use to prevent overheating.
📚 In This Guide
- What you need
- Instructions
- Tips and common mistakes
- Wrapping up and next steps
What you need
- ● Heat Mat: A seedling heat mat (10" x 20" or larger, depending on tray size). Look for one with a thermostat (70–90°F range) and even heat distribution.
- ● Seed Trays or Containers: Plastic or biodegradable trays with drainage holes (e.g., 10" x 20" shallow trays). Quantity: 1–2 trays, depending on seed volume.
- ● Growing Medium: Seed Starting Mix: Lightweight, sterile mix (e.g., Pro-Mix or Fox Farm Seedling Mix). Quantity: ~1–2 cubic feet.
- ○ Optional: Perlite or vermiculite (for aeration, 10–20% mix-in).
- ● Seeds: Fresh, high-quality seeds (check germination rates on packets!). Quantity: Adjust based on spacing needs (e.g., 1/4" apart for small seeds).
- ● Humidity Dome or Plastic Wrap: To retain moisture (clear plastic lid or wrap).
- ● Spray Bottle: For gentle watering (avoid over-saturating!).
- ○ Thermometer (Optional but Helpful): A small soil thermometer to monitor heat mat temperature.
- ● Power Source: Ensure your heat mat plugs into a dedicated outlet (avoid power strips). Use a surge protector for safety.
- ● Space: Place the mat on a level, stable surface (e.g., shelf, table). Keep away from direct sunlight or drafts.
- ● Safety First: Never leave the heat mat unattended for long periods.
- ● Check cords for wear before use.
- ● 🌡️ Most seeds thrive at 75–85°F—adjust your heat mat’s thermostat accordingly.
- ● ✨ For tropical seeds (e.g., peppers, tomatoes), lean toward the warmer end (85°F).
- ● 🔄 Rotate trays daily for even heat exposure if using one mat for multiple trays.
How to use a heat mat for faster, more reliable germination
Here’s my go-to method for using heat mats to accelerate germination—no guesswork, just consistent warmth for stronger starts.
🌱 Step 1: Select the Right Heat Mat and Position It Properly
A quality heat mat maintains a steady 75-85°F soil temperature, which is critical for fast germination. Place the mat on a flat, stable surface—uneven placement can create hot spots that damage seeds. I like to position it under seed trays or individual pots with ¼-inch drainage holes so excess moisture can escape.
Never place the mat directly on soil without a barrier. Use a thin layer of aluminum foil or a seed tray bottom to prevent moisture from seeping into the mat, which can cause electrical hazards. Test the mat’s heat distribution by placing your hand above it—it should feel warm but not scorching.
💧 Step 2: Moisten Seed Trays and Place Them on the Mat
Before adding seeds, moisten the seed-starting mix until it’s damp but not soggy. A spray bottle works best to avoid displacing seeds. Press the soil down lightly so it’s firm enough to hold seeds in place but still loose enough for roots to penetrate.
Place the trays directly on the heat mat, ensuring full coverage. If using individual pots, arrange them evenly so no area of the mat is left uncovered—uneven heat slows germination. I like to label trays with the seed variety and date to track progress, especially when testing multiple types.
☀️ Step 3: Cover Trays to Retain Humidity and Warmth
Cover the trays with a clear plastic dome or plastic wrap to create a greenhouse effect. This traps warmth from the mat while keeping humidity high—ideal conditions for germination. Check daily for condensation on the cover; if it’s foggy, you’ve got the right moisture level.
Keep the setup in a warm, dark place (like a cabinet or under a blanket) until seeds sprout. Light triggers germination in some seeds, but most need darkness initially. You’ll see the first sprouts in 3-10 days, depending on the seed type—watch for tiny green shoots breaking through the soil.
⏰ Step 4: Monitor and Adjust for Optimal Conditions
Once sprouts appear, remove the cover immediately to prevent damping-off disease, which thrives in high humidity. Place the trays under grow lights (12-16 hours daily) to prevent leggy growth. If seedlings look pale or stretched, the light is too far away—adjust to 2-4 inches above the plants.
Keep the soil consistently moist but never waterlogged. Stick your finger ½ inch deep—if it feels dry, water gently from below to avoid disturbing seedlings. If the mat overheats (soil feels too warm to touch), reduce the runtime or add a thin layer of insulation between the mat and trays.
✂️ Step 5: Transition to Normal Growing Conditions
After 7-14 days, when seedlings have 2-4 true leaves, gradually reduce heat mat use. Most seeds germinate best with warmth but thrive at room temperature (65-75°F) once established. Harden off seedlings by moving them to cooler conditions for 1-2 hours daily before full transplant.
Here’s the thing—don’t rush this step. Overheating now can stunt root growth, and sudden temperature drops shock delicate seedlings. I like to leave the mat on for short periods (4-6 hours) during the hardening process to ease the transition.
Tips & tricks for precision seed germination with heat mats
These game-changing insights will help you maximize your heat mat's potential while avoiding common pitfalls that slow down or ruin germination.
Temperature Consistency is Key: The 75-85°F range in Step 1 is non-negotiable for most seeds, but some varieties like peppers and tomatoes actually prefer the upper end (closer to 85°F) for faster results. I always double-check my mat's temperature with an infrared thermometer—some cheaper models run hotter than advertised. For delicate seeds like lettuce, aim for the lower end (around 75°F) to prevent overheating damage.
Layering for Even Heat Distribution: In Step 1, I recommend adding a second layer of protection between your heat mat and trays—try a thin piece of foam insulation board (½-inch thick) under the aluminum foil. This creates a more stable temperature zone while preventing hot spots that can scorch seeds. For large setups, I use multiple mats side by side with a small gap between them to ensure even coverage across all trays.
Germination Timing Secrets: The 3-10 day window in Step 3 is actually quite variable—fast germinators like radishes can sprout in 3 days, while slow ones like parsley may take 14. I keep a germination chart nearby and adjust my expectations accordingly. Pro tip: Mark your seed packets with the expected germination time before planting so you know when to start checking for sprouts.
Post-Sprout Care Transition: When you reach Step 5, the gradual reduction of heat mat use is crucial. I've found that tapering the mat's runtime from full coverage to just 4-6 hours helps seedlings adjust without shock. For sensitive plants like herbs, I actually remove the mat completely after 7 days and only use it again if nighttime temperatures drop below 60°F—this prevents over-reliance on artificial warmth.
Pro Tips for Heat Mat For Seed Germination
- These game-changing insights will help you maximize your heat mat's potential while avoiding common pitfalls that slow down or ruin germination.
- Temperature Consistency is Key: The 75-85°F range in Step 1 is non-negotiable for most seeds, but some varieties like peppers and tomatoes actually prefer the upper end (closer to 85°F) for faster results.
- Layering for Even Heat Distribution: In Step 1, I recommend adding a second layer of protection between your heat mat and trays—try a thin piece of foam insulation board (½-inch thick) under the aluminum foil.
Frequently asked questions
What’s the ideal temperature range for a heat mat during seed germination?
A heat mat should maintain a consistent 70–90°F (21–32°C)—depending on the seed type. Most veggies (like tomatoes or peppers) thrive at 75–85°F (24–29°C), while herbs and flowers often need 65–75°F (18–24°C). Check seed packets for specifics!
How long should I keep seeds on a heat mat before transplanting?
Germination time varies by seed: 3–14 days is typical. Once sprouts appear (usually within 5–7 days), remove the mat and keep seedlings under bright grow lights or in a sunny window. Overheating after sprouting can stress tender roots!
Can I use a regular heating pad instead of a seedling heat mat?
Not ideal! Heating pads lack precise temperature control and can overheat seeds. Seedling heat mats are designed for even warmth (no hot spots) and are safer for delicate sprouts. If you’re DIY-ing, use a thermostat-controlled pad set to low.
What if my seeds aren’t germinating even with the heat mat?
Check these first:
- Moisture: Keep soil damp (not soggy) with a spray bottle.
- Depth: Most seeds need ½ inch deep coverage.
- Freshness: Old seeds (over 1 year) may fail—test viability with a paper towel germination test.
- Light: Some seeds (like lettuce) need darkness to sprout.
Are heat mats safe to leave on 24/7?
Yes! Most heat mats are built for continuous use, but monitor them to avoid overheating. Place a thermometer under the mat to ensure temps stay in the safe range. Unplug if the soil feels too warm to touch (above 95°F/35°C).
Wrapping up and next steps
Using a heat mat for seed germination is a game-changer for gardeners eager to see faster, stronger sprouts! With the right setup—consistent warmth, proper moisture, and patience—you’ll unlock the full potential of your seeds.
Whether you’re a seasoned grower or just starting, this method makes the process effortless and reliable.
Now that you’re equipped with the know-how, why not try it this season? Grab a heat mat, pick your favorite seeds, and watch your green thumb shine! 🌱✨ Ready to grow? Start small, experiment, and enjoy the rewarding journey of nurturing life from the ground up!