
Propagation
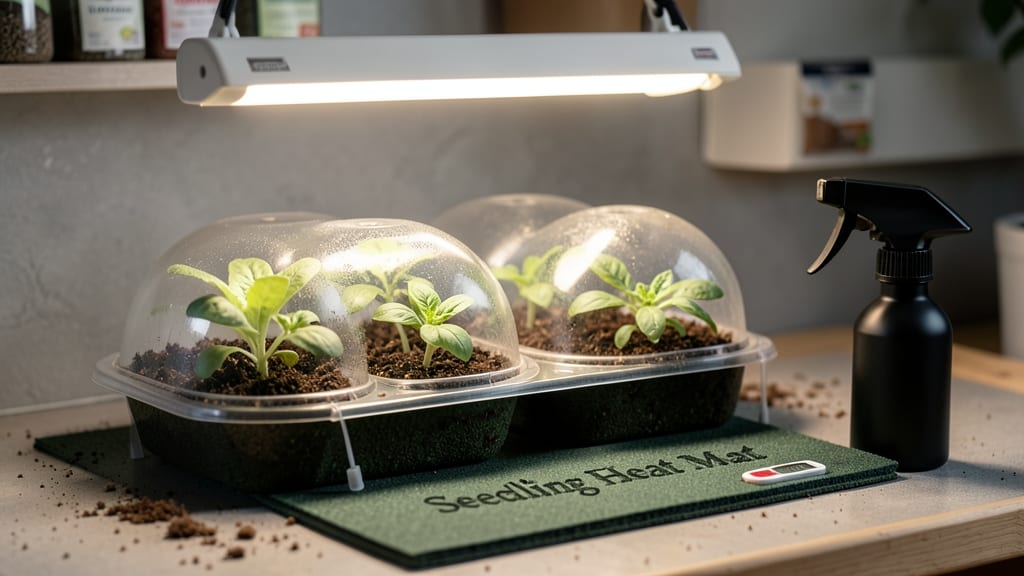
Heating pads for seed starting cut germination time in half—sometimes even more. 🌱 I remember my first batch of tomatoes taking three weeks to sprout until I discovered how a simple heating pad under the tray can trigger faster, more consistent growth.
The secret lies in mimicking the warm soil conditions seeds crave in their natural habitats.
Most seeds germinate best at 70-80°F, but some—like peppers, tomatoes, and basil—need 80-90°F to break dormancy quickly. A heating pad keeps the soil warm without the hassle of DIY setups, and it’s safer than heat mats that can dry out soil.
Just place it under your seed trays, plug it in, and watch those first green shoots appear in days instead of weeks.
You’ll notice stronger seedlings with deeper roots and fewer leggy, weak sprouts. The pad also helps prevent the "damp-off" fungus that kills seedlings by keeping the soil environment stable. For beginners, this means fewer losses and more confidence in your seed-starting routine.
Works for both windowsill setups and under grow lights, though you’ll want a thermostat to avoid overheating. Even advanced growers swear by them for tricky seeds like parsley or carrots. Let’s get those seeds sprouting faster than ever!
📚 In This Guide
- What you need
- Instructions
- Tips and common mistakes
- Wrapping up and next steps
What you need
- ● Heating pad (mat) – Choose a seedling heat mat (10"–12" x 20"–24" is ideal) with adjustable temperature settings (70°F–85°F range). Thermostatically controlled options are best!
- ● Seed trays or containers – 1–2 shallow trays (10"–12" x 20") with drainage holes. Plastic, fabric, or biodegradable options work.
- ● Growing medium – High-quality seed-starting mix (sterile, lightweight, and peat-based or coco coir blends). 1–2 cubic feet per tray.
- ● Seeds – Your chosen varieties! Check germination temps—some (like peppers or tomatoes) love warmth.
- ○ Humidity dome or plastic wrap – To retain moisture while seeds sprout (optional but helpful for slow starters).
- ○ Thermometer (optional but recommended) – A soil thermometer ensures your pad stays in the ideal range (70°F–85°F for most seeds).
- ● Grow lights – If your space lacks natural light, a LED grow bulb (12–16 hrs/day) keeps seedlings happy.
- ● Seedling heat tape – For DIY setups or larger setups, wrap around trays for even warmth.
- ● Labeling system – Toads or popsicle sticks to track seed varieties and planting dates.
- ● Fan (gentle breeze) – Encourages stronger stems by preventing leggy growth.
How to use heating pads for faster seed germination
Here's my foolproof method for cutting germination time in half with minimal effort.
🌱 Step 1: Select the Right Heating Pad
Choose a seedling heat mat designed for germination—look for one with adjustable temperature controls between 65-85°F. I recommend a 48-inch mat for most seed trays, as it provides even warmth across multiple flats. Avoid generic heating pads; they often run too hot and can scorch young roots.
Place the mat on a stable, level surface before setting your seed trays on top. The mat should cover at least 80% of the tray bottom to maintain consistent warmth. I like to use a thermometer probe inserted into the soil to verify the actual temperature—many mats advertise higher temps than they deliver.
💧 Step 2: Prepare Trays and Moisten Soil
Fill your seed-starting trays with moistened seed mix (never dry soil—it conducts heat poorly). I press the mix down lightly to eliminate air pockets, then water until it feels like a wrung-out sponge—damp but not dripping. Overly wet soil can cause uneven heating and fungal issues.
Distribute seeds according to packet instructions, then cover lightly with additional mix. Here's the thing—don't press down after planting. The seeds need contact with warm soil, but compacting the surface can prevent proper root penetration. A gentle sprinkle is all you need.
☀️ Step 3: Position Trays for Optimal Heat Distribution
Arrange trays so they're no more than 2 inches apart on the heating mat. This ensures edge seeds get warmth too—cold spots along tray edges are where germination fails. I like to rotate trays quarter-turn daily to prevent any potential heat gradient from developing.
Set the mat to 75°F for most vegetables and flowers (check seed packet recommendations). You'll see first sprouts in 3-5 days—half the time of room-temperature germination. Watch for condensation on the tray lid; if it's excessive, reduce the heat by 5°F to prevent overheating.
⏰ Step 4: Monitor and Adjust for Germination Success
Check daily for first signs of sprouting—tiny green hooks breaking through the soil. This is your cue to remove the tray lid immediately if using one, as trapped moisture invites damping-off. I keep a small notebook nearby to record which varieties sprout first—helpful for planning future batches.
If germination stalls after 7-10 days, increase the heat by 5°F (up to 85°F max). Some seeds like peppers and parsley need the extra warmth. Never exceed 85°F—you'll cook the seeds instead of helping them grow. Once 50% of seeds have sprouted, you can safely remove the heat mat entirely.
Tips & tricks for faster seed germination with heating pads
Here's what nobody tells you about maximizing your heating pad's effectiveness—tricks that'll get those sprouts popping in record time.
Temperature Verification: That advertised 75°F setting on your heating mat might not be accurate. I've seen mats read 85°F when set to 75°F—always verify with a soil thermometer probe. Place it just below the soil surface where seeds are planted, not on the mat itself. The 65-85°F range is ideal, but precision matters most for delicate seeds like lettuce or parsley.
Soil Moisture Balance: The "wrung-out sponge" consistency in Step 2 is critical—too wet and you risk fungal growth, too dry and seeds won't activate. I keep a spray bottle nearby to maintain moisture without overwatering. Pro tip: Water from the bottom by placing trays in a shallow tray of water for 10 minutes before setting on the mat. This prevents surface drying while keeping roots warm.
Edge Seed Strategy: Those seeds planted near tray edges often fail because heat dissipates faster there. Create a "warm border" by placing a second smaller mat underneath the tray edges or using aluminum foil to reflect heat. This ensures even germination across your entire tray—no cold spots to sabotage your batch.
Condensation Alert: Excessive condensation on tray lids after 24 hours means your setup is too moist. Reduce heat by 5°F immediately and consider removing lids temporarily to allow airflow. I've lost entire trays to damping-off from trapped moisture—don't make my mistake. A small fan on low setting can help without disturbing the seeds.
Pro Tips for Heating Pads For Seed Starting
- Here's what nobody tells you about maximizing your heating pad's effectiveness—tricks that'll get those sprouts poppi...
- Temperature Verification: That advertised 75°F setting on your heating mat might not be accurate. I've seen mats read...
- Soil Moisture Balance: The "wrung-out sponge" consistency in Step 2 is critical—too wet and you risk fungal growth, t...
Frequently asked questions
Got questions about using heating pads for seed starting?
Here are some of the most common ones—plus straightforward answers to help you get those sprouts off to a flying start!
How warm should a heating pad be for seed germination?
Aim for a consistent 70–85°F (21–29°C) at seed level, depending on the plant type. Most seeds thrive at the warmer end of this range (75–85°F/24–29°C). Use a thermometer to monitor—some pads have built-in gauges, but external checks are best for accuracy. Too hot? Seeds may rot; too cool? They’ll stall.
How long should I use a heating pad for seed starting?
Most seeds need warmth until they’ve sprouted and developed their first true leaves (usually 7–21 days, depending on the plant). Once seedlings emerge, you can gradually reduce heat or remove the pad entirely. Pro tip: Keep an eye on moisture—heat speeds evaporation, so check soil daily!
Can I use a heating pad under my whole seed tray, or just part of it?
For even warmth, cover the entire tray—especially if using a single pad. If your setup is large, layer multiple pads or use a heat mat designed for seed trays (they’re cut to fit standard sizes). Warning: Avoid placing pads under empty spaces—uneven heat can cause mold or uneven germination.
What if my seeds aren’t germinating even with a heating pad?
Check these first:
- Moisture: Soil should be damp, not soggy—overwatering drowns seeds.
- Depth: Most seeds need just enough cover (usually 2x their width). Too deep = delayed sprouting.
- Freshness: Old seeds (over 1 year) may have low viability—test a few in a separate tray.
- Light: Some seeds (like lettuce) need light to germinate—don’t bury them.
Are heating pads worth it compared to other germination methods?
Yes, if you’re starting slow-germinating or cold-sensitive seeds (e.g., peppers, tomatoes, or herbs). They’re cheaper and more consistent than DIY methods (like bulbs or heat lamps) and faster than room-temperature germination. For fast-sprouting seeds (like radishes or beans), a pad may be overkill—but it’s a game-changer for tricky varieties!
Wrapping up and next steps
Heating pads for seed starting are a game-changer for gardeners eager to kickstart their growing season! 🌱 With consistent warmth, they boost germination rates, help delicate seeds break dormancy, and give your plants a strong, healthy start.
Whether you're a seasoned gardener or just beginning, this simple tool can make your seedling journey smoother and more successful.
Now that you’re armed with the right knowledge, it’s time to put it into action. Grab a heating pad, set up your seed trays, and watch those tiny sprouts emerge faster than ever. Happy growing—and may your garden bloom with success! 🌿✨