
Lawn
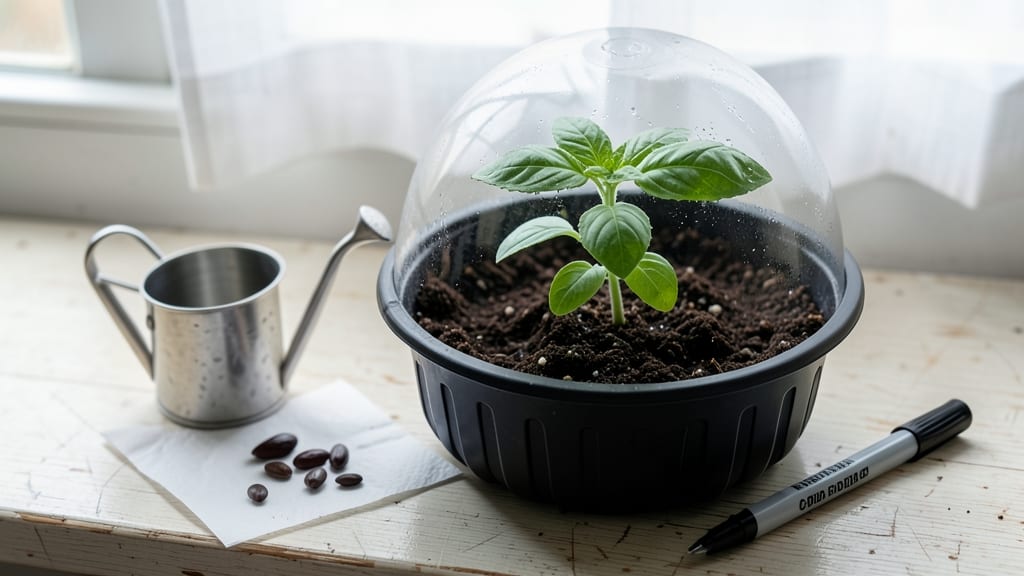
Getting a seed to sprout starts with understanding its tiny universe—moisture, warmth, and darkness must align just right. 🌱 I’ve watched seeds transform from lifeless specks to green promises, and the difference between success and failure often comes down to these three science-backed factors.
Some seeds need light to germinate; others refuse it until they’re buried. The trick is matching each seed’s personality to your setup.
First, prepare your growing medium—whether it’s soil, coconut coir, or paper towels—by keeping it consistently moist but never soggy. A spray bottle works best for delicate seeds, while larger ones can handle a gentle watering.
Temperature matters too: most seeds thrive between 65-75°F, but cool-loving veggies like lettuce prefer 50-60°F. A heat mat or warm windowsill can make all the difference in chilly climates.
Patience is your secret weapon, especially with slow starters like okra or some flower seeds, which can take 2-3 weeks to break through. If mold appears, it’s a sign of overwatering—let the surface dry slightly before covering again.
Once you see that first green hook, you’ll know you’ve cracked the code. The real magic happens when you repeat the process with confidence.
This method works for vegetables, flowers, and herbs alike—just adjust depth and moisture based on seed size. Whether you’re growing in a tray, egg cartons, or straight in the garden, the principles stay the same. Let’s turn those specks into sprouts.
📚 In This Guide
- What you need
- Instructions
- Tips and common mistakes
- Wrapping up and next steps
What you need
- ● Seeds: Choose high-quality, fresh seeds (check the seed packet for germination rates—aim for 80% or higher). Quantity depends on your project (e.g., 10–50 seeds for small containers, 100+ for larger beds).
- ● Growing Medium: Option 1: Potting mix (sterile, seed-starting blend—look for keywords like "peat-based" or "coco coir"). Quantity: Enough to fill your container(s) 2–3 inches deep.
- ● Option 2: Vermiculite or perlite (for moisture retention and aeration). Quantity: Mix 1 part with 2 parts potting soil.
- ● Containers: Shallow trays, seedling pots (2–4 inches deep), or even recycled containers (e.g., egg cartons, plastic clamshells). Ensure they have drainage holes or drill them yourself!
- ● Water: Room-temperature, dechlorinated water (let tap water sit out for 24 hours or use filtered water). A spray bottle or watering can with a fine rose attachment is ideal.
- ● Light Source: Natural light: A sunny windowsill (south-facing in the Northern Hemisphere).
- ● Grow lights: LED or fluorescent lights (12–16 hours/day, 6–12 inches above seedlings).
- ● Humidity Dome or Plastic Wrap: To retain moisture (e.g., a clear plastic lid, humidity tent, or even a zip-top bag).
- ○ Thermometer (Optional but Helpful): To monitor soil temperature (ideal range: 65–75°F for most seeds).
- ● Seedling Heat Mat: For cold-weather germination (keeps soil at optimal temps).
- ● Fungicide: A natural spray (e.g., neem oil or hydrogen peroxide solution) to prevent damping-off disease.
- ● Plant Labels: To track seed varieties and planting dates.
- ● Fertilizer: A balanced, water-soluble fertilizer (e.g., 5-5-5 or 10-10-10) for post-sprout nourishment.
- ● Garden Gloves: To protect your hands from soil and sharp edges.
Step-by-step instructions for reliable seed germination
Here’s the foolproof method I’ve used to sprout everything from delicate lettuce to stubborn heirloom tomatoes.
🌱 Step 1: Prep Seeds for Faster Germination
Start by checking your seed packet for special instructions—some seeds need scarification (a light nick with sandpaper) or soaking. Most seeds, though, just need warm water. Place them in a bowl and soak for 12-24 hours—this softens the outer coating and speeds up sprouting. I like to use lukewarm water because cold water can shock the seeds.
After soaking, drain them well and wrap the bowl in a damp paper towel. Store it in a warm spot (70-80°F)—a sunny windowsill or on top of the fridge works. Check daily for moisture; the towel should stay damp but not soggy. You’ll see tiny roots or a slight swelling in 24-48 hours—that’s your signal they’re ready to plant.
💧 Step 2: Choose the Right Container and Soil
Use small pots, seed trays, or even recycled containers with drainage holes—no need for fancy setups. Fill them with light, sterile seed-starting mix (never garden soil—it’s too dense and can harbor fungus). Moisten the mix until it’s damp like a wrung-out sponge. Press it down lightly so it’s firm but not compacted.
Plant seeds at the correct depth—usually twice the seed’s diameter. Tiny seeds like lettuce go ¼ inch deep, while larger ones like beans need 1 inch. I tap the seed packet gently to release one seed at a time; planting too many in one spot leads to weak, crowded seedlings. Cover lightly with more mix, then mist the surface with water until it’s evenly damp.
☀️ Step 3: Provide Ideal Conditions for Sprouting
Seeds need consistent warmth and moisture to germinate. Place the container in a warm, dark spot—like a seedling heat mat set to 75-85°F—until sprouts appear. A clear plastic bag or humidity dome keeps moisture trapped, but check daily to prevent mold. You’ll know it’s working when the soil stays damp but not waterlogged.
Once sprouts emerge (usually in 3-10 days, depending on the seed), move them to bright, indirect light. Avoid direct sun—it can scorch tender seedlings. If using a grow light, keep it 2-4 inches above the plants and on for 14-16 hours daily. You’ll see the first true leaves (not the initial seed leaves) in 7-14 days—that’s your cue to start thinning or transplanting.
⏰ Step 4: Monitor and Troubleshoot Common Issues
If seeds don’t sprout after 2 weeks, they may need more warmth or moisture. I’ve found that some seeds (like tomatoes) benefit from a second soak if they’re slow to wake up. Check for mold or foul smells—these mean the soil is too wet. If you see fuzzy growth, remove the dome immediately to improve airflow.
Leggy seedlings? That’s a sign of too little light. Move them closer to the light source or add a grow bulb. Yellowing leaves? Overwatering or poor drainage is usually the culprit. Let the soil dry slightly between waterings—you’ll know it’s ready when the top inch feels dry to the touch.
Tips & tricks for reliable seed germination
Here's what nobody tells you about turning stubborn seeds into thriving sprouts—these small details make all the difference.
Warmth is Everything: The 70-80°F range during the 12-24 hour soak is non-negotiable. I've ruined batches using cold water straight from the tap—seeds need that gentle warmth to activate their enzymes. If your kitchen runs cool, place the bowl on top of your fridge (not inside) for consistent warmth. Pro tip: Test your water temperature with your wrist—it should feel pleasantly warm, not hot.
The 48-Hour Rule: After the initial 12-24 hour soak, watch for those telltale signs of life—tiny white roots or swollen seeds. If nothing happens by 48 hours, give them a second soak (especially tomatoes and peppers). I've had seeds I thought were dead sprout after this extra step. Just remember to drain them thoroughly afterward to prevent mold.
Light Timing Trick: Once you move seedlings to light after 3-10 days, keep that grow light 2-4 inches away—closer than that can burn delicate leaves. I set a timer for 14-16 hours daily because consistent light patterns prevent leggy growth. Rotate your trays every few days so all seedlings get even exposure; otherwise, they'll stretch toward the light source.
Troubleshooting Slow Starters: If seeds still won't sprout after 2 weeks, they might need scarification. For hard-coated seeds like beans, rub them gently between sandpaper or a nail file until you see a small crack. This mimics natural weathering and helps water penetrate. Just don't overdo it—you're not trying to remove the seed coat, just create a tiny opening.
Pro Tips for Get A Seed To Sprout
- Here's what nobody tells you about turning stubborn seeds into thriving sprouts—these small details make all the difference.
- Warmth is Everything: The 70-80°F range during the 12-24 hour soak is non-negotiable.
- The 48-Hour Rule: After the initial 12-24 hour soak, watch for those telltale signs of life—tiny white roots or swollen seeds.
Frequently asked questions
Got questions about getting your seeds to sprout? You’re not alone! Here are answers to the most common concerns—so you can troubleshoot like a pro and watch those little green shoots appear.
How long does it take for a seed to sprout?
Germination time varies by seed type. Fast growers like radishes or lettuce sprout in 3–7 days, while slower seeds (e.g., beans, tomatoes) can take 7–21 days. Check the seed packet for specifics—patience is key! If nothing emerges after twice the expected time, the seed may be dead or conditions were off.
What if my seeds won’t sprout, even after following the steps?
Don’t panic! Try these fixes:
- Check moisture: Soil should stay consistently damp (not soggy). Use a spray bottle if needed.
- Test temperature: Most seeds need 65–75°F. A heat mat helps for cool climates.
- Inspect seeds: Old or damaged seeds may fail. Test a few in a damp paper towel to see if they’re viable.
- Light vs. dark: Some seeds (like peas) need darkness to sprout; others (like sunflowers) prefer light.
Can I use tap water to sprout seeds?
Yes, but it depends on your water quality. Chlorine in tap water can inhibit germination. Let it sit out for 24 hours before using, or use filtered/rainwater. For sensitive seeds (like orchids), distilled water is safest. Always keep water gentle—avoid blasting seeds with a stream.
Do I need to fertilize seeds right away?
Nope! Fertilizer can burn tender seedlings. Wait until seeds sprout and develop true leaves (not just the first seed leaves). Then, use a diluted liquid fertilizer or a slow-release granular option. Over-fertilizing is worse than none at all—start light!
Can I sprout seeds without soil?
Paper towel germination
or hydroponic setups work great for small seeds (like herbs or microgreens). Just:
- Moisten a paper towel, sandwich seeds between two, and fold.
- Place in a sealed bag or container to retain humidity.
- Keep in a warm, dark spot until sprouts appear (usually 3–5 days).
- Transplant carefully to soil once roots emerge.
Wrapping up and next steps
Growing a seed into a thriving sprout is all about patience, the right conditions, and a little science-backed care! 🌱 By choosing high-quality seeds, maintaining proper moisture, warmth, and light, and avoiding common pitfalls like overwatering or poor drainage, you’re already setting yourself up for success.
Whether you’re nurturing a tiny seedling for your lawn, garden, or indoor plants, every sprout starts with these foundational steps.
Now that you’re armed with the knowledge, it’s time to roll up your sleeves and give it a try. Start small—pick one seed type and experiment with the conditions you’ve learned.
Track your progress, adjust as needed, and soon, you’ll be rewarded with those first tiny green shoots breaking through the soil. Happy growing! 🌿