
Lawn
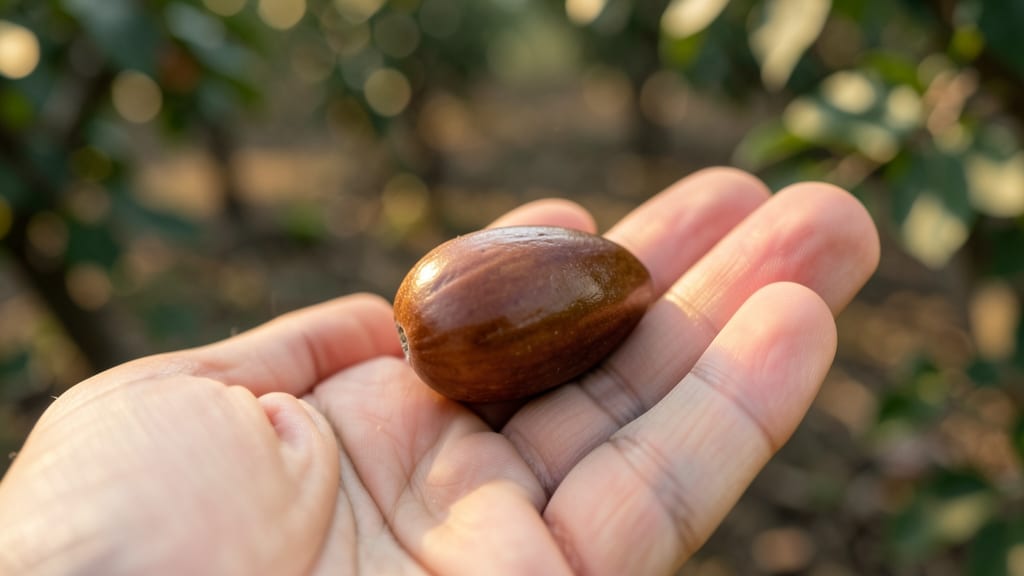
Holding that apple seed in your hand feels like holding a tiny promise of a future orchard. 🌱 The journey from seed to sapling is unpredictable—some varieties sprout in weeks, others take months—but the excitement of watching life emerge makes it worth every step.
I’ve grown apple trees from seed, and while the fruit may not match the parent, the process itself is pure magic. You’ll need just a few things: a ripe apple, patience, and a warm, moist environment.
The trick is breaking dormancy first—stratifying seeds in damp sand or a damp paper towel in the fridge for 6-8 weeks mimics winter and triggers germination.
Once you plant them, keep the soil consistently moist but not soggy, and expect tiny sprouts in 2-4 weeks for fast varieties like Honeycrisp, or up to 3 months for slower ones like Granny Smith.
The first leaves will be tiny and delicate, but with proper care, they’ll grow into a sturdy seedling. You’ll need to thin seedlings to the strongest one (yes, this is heartbreaking) and give it space to stretch its roots.
Remember, this won’t be the apple tree of your dreams—genetics mean the fruit will likely be small, tart, or even inedible—but the tree itself will be a living lesson in nature’s surprises. This project works best in spring or early fall, when temperatures are mild but not extreme.
Whether you’re a curious beginner or a seasoned gardener looking for a fun experiment, growing an apple tree from seed is a rewarding way to connect with nature’s unpredictability.
📚 In This Guide
- What you need
- Instructions
- Tips and common mistakes
- Wrapping up and next steps
What you need
- ● Apple seeds: 5–10 fresh, organic seeds (the more, the better—some may not sprout!)
- ● Small pots or seed trays: 4–6 (3–4 inches deep) with drainage holes
- ● Well-draining potting mix: 1 bag (look for a seed-starting blend with perlite or vermiculite)
- ● Spray bottle: 1 (for gentle watering)
- ● Plastic wrap or clear lid: 1 (to create a mini greenhouse effect)
- ○ Heat mat (optional but helpful): 1 (to maintain 70–80°F for faster germination)
- ● Grow lights or sunny windowsill: Access to indirect light (6+ hours/day)
- ● Permanent marker or labels: For tracking seed varieties and planting dates
- ● Seedling heaters: To keep seeds cozy during germination
- ● Humidity dome: For extra moisture retention
- ● Fertilizer (low-dose): Like fish emulsion or compost tea (once sprouts appear)
- ● Journal/notebook: To log progress, varieties, and germination timelines
- ● Gloves: For handling soil and seeds comfortably
How to germinate apple seeds reliably by variety
Here's the straightforward method I've used to coax sprouts from apple seeds—no fancy tools required.
🌱 Step 1: Select and Prepare Your Seeds
Pick seeds from an organic apple—conventional varieties often carry growth inhibitors. I like to use seeds from heirloom varieties like Granny Smith or Honeycrisp because they germinate more predictably. After washing the seeds, place them in a bowl of lukewarm water for 24 hours to soften the outer coating and speed up germination.
Once softened, you'll notice the seeds swell slightly. This is your signal they're ready for planting. Don't skip this step—seeds from store-bought apples often take weeks longer to sprout without soaking. Real talk: if you're impatient, soaking is the game-changer.
🌿 Step 2: Plant Seeds in Moist Growing Medium
Fill a small container with a mix of 50% peat moss and 50% perlite—this keeps the medium light and well-draining. Moisten it until damp but not soggy; you should be able to squeeze a handful and see moisture without it dripping. Plant the seeds ½ inch deep, spacing them about 1 inch apart.
Cover the container with plastic wrap or a humidity dome to trap warmth and moisture. Place it in a warm spot, like on top of the fridge or near a sunny window. You'll want the soil to stay consistently warm—70-75°F is ideal. Check daily for condensation on the plastic; if it's dry, mist the soil lightly.
⏰ Step 3: Monitor Germination by Variety
Germination times vary wildly by apple type. Sweet varieties like Gala or Fuji often sprout in 2-3 weeks, while tart ones like Granny Smith can take 4-6 weeks. Watch for the first tiny shoot to emerge—it’ll look like a tiny white root pushing through the soil.
Once sprouts appear, remove the plastic wrap immediately to prevent fungal growth. Keep the soil moist but not waterlogged; overwatering at this stage is the fastest way to kill new seedlings. You'll see the first true leaves (not the initial seed leaves) in about 2-3 weeks after sprouting—that's when you know they're ready for their own pots.
☀️ Step 4: Provide Light and Care for Young Seedlings
Move seedlings to a bright spot with indirect sunlight—direct sun can scorch tender new leaves. A south-facing window works well, but if your seedlings start stretching toward the light, they need more. At this stage, leggy growth means they're reaching for light, which weakens the stem.
Water when the top inch of soil feels dry. You'll know it's time when the soil pulls away slightly from the pot's edges. Fertilize lightly with a balanced liquid fertilizer (like 10-10-10) diluted to half strength after the first true leaves appear. Over-fertilizing now will burn delicate roots.
🪴 Step 5: Transplant and Prepare for Long-Term Growth
When seedlings have 3-4 sets of true leaves and are about 4-6 inches tall, it's time to transplant them into individual 4-inch pots with fresh potting mix. Handle them gently—apple seedlings have delicate roots that break easily. Water thoroughly after transplanting to help them settle in.
Here's the thing—apple trees grown from seed won't produce fruit identical to the parent apple. But that's part of the fun! If you're patient, you might get a surprise variety. Keep them in pots for at least a year before considering outdoor planting, and always harden them off gradually to avoid shock.
Tips & tricks for reliable apple seed germination
These little tricks will help you turn those tiny seeds into thriving saplings without the guesswork.
Soaking Secret: That 24-hour soak in lukewarm water isn't just helpful—it's essential. I've tried skipping it with store-bought seeds, and germination took nearly twice as long. The swelling you see signals the seed coat has softened enough for roots to break through. Pro move: Use filtered water to avoid chlorine, which can inhibit germination.
Variety-Specific Timing: Remember those 2-3 week vs 4-6 week ranges? Sweet varieties like Gala really do sprout faster than tart ones. I keep a small notebook to track which seeds come from which apples—this way, you can adjust expectations. If you're impatient with Granny Smith seeds, try mixing them with Fuji seeds for a more predictable timeline.
Humidity Dome Hack: The plastic wrap creates a mini greenhouse effect, but don't let it stay too long after sprouts appear. I've seen fungal growth develop within 48 hours if left covered. Once those first shoots emerge, remove the cover immediately and place a small fan nearby to improve air circulation—this prevents damping off disease that can kill seedlings overnight.
Light Transition Strategy: When moving seedlings to indirect sunlight in Step 4, do it gradually over 3-4 days. I start with just 2 hours of morning sun, then increase by 30 minutes daily. This prevents the shock of sudden bright light that causes those sad, leggy seedlings. Think of it as sunburn prevention for your tiny trees!
Pro Tips for Apple Seed In Hand
- These little tricks will help you turn those tiny seeds into thriving saplings without the guesswork.
- Soaking Secret: That 24-hour soak in lukewarm water isn't just helpful—it's essential. I've tried skipping it with st...
- Variety-Specific Timing: Remember those 2-3 week vs 4-6 week ranges? Sweet varieties like Gala really do sprout faste...
Frequently asked questions
Got questions about growing apple seeds? Here’s what you need to know to turn that apple seed in hand into a thriving sprout—without the guesswork!
How long does it take for an apple seed to sprout?
Most apple seeds sprout in 4–8 weeks under ideal conditions (moisture, warmth, and darkness). Some varieties like Granny Smith may germinate faster (3–4 weeks), while heirloom seeds could take up to 10 weeks. Patience is key—consistent moisture speeds things up!
Can I plant an apple seed directly in the ground?
Yes, but it’s riskier! Seeds need warmth (60–70°F) and darkness to germinate. Start indoors in a pot with damp paper towels or a seed-starting mix for better control. Once sprouted, transplant outdoors after the last frost—apple trees thrive in full sun!
What if my apple seed won’t sprout?
Try these fixes:
- Stratification: Refrigerate seeds in damp paper towels for 4–6 weeks to mimic winter.
- Check viability: Soak seeds in water—if they sink, they’re likely viable.
- Freshness matters: Older seeds (over 1 year) may lose vigor.
Will my homegrown apple tree bear fruit?
Probably not the same variety as the parent tree! Apple seeds grow wild, unpredictable varieties due to cross-pollination. For consistent fruit, graft a named cultivar onto your seedling later. Grafting is a fun (but advanced) skill—great for orchard dreams!
Are there faster alternatives to growing from seed?
Skip the wait with:
- Rooted cuttings: Propagate from a friend’s apple tree (if disease-free).
- Nursery saplings: Buy a grafted tree (e.g., Honeycrisp or Fuji) for guaranteed fruit.
- Layering: Bend a low branch into soil—roots form in 6–12 months!
Wrapping up and next steps
Growing an apple tree from a seed is a rewarding journey that blends patience with the joy of nurturing life! 🌱 Whether you’re working with a Granny Smith, Honeycrisp, or Fuji, understanding your variety’s germination timeline helps set you up for success.
Remember, consistency in moisture, warmth, and care is key—your tiny seedling will thank you with fresh fruit in years to come!
Ready to take the next step? Plant your seeds today and track their progress! For extra guidance, explore seed stratification tips or join gardening forums to share your sprouting milestones. Happy growing—your future orchard awaits! 🍏✨