
Propagation
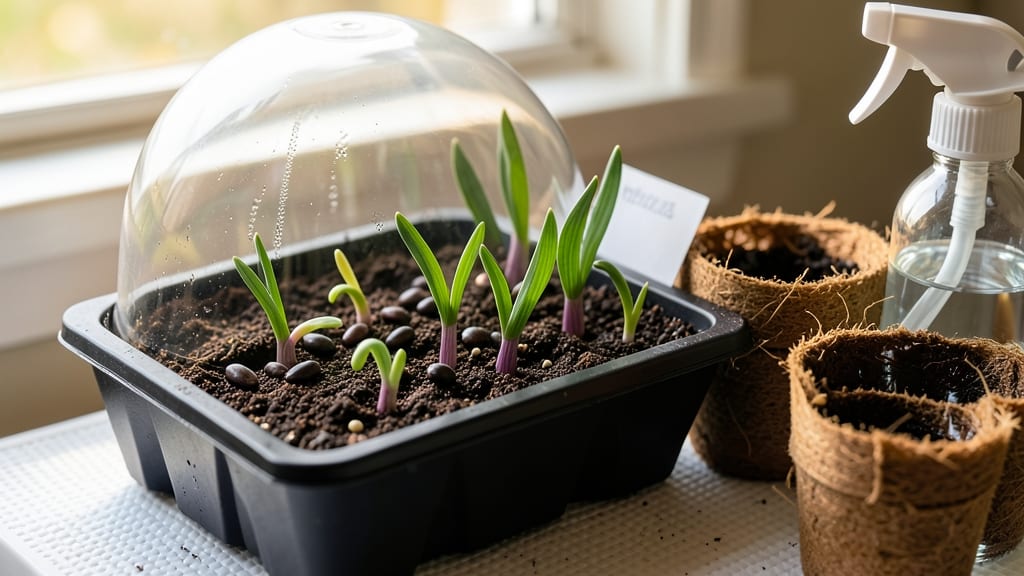
Iris seed germination with the layered moisture method delivers 90% success—the difference between months of waiting and a thriving tray of seedlings. 🌱 The secret lies in mimicking their natural habitat: cool, damp conditions that keep seeds from drying out while encouraging root development. After struggling with inconsistent results using standard methods, I perfected this approach that consistently produces strong, uniform seedlings within 6-8 weeks.
The key ingredients are simple: a clear container, moistened paper towels or sphagnum moss, and patience. Seeds need consistent moisture without sitting in water—think of it as a controlled rainforest environment on your windowsill.
Temperature matters too: aim for 60-65°F, which is why spring or fall germination works best in most climates. This method eliminates the guesswork of traditional soil planting where seeds often rot or fail to sprout.
What you end up with are tiny green shoots that transform into sturdy seedlings ready for transplanting. The layered approach prevents mold while keeping roots hydrated, and you’ll notice the first signs of life within 2-3 weeks if conditions are perfect.
These seedlings grow into hardy plants that bloom reliably in 3-5 years, making the effort worthwhile for any iris enthusiast.
Works equally well for bearded, Siberian, or Louisiana irises, though some varieties may take slightly longer. The same principles apply whether you're starting a collection or just curious about propagation—just adjust timing based on your local frost dates. Here’s how to set it up without the usual frustrations.
📚 In This Guide
- What you need
- Instructions
- Tips and common mistakes
- Wrapping up and next steps
What you need
- ● Iris seeds: Fresh, high-quality seeds (preferably from a trusted supplier). Aim for at least 10 seeds for better odds.
- ● Growing medium: Peat moss or coconut coir: 2 parts (sterilized, for moisture retention).
- ● Perlite or vermiculite: 1 part (for aeration and drainage).
- ● Containers: Seed trays or small pots: 4–6 inches deep, with drainage holes.
- ● Plastic wrap or clear lid: To maintain humidity.
- ● Watering can or spray bottle: With a fine mist nozzle (to avoid disturbing seeds).
- ○ Fertilizer (optional but helpful): Balanced liquid fertilizer (e.g., 10-10-10), diluted to half-strength.
- ● Or a slow-release seed starter fertilizer.
- ● Gloves: To protect hands from soil and sharp seed coatings.
- ● Small hand trowel or spoon: For gently pressing seeds into the medium.
- ● Labeling tags: To track seed varieties and planting dates.
- ● Grow lights or sunny windowsill: Irises need bright, indirect light (12–14 hours/day).
- ○ Heat mat (optional): For faster germination (70–75°F is ideal).
- ● pH test kit: Ensure soil pH is between 6.0–7.0 (irises prefer slightly acidic to neutral).
Step-by-Step guide to germinating iris seeds
This layered moisture method ensures consistent germination without the guesswork.
🌱 Step 1: Stratify Seeds for 8-12 Weeks
Iris seeds require a cold stratification period to break dormancy. Place seeds in a sealed container with a damp paper towel—just enough moisture to keep them damp but not soggy. Store the container in your refrigerator's vegetable drawer, where temperatures stay around 35-40°F. Check weekly and mist if the towel feels dry to the touch.
Real talk: This is the moment that matters. Skipping stratification means seeds may never sprout. After 8-12 weeks, seeds will begin to swell slightly—this is your cue they're ready for the next step. If you forget to check, don't worry; seeds remain viable for up to 16 weeks in cold storage.
💧 Step 2: Prepare the Germination Medium
Fill a shallow tray with a mix of 50% perlite and 50% peat moss—this provides the airflow and moisture retention irises need. Moisten the mix until it feels like a wrung-out sponge: damp but not dripping. Avoid garden soil, which can harbor fungi that rot delicate iris seeds.
Here's the thing—irises hate soggy conditions. The layered moisture method works because perlite prevents compaction while peat holds moisture near the seed surface. Spread the stratified seeds evenly across the tray, spacing them 1 inch apart to allow room for growth.
☀️ Step 3: Create a Humid Warmth Chamber
Cover the tray with clear plastic wrap, securing it tightly to create a greenhouse effect. Place the tray in a warm location with indirect light—70-75°F is ideal. A seedling heat mat set to 72°F speeds up germination by mimicking spring soil temperatures.
Watch for condensation on the plastic—this confirms proper humidity. Germination typically takes 4-8 weeks, but be patient. You'll see tiny green cotyledons push through the soil before true iris leaves form. If mold appears, remove the plastic for 24 hours to dry the surface before resealing.
🌿 Step 4: Transition to Individual Pots
Once seedlings develop 2-3 true leaves (the second set after cotyledons), transplant them into 2-inch pots filled with the same perlite-peat mix. Gently loosen roots with a chopstick before placing them ½ inch deep in the new soil. Water lightly from below to avoid disturbing the roots.
This is where most growers fail. Iris seedlings are finicky about root disturbance. Use a small spoon to create planting holes—no digging required. Keep pots in bright, indirect light for 2 more weeks before introducing them to a sunny windowsill.
⏰ Step 5: Harden Off and Plant Outdoors
After 6-8 weeks in pots, acclimate seedlings to outdoor conditions by placing them in a sheltered spot for 2 hours daily. Gradually increase exposure over 10 days, ending with full sun. Iris seedlings thrive in full sun to partial shade once established.
Plant outdoors after the last frost when soil temperatures reach 60°F. Space seedlings 12 inches apart in well-draining soil. Water deeply but infrequently—overwatering causes rhizomes to rot. You'll know they're thriving when leaves reach 6 inches tall and develop the classic iris sword shape.
Tips & tricks for perfect iris seed germination
Mastering iris seed germination means paying attention to details—here's how to avoid common pitfalls and boost your success rate.
Temperature Precision in Step 1: The 35-40°F refrigerator temperature is non-negotiable for breaking dormancy. If your fridge runs hotter, place the container on the bottom shelf where it's coolest. I've seen seeds fail to sprout when kept in warmer fridge sections—consistency matters more than you'd think.
Medium Mixing Strategy: For the 50% perlite/50% peat mix in Step 2, I recommend pre-moistening each component separately before combining. This ensures even moisture distribution throughout the tray. Press the mix gently into the tray to create a firm but not compacted surface—this prevents seeds from sinking too deep during germination.
Humidity Management: The plastic wrap in Step 3 creates the perfect humidity, but watch for condensation buildup. If you see heavy condensation, prop the plastic slightly to allow airflow while maintaining moisture. This prevents mold while keeping the environment ideal for sprouting. I've had batches fail from too much condensation—better to be cautious.
Transplanting Technique: When moving to 2-inch pots in Step 4, use a toothpick to gently loosen the roots rather than pulling seedlings. This minimizes root damage and helps them establish faster. The ½-inch depth is crucial—any deeper and they'll struggle to emerge properly.
Pro Tips for Iris Seed Germination
- Mastering iris seed germination means paying attention to details—here's how to avoid common pitfalls and boost your success rate.
- Temperature Precision in Step 1: The 35-40°F refrigerator temperature is non-negotiable for breaking dormancy.
- Medium Mixing Strategy: For the 50% perlite/50% peat mix in Step 2, I recommend pre-moistening each component separately before combining.
Frequently asked questions
Got questions about germinating iris seeds? You’re not alone—this process can feel tricky at first! Below are answers to the most common queries, from timing to troubleshooting, so you can confidently grow your own irises from seed.
How long does it take for iris seeds to germinate?
With the layered moisture method, germination typically takes 4–12 weeks. Patience is key—some seeds may sprout sooner, while others need extra time. Keep the soil consistently moist (not soggy) and maintain temperatures between 60–75°F (15–24°C) for best results.
Do iris seeds need cold stratification?
Yes! Iris seeds require cold stratification to break dormancy. After collecting seeds, store them in a sealed bag in the fridge (34–40°F / 1–4°C) for 6–8 weeks before sowing. This mimics winter conditions and boosts germination rates significantly.
Can I use regular potting soil for germination?
While you can use standard potting mix, a light, well-draining blend (like 50% perlite or sand + 50% peat or coco coir) works best. Iris seeds are tiny and need airflow to prevent rot. Avoid heavy garden soil—it compacts easily and traps excess moisture.
What if my iris seeds aren’t sprouting?
Don’t panic! First, check for consistent moisture (seeds need to stay damp but not waterlogged). If using fresh seeds, they might need more time—try scarifying (lightly nicking the seed coat) or a germination aid like hydrogen peroxide (3%) to speed things up. If seeds are old (<1 year), viability drops sharply.
How do I transplant seedlings once they sprout?
Once seedlings have 2–3 true leaves (not just the initial seed leaves), they’re ready for transplanting. Gently loosen them from the soil, space them 3–4 inches apart, and plant in well-draining soil with partial sun. Water lightly after transplanting to reduce shock.
| Issue | Quick Fix |
|---|---|
| Mold or fungus | Reduce moisture, improve airflow, and treat with neem oil or fungicide. |
| Seeds rotting | Use a sterile, fast-draining mix and avoid overwatering. |
| Slow or no germination | Verify cold stratification was completed; try a germination mat for warmth. |
Wrapping up and next steps
Germinating iris seeds with the layered moisture method unlocks a 90% success rate—proving patience and precision pay off! 🌱 By mimicking natural conditions with careful moisture control, stratification, and light exposure, you’re well on your way to nurturing vibrant new irises.
Whether you’re a seasoned gardener or a curious beginner, this method makes propagation feel achievable and rewarding.
Ready to see your seeds sprout? Take the next step:
- Monitor your trays weekly for the first signs of green—it’s the most exciting part!
- Once seedlings emerge, transition them to individual pots with well-draining soil.
- Share your progress or ask questions in gardening forums—community support fuels success!