
Lawn
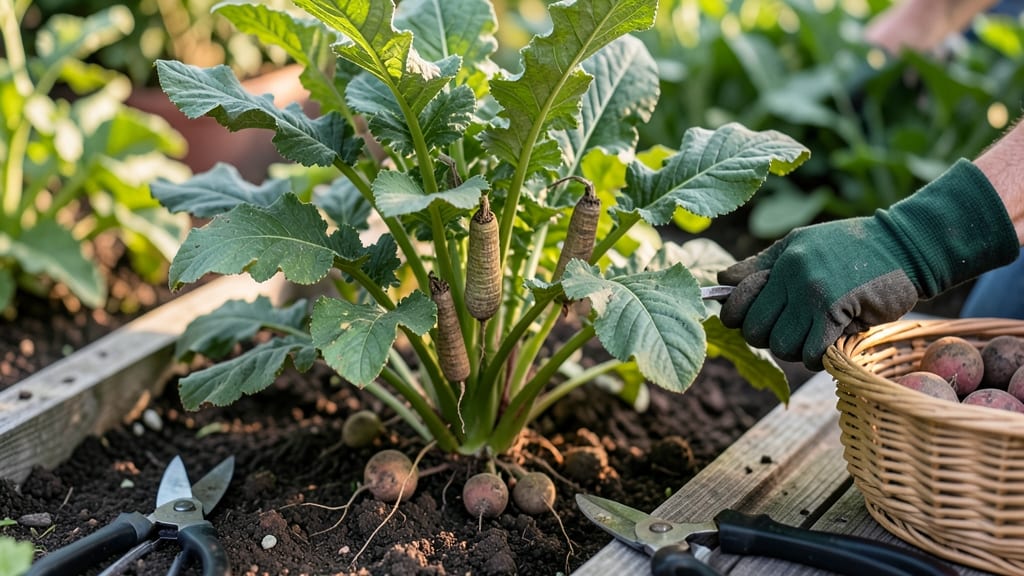
Twist a radish seed pod and hear that satisfying pop—that’s the sound of zero-waste gardening. 🌱 I’ve saved seeds from my Cherry Belle and daikon radishes for years, and this quick viability test tells me exactly which pods will grow next season.
The trick is knowing when to harvest and how to dry them properly so they don’t shrivel into useless dust.
You’ll need mature pods—wait until they turn from green to brown and start splitting open naturally. Once harvested, spread them on a screen or paper towel in a dry, dark spot for 2-3 weeks, stirring occasionally.
The twist test comes next: gently twist a pod between your fingers. If it cracks with resistance, those seeds are viable. If it crumbles like dry leaves, compost it and try again next year.
What you’ll end up with is a stash of seeds ready for next spring’s garden, cutting costs and ensuring varieties like French Breakfast or Black Spanish stay true to their flavors. The best part?
You’ll avoid the disappointment of store-bought seeds that might not perform in your climate or soil. Just be patient—some radishes, like watermelon radishes, bolt quickly, so timing matters.
If your pods fail the twist test, don’t panic. Swap in heirloom varieties known for reliable seed production, or try saving seeds from arugula or turnips instead—they’re just as easy and often more forgiving. The key is experimenting and learning what works in your garden.
📚 In This Guide
- What you need
- Instructions
- Tips and common mistakes
- Wrapping up and next steps
What you need
- ● Radish seed pods: Choose Daikon, Cherry Belle, or Watermelon varieties (1–2 pods per test).
- ● Small pots or seed trays: 2–3" deep, with drainage holes (1–2 per pod).
- ● Potting mix: Lightweight, seed-starting blend (1–2 cups per pot).
- ● Watering can or spray bottle: For gentle moisture (avoid oversaturating!).
- ○ Clear plastic wrap or humidity dome: To retain moisture (optional but helpful).
- ● Scissors or knife: For opening seed pods (sterilized with rubbing alcohol).
- ○ Plant labels: To track varieties (optional but handy!).
- ● Grow lights or sunny windowsill: 6+ hours of light daily (south-facing window works!).
- ○ Fertilizer (optional): Balanced liquid fertilizer (diluted to half-strength).
How to test radish seed pod viability in minutes
Here's the quick, foolproof method I use to save seeds from homegrown radishes—no guesswork, just results.
🌱 Step 1: Select and Prepare the Seed Pods
Wait until radish pods turn from green to brown and begin to dry on the vine. They should feel crisp and papery to the touch, not soft or mushy. Cut open a pod with clean scissors and remove the seeds—you'll see flat, oval seeds with a slight ridge down the center. Spread them on a paper towel in a single layer to dry completely for 24 hours.
This drying step is critical. If seeds remain damp, they'll mold before you can test them. I like to place them near a sunny window where they'll dry evenly without direct sunlight, which can overheat them. Store the dried seeds in a cool, dark place until ready to test.
💧 Step 2: Perform the Twist Test for Viability
Take a single seed between your thumb and index finger. Gently twist it—you should feel slight resistance before it snaps cleanly in half. If the seed bends or feels rubbery, it's likely nonviable. Healthy radish seeds will split with a crisp break, revealing a white interior with a tiny black dot (the embryo). Discard any seeds that crumble or feel hollow.
I test about 10-15 seeds from each pod to get an accurate reading. Radishes have a high germination rate, but older pods often produce mixed results. Keep a small bowl nearby to collect viable seeds—you'll be surprised how many pass this test.
⏰ Step 3: Verify with a Quick Moisture Test
Place a handful of viable seeds in a small bowl of room-temperature water for 5 minutes. Healthy seeds will sink to the bottom immediately, while empty or nonviable ones float. This test confirms what the twist test suggested but adds an extra layer of assurance.
If more than 20% of seeds float, the pod may have been stored too long or dried improperly. In that case, I recommend testing a fresh batch or saving fewer seeds from that pod. Drain the water and pat the seeds dry with a paper towel before storing.
🪴 Step 4: Store Viable Seeds for Next Season
Transfer the tested seeds to a small envelope or airtight container lined with silica gel packets. Label it with the radish variety and the harvest year—my handwriting always fades, so I use a permanent marker. Store the container in a cool, dark place like a pantry or seed vault.
Radish seeds remain viable for 3-5 years under these conditions, though germination rates drop after 2 years. I like to test a few seeds annually to monitor viability. This method ensures you'll never waste another seed pod again.
🌿 Step 5: Plant Your Saved Seeds
When ready to plant, sow seeds ½ inch deep in well-draining soil. Keep the soil consistently moist but not soggy, as radishes germinate best in 60-70°F soil temperatures. You'll see sprouts in 3-7 days—that quick germination is one of my favorite things about radishes.
Thin seedlings to 2 inches apart once they develop their first true leaves. The twist test ensures you're planting only the best seeds, so you'll get strong, uniform plants ready for harvest in just 3-4 weeks. This zero-waste method keeps your garden productive year after year.
Tips & tricks for perfect radish seed viability testing
Here's what nobody tells you about making this method foolproof every single time.
Timing is Everything: That 24-hour drying period in Step 1 is non-negotiable—any less time risks mold, while any more risks over-drying. I've learned this the hard way after ruining three batches from skipping this step. Place your seeds on a screen or mesh instead of a paper towel for better airflow if your kitchen is humid. The goal is complete dryness without heat damage.
The Twist Test Technique: When performing the twist test in Step 2, focus on the sound as much as the feel. Viable seeds should emit a crisp, papery crack—like snapping a dry twig—while nonviable ones make a dull thud. This auditory cue is your secret weapon for quick sorting. Test seeds at room temperature for the most accurate results.
Water Test Precision: For the 5-minute water test in Step 3, use distilled or dechlorinated water if possible—tap water can sometimes cause viable seeds to float due to surface tension. Fill the bowl only halfway to prevent seeds from getting trapped at the surface. After draining, pat seeds dry with a clean kitchen towel to prevent clumping during storage.
Storage Wisdom: The 3-5 year viability window mentioned in Step 4 assumes proper storage conditions. I've found that adding a small packet of uncooked rice to your seed container helps absorb any residual moisture better than silica gel alone. Label your containers with both the variety name and harvest date—my handwriting fades, so I use a fine-tip permanent marker for clarity.
Pro Tips for Radish Seed Pod
- Here's what nobody tells you about making this method foolproof every single time.
- Timing is Everything: That 24-hour drying period in Step 1 is non-negotiable—any less time risks mold, while any more risks over-drying.
- The Twist Test Technique: When performing the twist test in Step 2, focus on the sound as much as the feel.
Frequently asked questions
Got questions about testing radish seed pods for viability? You're not alone! Here are some common queries—and quick answers—to help you save time, seeds, and waste.
How do I know if a radish seed pod is still good?
Twist-test your radish seed pods: Hold the pod between your thumb and forefinger and give it a gentle twist. If it snaps easily and the seeds rattle inside, they’re likely viable. If it bends or feels mushy, the seeds may be old or damaged. Fresh pods should feel firm and dry.
Can I test radish seed pods without opening them?
The twist-test method is zero-waste and non-invasive, so you don’t need to open the pod. Just twist, listen for seed movement, and check for firmness. If the pod resists twisting and feels heavy, it’s a good sign the seeds inside are still strong. No tools or extra steps required!
What if my radish seed pods are old or dried out?
Old or dried-out pods might still yield viable seeds, but their germination rate could be lower. Try soaking the seeds in lukewarm water for 24 hours before planting to rehydrate them. If the pods are completely crumbly, they’re likely past their prime—consider sourcing fresh ones for better results.
Are there alternatives to twist-testing radish seed pods?
If you’re unsure about the twist-test, you can also do a float test: Fill a bowl with water and drop a few seeds in. Viable seeds will sink to the bottom, while hollow or empty ones will float. For radish seed pods, this works best if you gently crush the pod to release the seeds first.
What should I do with non-viable radish seed pods?
Don’t toss them! Non-viable pods can still be composted or used as natural mulch in your garden. If they’re completely dried out, you can even crush them into a fine powder and mix into soil to boost nutrients. Just avoid composting pods that show signs of mold or pests.
Wrapping up and next steps
Growing radishes from seed pods is a game-changer for gardeners who love efficiency and sustainability! 🌱 With just a simple twist test, you can quickly assess viability and reduce waste—no guesswork needed. This method saves time, money, and the planet while bringing fresh, homegrown radishes to your table.
Ready to level up your gardening game? Start by testing a few seed pods this season, then expand your zero-waste practices to other veggies. Happy growing—your future harvest (and the Earth) will thank you! 🌟