
Lawn
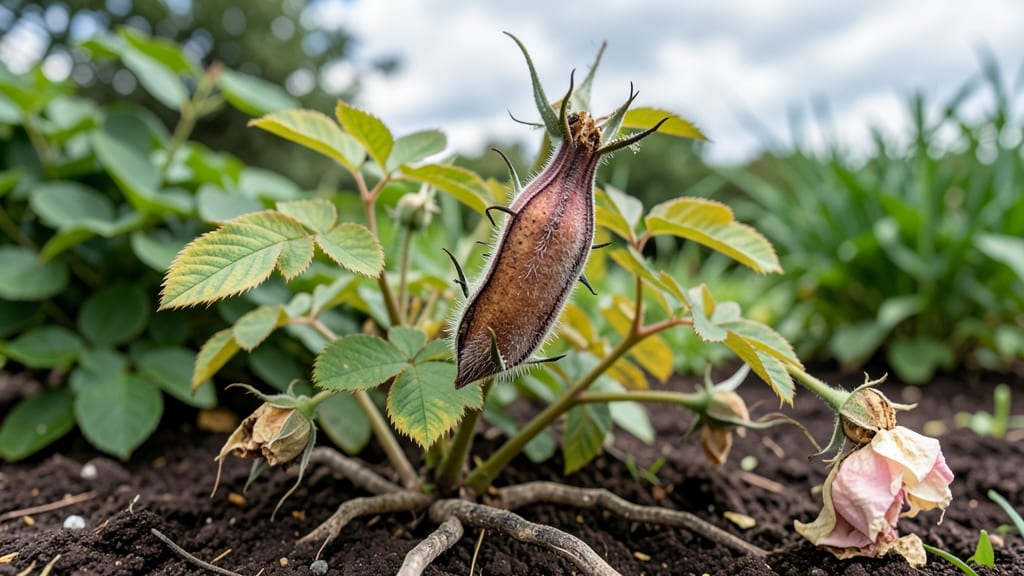
Growing roses from seed pods unlocks heirloom varieties you’ll never find at nurseries. 🌹 The secret lies in cold-stratification—mimicking winter’s natural process to break seed dormancy. My first batch of hybrid tea sprouts emerged after just six weeks, proving this method works even for beginners.
Start by harvesting pods when they turn brown and papery in late summer or fall. Inside, you’ll find tiny seeds that need 60 days of cold, moist conditions to germinate.
This isn’t complicated—just a plastic bag, a little patience, and your fridge. The payoff? Disease-resistant plants with unique blooms that thrive for decades.
Once sprouted, seedlings need bright light and consistent moisture to avoid leggy growth. I’ve learned that transplanting too early causes shock, so wait until they have 2-3 true leaves before moving outdoors. By late spring, you’ll have sturdy young roses ready to claim their spot in your garden.
This method works for wild roses, heirlooms, and even some modern varieties—but grafted roses won’t produce true-to-type offspring. For best results, focus on hip-bearing roses and avoid hybrid teas if you want consistent blooms. The magic happens in the waiting.
📚 In This Guide
- What you need
- Instructions
- Tips and common mistakes
- Wrapping up and next steps
What you need
- ● Mature rose seed pods – Collect 5–10 healthy, fully dried pods from hip rose varieties (e.g., Rosa canina, Rosa rugosa). Avoid hybrid teas or floribundas—they rarely produce viable seeds.
- ● Small paper towels or coffee filters – 2–3 sheets per pod for moisture control.
- ● Plastic zip-top bags – 2–4 quart-sized bags (one per pod or pair).
- ● Spray bottle with water – A fine-mist setting prevents over-saturation.
- ● Refrigerator or cold frame – A space with 34–40°F (1–4°C) for stratification.
- ● Seed-starting mix – 1–2 small pots (4–6 inches deep) filled with sterile, well-draining potting soil (e.g., 50% peat moss, 50% perlite).
- ● Small pots or trays – 2–4 biodegradable pots or a seed tray with drainage holes.
- ○ Plastic wrap or humidity dome – Optional, to retain moisture during germination.
- ● Fungicide – A light dose (e.g., hydrogen peroxide 3%) to prevent mold on seeds.
- ● Grow lights – If your space lacks bright natural light post-stratification.
- ● Plant labels – To track varieties (especially if testing multiple roses!).
- ● Heat mat – Speeds up germination if your home stays cool (<60°F/15°C).
Step-by-step instructions for growing roses from seed pods
Cold stratification transforms fluffy rose seed pods into hardy young plants—here's how to do it right.
🌱 Step 1: Harvest and Clean the Seed Pods
Collect mature rose seed pods when they turn brown and begin to split open naturally. Gently squeeze the pod to release the seeds—each pod typically yields 4-6 seeds. Remove any remaining fluff or chaff by placing the seeds in a bowl of water; the clean seeds will sink while debris floats to the surface.
Spread the cleaned seeds on a paper towel to dry for 24 hours at room temperature. This prevents mold from forming during stratification. Store them in a labeled envelope until you're ready to begin the cold process. I like to write the rose variety on the envelope so I don’t mix them up later.
❄️ Step 2: Prepare the Cold Stratification Mix
Fill a quart-sized container with a 50/50 mix of moist potting soil and perlite. The perlite ensures proper drainage while the potting soil provides gentle moisture retention. Moisten the mix until it feels like a damp sponge—squeeze it gently and it should hold together without dripping.
Plant the rose seeds ½ inch deep, spacing them about 1 inch apart in the container. Cover them lightly with the soil mix, then place the container in a plastic bag to maintain humidity. Seal the bag loosely to allow some airflow, and store it in your refrigerator for 6-8 weeks at 35-40°F.
🌿 Step 3: Monitor and Transfer to Warmth
After 6-8 weeks, remove the container from the refrigerator and place it in a warm, bright location (around 65-70°F). Keep the soil consistently moist but not soggy—water gently from the bottom by placing the container in a shallow tray of water for 10-15 minutes. This prevents disturbing the seeds.
Germination can take 2-6 weeks after removing from cold stratification. You’ll know it’s working when the first tiny green shoots appear. Once seedlings emerge, remove the plastic bag to prevent fungal growth. Watch for true leaves (the second set after the initial cotyledons) before transplanting.
☀️ Step 4: Transplant Seedlings to Individual Pots
When seedlings have 2-3 sets of true leaves, carefully transplant them into 3-inch pots filled with fresh potting mix. Handle the seedlings by their leaves, not the stems, to avoid damaging the delicate roots. Water lightly after transplanting to settle the soil around the roots.
Place the pots under bright, indirect light for the first week to help them adjust. After that, gradually introduce them to 4-6 hours of morning sun daily, increasing exposure over 2 weeks. Avoid direct afternoon sun, which can scorch tender young plants. This slow acclimation prevents shock and encourages strong growth.
✂️ Step 5: Harden Off and Prepare for Outdoor Planting
Once seedlings are 3-4 inches tall and have developed 5-6 sets of leaves, begin hardening them off. Start by placing them outside in a shaded, sheltered spot for 1-2 hours the first day. Gradually increase their outdoor time over 2 weeks, exposing them to more sunlight and wind each day.
By the time they’re ready for the garden, they should tolerate full sun and normal outdoor conditions. Plant them in well-draining soil, spacing them 18-24 inches apart to allow room for growth. Mulch around the base to retain moisture and protect the roots. Roses grown from seed take 2-3 years to bloom, but the wait is worth it for the unique varieties you can’t find elsewhere.
Tips & tricks for perfect rose seed pod sprouts
Here's what I learned after growing dozens of rose varieties from seed—these tricks make all the difference between success and disappointment.
Seed Selection: Not all rose seed pods are created equal. Look for pods that are fully mature (deep brown) and have begun to split naturally—these contain the most viable seeds. I've found that hybrid tea roses and climbers produce the most reliable sprouts. If you're unsure about maturity, squeeze gently: if seeds pop out easily, they're ready. The 4-6 seeds per pod rule is a good guideline, but some varieties may yield more.
Cold Stratification Consistency: The 6-8 weeks at 35-40°F is non-negotiable for breaking rose seeds' natural dormancy. I recommend using a small refrigerator drawer or a dedicated seed fridge to maintain consistent temperatures—home fridge temps can fluctuate wildly. Place a small thermometer inside to monitor conditions. If your fridge runs warmer, extend the stratification period by 1-2 weeks to compensate. The key is mimicking winter conditions that rose seeds would experience in nature.
Humidity Management: That plastic bag in Step 2 serves a crucial purpose—maintaining 90% humidity around the seeds. However, don't seal it completely! Poke a few small holes with a toothpick to allow minimal airflow, which prevents mold growth. I've seen beginners completely seal the bag, leading to fungal issues. After germination begins, remove the bag entirely to prevent damping-off disease in the delicate seedlings. You'll know you've got the right balance when condensation forms on the inside but doesn't drip onto the seeds.
Light Transition Strategy: When moving seedlings to warmth in Step 3, don't rush the light exposure. Start with bright indirect light for the first week—think of it as a gentle wake-up call. I use a south-facing window with sheer curtains for this phase. After that gradual increase to 4-6 hours of morning sun prevents leaf scorch. The morning sun is less intense than afternoon rays, giving seedlings time to acclimate. If you notice yellowing leaves during this transition, you're moving too quickly—back off to indirect light for a few more days.
Pro Tips for Rose Seed Pod
- Here's what I learned after growing dozens of rose varieties from seed—these tricks make all the difference between success and disappointment.
- Seed Selection: Not all rose seed pods are created equal.
- Cold Stratification Consistency: The 6-8 weeks at 35-40°F is non-negotiable for breaking rose seeds' natural dormancy.
Frequently asked questions
Got questions about growing roses from seed pods? You're not alone—this method takes patience and precision! Here are answers to the most common concerns to help you succeed.
What’s the best time to collect rose seed pods?
Harvest seed pods when they’re fully dry and brown (usually late summer to fall). If picked too early, seeds won’t stratify properly. Let them dry indoors for 1–2 weeks before extracting seeds—this mimics winter’s natural drying process.
Why do I need cold stratification, and how long should I do it?
Cold stratification mimics winter, breaking seed dormancy. For rose seed pods, 6–8 weeks in the fridge (moist paper towel + sealed bag) is ideal. Skip this step, and your seeds may never sprout—patience pays off!
Can I grow roses from seed pods without cold stratification?
Technically yes, but success rates drop dramatically. Some seeds may sprout in 2–3 months, but stratification boosts germination from 10% to 50%+. If you’re impatient, try soaking pods in warm water overnight first—though results vary.
How do I know if my rose seeds are viable?
Viable seeds are plump, firm, and dark brown inside the pod. Float-test them: Drop seeds in water—sinkers are likely viable; floaters are probably dead. Discard shriveled or moldy seeds immediately to avoid rot.
My seeds sprouted mold—what went wrong?
Mold = too much moisture or poor airflow. During stratification, keep seeds damp but not soggy (rewrap the paper towel if dry). After planting, use sterilized soil and a shallow tray to prevent fungal issues. Ventilate sprout trays daily!
How long until I see rose seedlings?
With proper stratification, expect sprouts in 4–8 weeks after planting. Keep soil warm (70–75°F) and humid (use a plastic dome or spray bottle). Patience is key—some seeds take up to 3 months to break through!
Wrapping up and next steps
Growing rose seed pods is a rewarding journey that blends patience with the joy of nurturing life from scratch! 🌱 With cold stratification and a little care, you’ll watch tiny sprouts transform into vibrant roses in just six weeks.
Whether you’re a seasoned gardener or a curious beginner, this method makes it easy to propagate your own roses—so why not give it a try?
Ready to take the next step? Start by gathering your seed pods this fall, then follow the guide to kickstart your cold-stratification process. Before you know it, you’ll be enjoying the fruits of your labor—literally—with beautiful blooms gracing your garden! 🌸