
Lawn
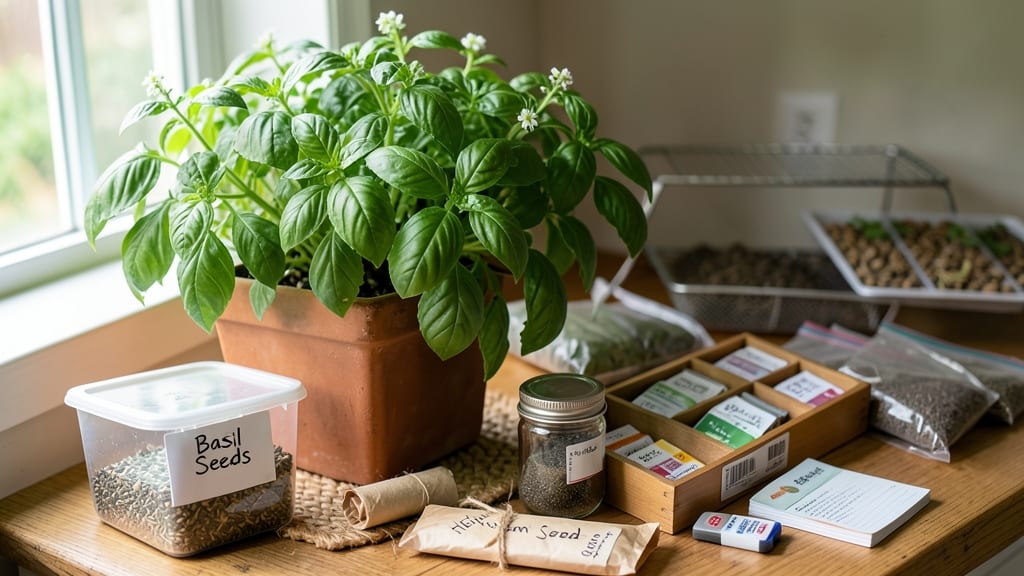
Storing seed packs properly means next year’s garden starts with the freshest possible foundation. ✨ I’ve learned the hard way that damp, warm storage turns viable seeds into dust—so I now treat them like precious heirlooms, not afterthoughts.
The key? Cool, dry, dark conditions that mimic winter dormancy, plus airtight containers that block moisture and light.
You’ll need airtight containers (glass jars or Mylar bags work best), a dehumidifier or silica gel packets, and permanent markers for labeling. Most seed packs last 3–5 years under ideal conditions, but some (like onions or leeks) only keep for 1 year—so always check the packet for storage notes.
The biggest mistake? Storing seeds in the fridge without protection—the condensation ruins them faster than heat ever could.
Test viability before planting by filling a glass with water, dropping 10 seeds inside, and counting how many sink. If 8+ float, they’re too old to germinate. Properly stored seeds, though, will sprout 90%+ of the time—meaning stronger starts, higher yields, and fewer replanting headaches.
The payoff? A garden that feels like it’s been growing for decades, not just a season.
Adapt this for any climate: humid areas need extra silica gel, while dry climates can skip it if containers are truly airtight. Label with the variety, date, and germination rate—trust me, you’ll thank yourself in March when you’re ready to sow.
Here’s how to set it up right the first time.
📚 In This Guide
- What you need
- Instructions
- Tips and common mistakes
- Wrapping up and next steps
What you need
- ● Seed packs – Any variety you plan to save (check expiration dates if reseeding).
- ● Air-tight containers – 2-3 glass jars (quart or pint size) or Mylar bags with zip locks.
- ● Silica gel packets – 1-2 per container (for moisture control).
- ○ Food-grade desiccant – Optional but effective (e.g., rice or uncooked beans).
- ● Permanent marker – For labeling seed types and dates.
- ● Small paper bags or envelopes – If storing seeds loose (to prevent clumping).
- ● Digital thermometer/hygrometer – To monitor temp (ideal: 32–41°F) and humidity (5–10%).
- ○ Vacuum sealer – For extra-long-term protection (optional but ideal).
- ● Cool, dark storage space – A basement, fridge, or seed vault (avoid attics or garages).
- ● Aluminum foil or blackout bags – To block light (if storing in opaque containers).
Step-by-Step instructions for storing seed packs long-term
Here’s how to preserve your seeds through seasons—no fancy equipment needed.
🪴 Step 1: Dry Seeds Completely Before Storage
Remove seeds from their original packaging and spread them on a clean, dry surface. Let them air-dry for 3-5 days in a cool, dark place—a paper towel works perfectly. You’ll know they’re ready when they feel dry to the touch and break with a crisp snap, not a bend. Humidity is the enemy here; even slightly damp seeds will rot in storage.
For extra insurance, place the seeds in a single layer on a mesh screen or paper towel. This prevents moisture buildup between seeds. Avoid plastic containers at this stage—they trap humidity and encourage mold. If you’re in a humid climate, consider using a small fan on low to speed up drying.
⏰ Step 2: Choose the Right Storage Containers
Use airtight, moisture-proof containers like glass jars, metal tins, or heavy-duty plastic containers with tight seals. Mylar bags with oxygen absorbers work too, but they require extra care to seal properly. Label each container with the seed variety, date, and germination rate—a Sharpie on the lid works best. I like to add a small silica gel packet inside to absorb any lingering moisture.
Never store seeds in paper envelopes or plastic bags with loose ties. Even a tiny gap lets moisture seep in, drastically shortening shelf life. For bulk storage, divide seeds into smaller containers—1-2 ounces per jar is ideal. This keeps them organized and makes it easier to access just what you need without disturbing the rest.
☀️ Step 3: Store in a Cool, Dark, Stable Environment
Place your sealed containers in a consistently cool spot—32-41°F is perfect. A refrigerator’s crisper drawer works well, but avoid the freezer (temperature fluctuations damage seeds). Basements or root cellars are ideal if you have them. The key is stability: seeds hate temperature swings, which cause condensation inside the container.
Check your storage spot once a year. If you notice condensation on the outside of the containers, move them immediately to a drier location. Seeds can last 5-10 years under these conditions, but some varieties (like onions or leeks) degrade faster—2-3 years max. Always test a few seeds before planting to confirm viability.
🌱 Step 4: Test Germination Before Planting Next Season
Before committing to a full planting, test a handful of seeds from each variety. Place 10 seeds between damp paper towels in a sealed plastic bag. Keep them in a warm (70-75°F), dark place for 7-10 days. Check daily for sprouts—50% or more means your seeds are still good. If fewer than half sprout, reduce the number of seeds you plant or consider sourcing fresh ones.
This step saves time and heartache. I’ve had old seed packets that looked fine but failed to germinate. A quick test tells you exactly what to expect before you spend time in the garden. Discard any seeds that don’t pass the test—old seeds lose vigor, and you’ll get better results with fresh ones.
Tips & tricks for perfect seed pack storage
Here’s what I’ve learned after years of storing seeds—these details make all the difference between seeds that last and seeds that fail.
Drying Secrets: That 3-5 day drying window in Step 1 is non-negotiable, but humidity can sneak up on you. If your climate is damp, place a small fan on low near your drying surface—it creates gentle airflow without disturbing the seeds. I’ve seen seeds go from perfectly dry to moldy overnight when left in a still, humid room. Also, test dryness by gently bending a seed—it should snap cleanly, not bend like taffy.
Container Intelligence: Glass jars are my top pick for long-term storage, but if you choose Mylar bags, seal them in a vacuum sealer first. I’ve had bags fail when the oxygen absorbers weren’t properly activated—always check the package instructions. For the 1-2 ounces per jar guideline, smaller containers actually work better because you avoid disturbing seeds when accessing them later. Labeling with a Sharpie won’t last forever, so consider using masking tape for extra durability.
Temperature Stability: The 32-41°F range in Step 3 is critical, but what matters more is consistency. I store mine in the back of my fridge’s crisper drawer (not the door—temperature fluctuates there). If you’re using a basement, avoid areas near exterior walls where cold air seeps in. Pro tip: Place a small thermometer near your storage spot to monitor—even a 5°F swing can cause condensation inside containers over time.
Germination Test Hack: When testing viability in Step 4, use a clear plastic bag instead of opaque ones—you’ll spot sprouts earlier. I also add a tiny drop of water to the paper towel before sealing, which creates a more even moisture environment. If you’re short on time, check for sprouts at day 5 instead of waiting the full 7-10 days—you might get your answer sooner without risking mold growth.
Pro Tips for Seed Pack Storage
- Here’s what I’ve learned after years of storing seeds—these details make all the difference between seeds that last a...
- Drying Secrets: That 3-5 day drying window in Step 1 is non-negotiable, but humidity can sneak up on you. If your cli...
- Container Intelligence: Glass jars are my top pick for long-term storage, but if you choose Mylar bags, seal them in ...
Frequently asked questions
Got questions about keeping your seed packs fresh for next season? You’re not alone!
Here are some of the most common concerns—and expert answers—to help you store seeds like a pro.
How long can I store seed packs before they lose viability?
Most seed packs last 1–5 years depending on the type. Check the packaging date (if available) or use the USDA seed viability chart. Store them properly, and many—like grass seed—can stay good for 3–4 years. For heirlooms or rare varieties, test germination before planting!
What’s the best temperature and humidity for seed storage?
Keep seeds in a cool (32–41°F), dry (30–50% humidity) space, like a fridge or climate-controlled basement. Avoid moisture, heat, or light, which speed up degradation. A dehumidifier or silica gel packets can help if humidity’s an issue.
Can I reuse seed pack containers for storage?
Yes! Clean, dry containers (like airtight jars or Mylar bags) work great. Just label them with the seed type and date. Avoid plastic bags alone—they trap moisture. For extra protection, add a desiccant or oxygen absorber.
What if my seeds sprout mold or smell bad?
Discard them immediately—moldy or musty seeds won’t grow and may harbor harmful bacteria. If seeds feel damp or smell off, they’ve absorbed moisture. Store them in a dry, well-ventilated space next time, and check periodically. Prevention is key!
Are there alternatives to seed packs for long-term storage?
For bulk storage, try:
- Paper envelopes (breathable, low-tech)
- Glass jars (airtight + reusable)
- Vacuum-sealed bags (removes oxygen to slow aging)
- Seed banks (for rare varieties—check local options!)
Wrapping up and next steps
Proper seed pack storage is your secret weapon for ensuring next year’s garden thrives—no guesswork, just reliable results! 🌱 By controlling temperature, humidity, and light, you’re not just preserving seeds; you’re investing in healthier plants and bountiful harvests.
Whether you’re a seasoned gardener or just starting out, these strategies make seed storage simple and stress-free.
Ready to take the next step? Audit your seed stash today—organize, label, and store your packs with confidence. Your future garden (and your wallet!) will thank you. 🌿