
Propagation
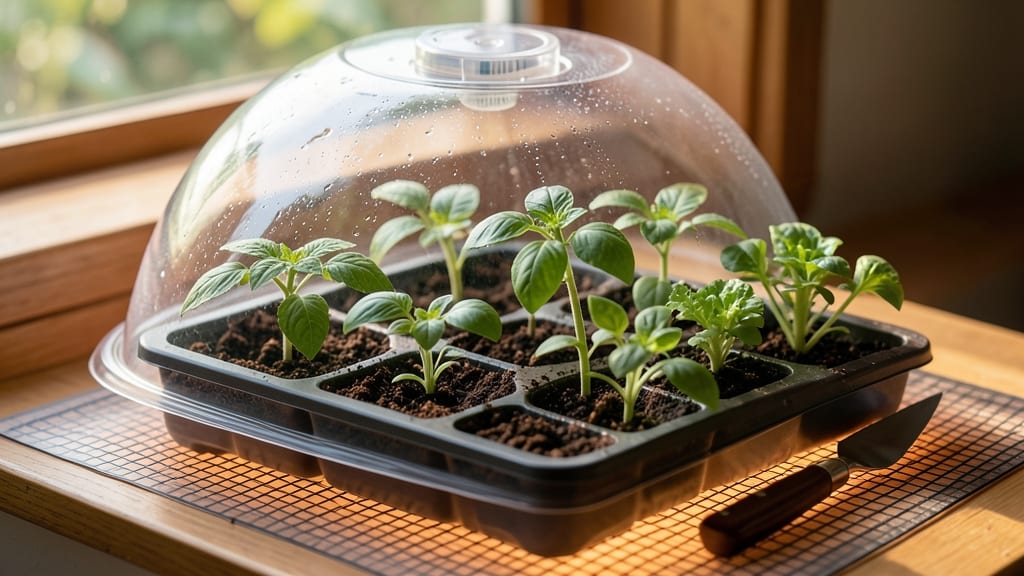
Your seeds could sprout in 7 days instead of 21—warming mats make that possible. 🌱 I’ll never go back to waiting weeks for germination after discovering how these simple tools transform my seed-starting routine. The secret? Consistent, gentle heat that mimics spring conditions without the fuss of heat lamps.
These mats work by providing bottom heat—exactly what cool-season seeds crave. You’ll see faster germination, stronger roots, and healthier seedlings that outpace their unheated counterparts. Perfect for tomatoes, peppers, and herbs, they’re especially helpful when your windowsill stays chilly.
Just place them under your seed trays, plug them in, and let the magic happen.
With warming mats, you’ll avoid the frustration of slow starts or uneven sprouting. The key is monitoring temperature—most seeds thrive between 70-85°F, but check your seed packets for specifics. Overheating can scorch seeds, while too little heat defeats the purpose. A simple infrared thermometer solves this problem.
This method works for any seed type, whether you’re growing veggies, flowers, or herbs. Once you try it, you’ll wonder how you ever started seeds without them. Let’s get those trays warmed up!
📚 In This Guide
- What you need
- Instructions
- Tips and common mistakes
- Wrapping up and next steps
What you need
- ● Seed Starting Warming Mat – 1 (choose a size that fits your seed tray; common options are 10" x 20" or 12" x 24" for standard trays). Look for 10-15W mats for optimal heat output.
- ● Seed Trays or Containers – 1 or more (ensure they fit snugly on the mat; plastic or biodegradable options work well).
- ● Seed Starting Mix – 1 bag (sterilized, lightweight mix designed for seedlings; avoid garden soil to prevent compaction and disease).
- ● Seeds – Your chosen variety (check seed packets for specific planting depths and spacing).
- ● Spray Bottle – 1 (for gentle watering to avoid disturbing seeds).
- ○ Clear Plastic Dome or Plastic Wrap – 1 (optional but recommended for humidity; use a dome that fits over your tray or cut plastic wrap to size).
- ● Timer or Smart Plug – 1 (to regulate mat usage; most seeds thrive with 12-16 hours of warmth daily).
- ● Grow Lights – 1 (LED or fluorescent, 12-16 hours/day) for seedlings needing extra light before transplanting.
- ● Thermometer – 1 (to monitor soil temperature; ideal range is 70-85°F for most seeds).
- ● Labeling Sticks or Tags – 10+ (to track seed varieties and planting dates).
- ● Heat Mat Cover – 1 (if your mat doesn’t have built-in insulation; helps maintain even warmth).
- ● Humidity Tent Kit – 1 (for seeds that love high moisture, like orchids or ferns).
How to use seed starting warming mats for faster germination
Here’s my go-to method for cutting germination time in half—no fuss, just consistent heat.
🌱 Step 1: Prepare Your Seed Trays and Soil
Fill your seed trays with moistened seed-starting mix—never garden soil, as it’s too dense and may harbor pathogens. I like to press the mix down gently with my fingers until it’s firm but still light, like a damp sponge. This ensures even moisture distribution without compacting the soil too tightly. Tap the tray lightly on the table to settle everything evenly.
Sow your seeds according to packet instructions, then cover them with a thin layer of soil—about ¼ inch deep for most seeds. Mist the surface lightly with water if it feels dry, but avoid soaking it. The goal is to keep the soil damp, not soggy. Place the tray on the warming mat, making sure the mat covers the entire surface area of the tray.
💧 Step 2: Set the Mat and Monitor Moisture
Plug in the warming mat and set the temperature to 75–85°F—this is the sweet spot for most seeds. You’ll see a gentle warmth radiating from the mat, which is exactly what you want. Cover the tray with a clear plastic dome or plastic wrap to trap humidity, but leave a tiny gap for airflow. This prevents condensation buildup, which can suffocate seedlings.
Check the soil daily—it should feel consistently damp, like a wrung-out sponge. If the top layer feels dry, mist it lightly with water. Overwatering here is easy to do, but dampness is key for germination. I like to use a spray bottle to avoid disturbing the seeds. Once you see the first signs of sprouts, remove the dome immediately to prevent damping-off disease.
☀️ Step 3: Provide Supplemental Light After Sprouting
The moment your seedlings break through the soil, move them to a bright, indirect light source—a south-facing window or a grow light positioned 2–4 inches above the plants. Without enough light, seedlings will stretch toward the light source, becoming leggy and weak. You’ll know they’re getting enough light when they grow sturdy and compact, with dark green leaves.
If your seedlings start leaning toward one side, rotate the tray a quarter turn daily to encourage even growth. This simple step prevents them from growing lopsided. Keep the warming mat plugged in for another 3–5 days after germination to support early root development, then you can unplug it once the seedlings have their first true leaves.
⏰ Step 4: Harden Off and Transplant
After 10–14 days of growth, when seedlings have 2–3 sets of true leaves, it’s time to harden them off. Start by moving the tray to a shaded outdoor spot for 1–2 hours the first day. Gradually increase their time outside over 7–10 days, exposing them to more sunlight and wind each day. This prepares them for life in the garden.
When transplanting, handle seedlings by their leaves—not the stems—to avoid damaging the delicate roots. Plant them at the same depth they were growing in the tray, and water them deeply right after transplanting. The warming mat has done its job, but now it’s up to the soil to keep them thriving.
Tips & tricks for heat-activated seed germination
These small adjustments can make all the difference between struggling seedlings and thriving plants that pop up in record time.
Temperature Precision: The 75–85°F range is ideal because it mimics the heat seeds experience in nature when buried just below the soil surface. Use a small thermometer to verify your warming mat's output—some models run hotter than advertised. If your kitchen stays cool, consider placing the tray on a second warming mat or using a small heat lamp to maintain consistent warmth.
Soil Science: In Step 1, when pressing the seed-starting mix, think "firm but fluffy"—like packing snow for a snowman. This balance prevents air pockets that can suffocate seeds while still allowing roots to penetrate easily. Pro tip: If your mix feels too dry after pressing, add a fine mist of water and press again. The goal is dampness without creating mud.
Dome Management: The plastic dome in Step 2 creates a greenhouse effect, but too much condensation can drown your seeds. Remove the dome for 10–15 minutes daily to refresh airflow, especially in humid conditions. You'll know it's working right when tiny water droplets form on the inside but don't pool on the soil surface.
Light Transition: When moving seedlings to light in Step 3, position the grow light so it's just above the tallest seedlings—not centered over the tray. This prevents the strongest light from creating "shadow seedlings" that grow toward it while others stay weak. Rotate the tray daily to ensure even exposure, even if your light source isn't perfectly centered.
Pro Tips for Seed Starting Warming Mats
- These small adjustments can make all the difference between struggling seedlings and thriving plants that pop up in record time.
- Temperature Precision: The 75–85°F range is ideal because it mimics the heat seeds experience in nature when buried just below the soil surface.
- Soil Science: In Step 1, when pressing the seed-starting mix, think "firm but fluffy"—like packing snow for a snowman.
Frequently asked questions
How long should I keep seeds on a warming mat?
A warming mat typically speeds up germination in 3–7 days, depending on the seed type. Most seeds (like tomatoes, peppers, or herbs) benefit from 12–24 hours of warmth per day until sprouts appear. Once they break through soil, remove them from the mat to prevent overheating.
Can I use a warming mat 24/7?
No—continuous heat is unnecessary and risky. Seeds need a cool-down period (like nighttime) to mimic natural cycles. Run the mat for 12–16 hours/day, then let seeds rest. Overheating can kill seeds or cause mold.
What if my warming mat isn’t working?
First, check the power source (plug it in directly, not through a power strip). If it’s still cold, test the temperature setting—some mats auto-adjust. For stubborn issues, try a backup heat source (like a seedling heat mat with a built-in thermostat) or troubleshoot the wiring.
Are warming mats worth it compared to other heat methods?
Yes! Warming mats are gentler, more consistent, and safer than DIY methods (like heating pads or incandescent bulbs). They provide even warmth without drying out soil and are reusable for multiple growing seasons. Budget options start around $20–$40.
What’s the ideal temperature for seed germination?
Most seeds thrive at 70–85°F (21–29°C), but check seed packets—some (like cold-hardy veggies) prefer 50–60°F (10–15°C). Warming mats typically hit 80–85°F, so monitor with a seedling thermometer to avoid overheating delicate seeds.
Wrapping up and next steps
Seed starting warming mats are a game-changer for gardeners eager to jumpstart their growing season! With consistent warmth and precise control, you’ll watch tiny seeds transform into sturdy seedlings in just 7 days—no guesswork, no waiting.
Whether you’re a beginner or a seasoned green thumb, these mats simplify the process, making germination easy and reliable. 🌱
Ready to turn your seed dreams into a thriving garden? Grab a warming mat, follow the steps, and let the magic of heat-activated growth work for you. Your future harvest starts now!