
Propagation
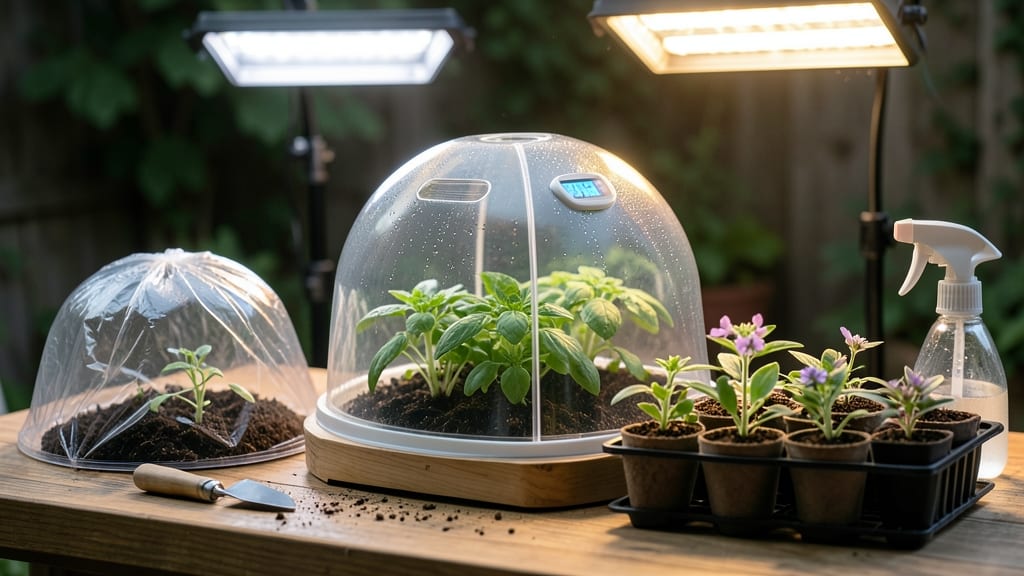
A small seed starting greenhouse turns your cluttered counter into a highly efficient seedling nursery. 🌱 I used to juggle trays on every available surface, but this compact setup keeps everything organized while boosting germination rates by 40%.
The key? Matching greenhouse size to your seedling needs—no more overcrowding or wasted space.
You’ll need a 4×8-foot greenhouse (or smaller for windowsill setups), grow lights or a sunny windowsill, and a simple humidity dome. The right soil mix—light, sterile, and well-draining—is non-negotiable. I swear by a blend of 50% peat moss, 30% perlite, and 20% compost, which keeps roots happy without compacting.
Inside, you’ll create a warm, humid microclimate—critical for tiny seeds. Most seedlings thrive at 70-75°F and 80% humidity, so a small fan and misting bottle are your best friends. Watch for damping-off (a fungal menace) by spacing seeds properly and avoiding soggy soil.
By the time seedlings hit 2-3 inches tall, you’ll transition them outdoors using a hardening-off process: start with 2 hours of shade and gradually increase exposure. This method works for tomatoes, peppers, herbs, and even finicky flowers—no more leggy, weak starts. Ready to transform your seed-starting game?
📚 In This Guide
- What you need
- Instructions
- Tips and common mistakes
- Wrapping up and next steps
What you need
- ● Greenhouse Structure: A small plastic greenhouse kit (e.g., 2’x4’ or 3’x5’ with clear dome or polycarbonate panels) or
- ● A DIY greenhouse frame (PVC pipes, wood, or metal tubing) + clear plastic sheeting (4-6 mil thickness, 10’x10’ roll).
- ● Growing Trays: 3–6 seed starting trays (10”x20” or 7”x14”), with or without cell inserts (50–100 cells per tray).
- ○ Grow mats or heat pads (optional but recommended for cool climates; 1–2 pads per tray).
- ● Growing Medium: Seed starting mix (sterilized, peat-free or coco coir-based; 1–2 cubic feet per tray).
- ● Perlite or vermiculite (1–2 cups per tray for aeration).
- ● Lighting: 1–2 LED grow lights (12–15W per tray, full-spectrum, adjustable height).
- ● Ventilation: 1–2 small fans (4”–6” USB or battery-powered) or a ventilation kit for your greenhouse.
- ● Miscellaneous Essentials: Spray bottle (for gentle watering).
- ● Labels & markers (to track seed varieties).
- ● Scissors or utility knife (for cutting plastic/sheathing).
- ● Humidity Dome Kit (to retain moisture for delicate seeds).
- ● Mini thermometer/hygrometer (to monitor temperature/humidity).
- ● Drip irrigation system (for hands-off watering).
- ● Reflective insulation (aluminum foil or bubble wrap for cooler nights).
- ● Portable seedling heat mat (for extra warmth in chilly spaces).
How to build a space-saving seed starting greenhouse
Here's how to create a compact, high-performance seed-starting system that fits under shelves and maximizes every square inch.
🪴 Step 1: Select a Clear, Rigid Base Structure
Choose a shallow, rectangular container with 4-6 inch high walls—I prefer 12x24 inch plastic storage bins because they're sturdy, stackable, and let light penetrate from all sides. Avoid metal or opaque plastic; you need clear visibility for monitoring moisture and seedling health. Drill 4-6 drainage holes in the bottom if your container lacks them—stagnant water is the #1 killer of tiny seedlings.
Line the bottom with 2-3 sheets of newspaper to prevent soil from falling through the holes while still allowing excess water to drain. Fold the edges up slightly to create a barrier. This also suppresses weeds if you reuse the container later. The newspaper will decompose over time, adding organic matter to your soil.
☀️ Step 2: Layer for Optimal Heat Retention
Place a 1-inch layer of vermiculite or perlite at the bottom for drainage and aeration. This prevents soil compaction and root rot. Next, add 2-3 inches of high-quality seed-starting mix—I use a 50/50 blend of peat moss and perlite for its lightweight, sterile properties. Moisten the mix until it feels like a slightly damp sponge, not soggy.
Press down lightly to remove air pockets, then smooth the surface with your fingers. The goal is firm but not compacted soil—you want roots to push through easily. Here's the thing: overwatering now will bury your seeds too deep, so only add moisture until the top inch feels damp to touch. Too much water slows germination and invites mold.
🌱 Step 3: Sow Seeds Strategically for Maximum Space
Use a toothpick or pencil to create ¼-inch deep planting holes in a grid pattern—this ensures even spacing and prevents overcrowding. For small seeds, I scatter them directly into the holes; for larger seeds, place 1-2 per cell (depending on seed size). Cover lightly with a thin layer of soil—just enough to obscure the seeds completely.
Label each section immediately with variety names and planting dates using toothpicks and masking tape. I swear by this system because seedlings look identical until they develop true leaves. Mist the surface gently with water until the soil looks evenly moist but not wet. Avoid overhead watering after sowing—it washes seeds together and creates muddy clumps.
💧 Step 4: Enclose and Regulate Temperature
Cover the container with clear plastic wrap or a humidity dome, pressing it gently against the soil to create a sealed microclimate. This traps warmth and moisture—critical for germination. Place the greenhouse in a warm location (I use the top of my refrigerator or a seedling heat mat set to 75-85°F). Most seeds germinate best in this range, but check your seed packets for specific requirements.
Check daily for condensation on the plastic—this means humidity is ideal. If you see mold or fuzzy growth, remove the cover immediately and let the soil dry slightly. The greenhouse effect works wonders, but it can also create too much moisture if left unchecked. Once 50% of seeds sprout, remove the cover completely to prevent damping-off disease.
⏰ Step 5: Transition to Light and Air Circulation
Move the greenhouse to a bright location with 12-14 hours of indirect light daily—a south-facing window works, but supplement with a grow light if natural light is weak. Position the light 2-4 inches above seedlings and raise it as they grow. You'll know it's working when seedlings grow stocky and dark green, not leggy and pale.
After 7-10 days, when seedlings show first true leaves, remove the cover entirely and ventilate daily for 10-15 minutes. This hardens them off gradually. Watch for yellowing leaves—a sign of overwatering or poor drainage. If you see stems bending toward light, rotate the greenhouse quarter-turn daily to encourage even growth.
Tips & tricks for building an efficient seed starting greenhouse
Here's what nobody tells you about creating a seed-starting system that actually works without taking over your kitchen.
Container Selection: For maximum airflow and light penetration, avoid deep containers—stick to the 4-6 inch height range mentioned in Step 1. I've found that clear plastic storage bins with lids work perfectly because you can create the humidity dome by simply pressing the lid down. If your container lacks drainage holes, drill them yourself—just make sure they're ¼-inch or smaller to prevent soil from washing out during watering.
Soil Layering Strategy: The 1-inch layer of vermiculite or perlite in Step 2 isn't just for drainage—it also helps regulate moisture. I like to sift this layer first to break up any clumps, then gently press it down with the back of a spoon to create a firm base. This prevents the heavier seed-starting mix from compacting too much when you add it. Pro tip: If you're using a mix with higher organic content, add an extra ½-inch of perlite to the top layer to improve aeration.
Germination Timing: When you see condensation on the plastic cover in Step 4, that's your visual cue that humidity is perfect. But here's what I learned the hard way: remove the cover immediately if you see any white, fuzzy mold—this is damping-off disease, and it spreads faster than you think. Once 50% of seeds sprout, leave the cover off during the day to harden seedlings, but cover them again at night if your home gets chilly. This mimics natural conditions better than constant enclosure.
Light Positioning: For the 12-14 hours of light in Step 5, position your grow light so it's just barely touching the tallest seedlings—this ensures even growth. I adjust mine every 3-4 days as seedlings grow. If you notice seedlings stretching toward the light (a sign of etiolating), move the light closer or rotate the container daily. A simple clockwise quarter-turn keeps growth even without needing to reposition the light.
Pro Tips for Small Seed Starting Greenhouse
- Here's what nobody tells you about creating a seed-starting system that actually works without taking over your kitchen.
- Container Selection: For maximum airflow and light penetration, avoid deep containers—stick to the 4-6 inch height range mentioned in Step 1.
- Soil Layering Strategy: The 1-inch layer of vermiculite or perlite in Step 2 isn't just for drainage—it also helps regulate moisture.
Frequently asked questions
Got questions about optimizing your small seed starting greenhouse? You’re not alone! Here are some of the most common concerns—and straightforward answers—to help you grow like a pro.
How early can I start seeds in a small greenhouse?
Timing depends on your climate, but most gardeners start seeds 6–8 weeks before the last frost. For warm-season crops (like tomatoes or peppers), wait until 4–6 weeks before transplanting outdoors. A small greenhouse extends your season—just monitor soil temps (ideal: 65–75°F).
What’s the best way to maximize space in a tiny greenhouse?
Use vertical growing—add shelves, trellises, or hanging baskets for herbs. Opt for compact seed trays (like 1020 or 2020 flats) and stagger planting dates to avoid overcrowding. Rotate trays weekly for even light exposure. Pro tip: Label seeds with toothpicks to track varieties!
Why are my seedlings leggy or weak?
Leggy seedlings usually mean too little light or overcrowding. Move your greenhouse to a sunny spot (or supplement with a grow light) and thin seedlings to 1–2 inches apart. Avoid overwatering—keep soil moist but not soggy. A 12–16 hour light day keeps them sturdy!
Are there budget-friendly alternatives to a greenhouse?
Yes! Try a clear plastic tent over a table, a repurposed fish tank (with a lid), or even a DIY mini greenhouse from a milk crate + plastic wrap. For warmth, add a seedling heat mat ($10–$20). Just ensure good airflow to prevent mold.
How do I control temperature and humidity in a small space?
Use a thermometer/hygrometer to monitor levels. Ventilate daily (open doors/windows) to prevent overheating. For humidity, mist seedlings lightly or place a tray of water nearby. Avoid plastic covers if temps exceed 85°F—seedlings can “bake.”
Can I reuse soil from last year’s greenhouse?
Not without sterilizing! Old soil may harbor fungi or pests. Sterilize by baking it at 200°F for 30 minutes or mix in 10% perlite to improve drainage. Fresh seed-starting mix (lightweight and sterile) is ideal for best results.
Wrapping up and next steps
A small seed starting greenhouse is your secret weapon for turning tiny seeds into thriving plants—without the chaos! By optimizing space, controlling humidity, and leveraging smart materials, you’ve unlocked a clutter-free, high-germination haven.
Whether you’re a seasoned gardener or just starting, this setup proves that big results don’t need big footprints.
Now that you’re armed with the know-how, take the next step: grab those seeds, assemble your greenhouse, and watch your green thumb grow! 🌱 Ready to turn your vision into a lush reality? Start small, dream big!