
Lawn
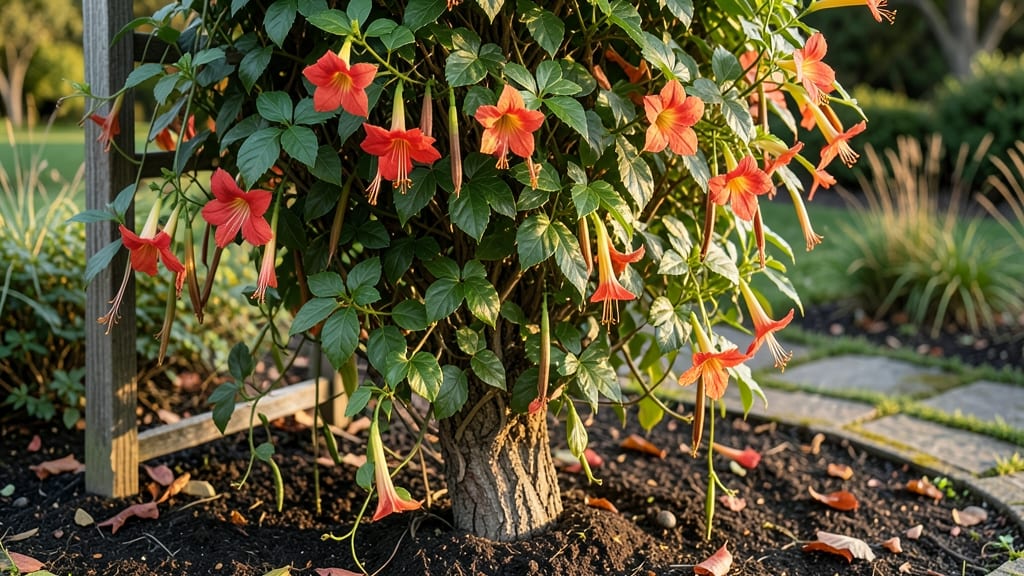
Trumpet creeper seed pods hold the secret to growing your own vibrant orange vines—if you know how to test their viability first. 🌿 I’ve cracked the code after years of watching these pods twist and split at the wrong times, and the trick is simpler than you’d think: a quick twist-free check before planting.
The key is timing—harvest pods when they’re plump but still firm (late summer to early fall), then let them dry indoors for a week. Once they’re brittle, gently twist open the pod to check for healthy seeds inside.
Viable seeds are plump and cream-colored; discard any that look shriveled or dark. You’ll end up with seedlings that emerge in 2-4 weeks when planted in warm soil, and these vines grow aggressively—think 30 feet in a single season if given space.
The orange trumpet-shaped blooms arrive by midsummer, attracting hummingbirds and adding bold color to trellises or fences. Works best in zones 6-9, but even in cooler climates, you can start seeds indoors in early spring. Just be ready for fast growth—they’ll need pruning to keep them in check!
📚 In This Guide
- What you need
- Instructions
- Tips and common mistakes
- Wrapping up and next steps
What you need
- ● Mature trumpet creeper seed pods – Collect at least 20-30 pods (more = better data!). Ensure they’re fully dry and slightly papery to touch.
- ● Paper towels or coffee filters – 2-3 sheets per batch of pods (for moisture control). Opt for unbleached, seed-safe options.
- ● Plastic ziplock bags – 3-5 quart-sized bags (or reusable silicone bags for eco-friendliness). Poke 5-10 small holes in each for airflow.
- ● Spray bottle with water – A fine-mist setting works best to avoid oversaturating pods.
- ● Permanent marker – For labeling bags with dates (e.g., "Tested Jan 2024").
- ● Small notebook or spreadsheet – Track pod viability over time (include columns for date, pod count, and germination status).
- ○ Optional but helpful: Grow lights or a sunny windowsill (if testing indoors).
- ● Seed-starting trays with soil (for transplanting viable seeds).
- ● Ruler or measuring tape (to monitor seedling growth).
How to test trumpet creeper seed pods for germination success
Skip the guesswork—this foolproof method reveals which pods will sprout before you plant.
🌱 Step 1: Harvest and Dry the Seed Pods Properly
Pick mature trumpet creeper seed pods when they turn brown and papery—they should open slightly on their own. Place them in a single layer on a paper towel in a well-ventilated area (like a mesh bag) for 7-10 days. This drying process prevents mold and ensures the seeds inside stay viable.
Check daily for moisture buildup—if the pods feel damp, spread them out again. You’ll know they’re ready when they rattle slightly when shaken (a sign the seeds are loose inside). Avoid direct sunlight here; it can overheat the pods and reduce germination rates.
💧 Step 2: Perform the Twist Test for Viability
Take a single dried pod and hold it firmly between your thumb and index finger. Gently twist it—if it snaps cleanly with a slight crack, the seeds inside are likely viable. If it bends or feels mushy, discard it. This test works because healthy trumpet creeper pods have a fibrous, dry interior that resists twisting.
I like to test 5-10 pods at once to gauge overall seed quality. Set aside the pods that pass—you’ll use these for planting. Real talk: Even "good" pods might not all germinate, so having extras ensures you’ll get strong starts.
☀️ Step 3: Stratify Seeds for Faster Germination
Trumpet creeper seeds need stratification to break dormancy. Place the viable seeds in a ziplock bag with a damp paper towel (not soaking wet—just enough to feel slightly damp). Seal the bag and refrigerate for 4-6 weeks. This mimics winter conditions and tricks the seeds into thinking it’s time to grow.
Check the bag weekly to ensure the towel stays moist. If it dries out, spritz it lightly with water. After 4 weeks, transfer the bag to a warm spot (65-75°F) for another 2 weeks. You’ll see tiny roots or sprouts peeking out of the seeds—this is your signal they’re ready to plant.
🌿 Step 4: Plant Prepped Seeds in Ideal Conditions
Fill small pots (2-3 inches deep) with well-draining potting mix (trumpet creeper hates soggy roots). Plant 2-3 seeds per pot, ¼ inch deep, and lightly cover with soil. Water gently until the soil is evenly moist but not soggy. Place the pots in a warm, bright spot (like a sunny windowsill) where temperatures stay above 60°F.
Germination takes 2-4 weeks—patience is key. Keep the soil moist (not wet) and avoid moving the pots until you see first true leaves (not the tiny seed leaves). Once seedlings emerge, thin to the strongest one per pot to give it room to grow.
⏰ Step 5: Transplant After Hardening Off
When seedlings reach 3-4 inches tall and have 3-4 sets of true leaves, it’s time to harden them off. Start by placing them outside in a shaded, sheltered spot for 1-2 hours the first day. Gradually increase their outdoor time over 10-14 days, ending with a full day in the sun. This prepares them for their permanent home.
Trumpet creeper thrives in full sun and well-draining soil, so choose a spot with these conditions. Plant in spring or early fall to avoid heat stress. After transplanting, water deeply and mulch to retain moisture—you’ll see vigorous growth within weeks.
Tips & tricks for testing trumpet creeper seed pods
Here's what nobody tells you about making this process foolproof—these little details make all the difference.
The Drying Factor: In Step 1, spread those pods on a paper towel in a single layer—this isn't just about airflow, it's about preventing mold. I learned this the hard way after ruining three batches with damp pods. Use a mesh bag or even a colander with holes to keep the airflow going strong. The 7-10 day drying time is critical—don't rush it!
Twist Test Precision: When performing the twist test in Step 2, focus on the sound as much as the feel. A clean snap with a slight crack means viable seeds, but if it makes a dull thud or bends without resistance, those seeds are likely dead. I test 5-10 pods at once to get a good sample—this gives me confidence I'm working with quality seeds for planting.
Stratification Secrets: During Step 3's stratification, don't be afraid to get creative with your warm spot. I've used everything from a sunny windowsill to a seedling heat mat. The key is maintaining that 65-75°F range consistently. If your fridge is too cold, try the vegetable crisper drawer—it's often warmer. And remember, the damp towel should feel like a wrung-out sponge, not a soaking wet washcloth.
Pro Tips for Trumpet Creeper Seed Pods
- Here's what nobody tells you about making this process foolproof—these little details make all the difference.
- The Drying Factor: In Step 1, spread those pods on a paper towel in a single layer—this isn't just about airflow, it's about preventing mold.
- Twist Test Precision: When performing the twist test in Step 2, focus on the sound as much as the feel.
Frequently asked questions
Got questions about trumpet creeper seed pods? You're not alone! Here are some of the most common queries—plus straightforward answers to help you navigate growing, harvesting, and troubleshooting this vibrant vine.
When are trumpet creeper seed pods ready for harvest?
Seed pods typically mature in late summer to early fall (August–October) when they turn brown and begin to split open. Harvest them just before they burst to preserve seed viability. Look for pods that are dry and papery—they’ll rattle when shaken!
How do I test if trumpet creeper seeds are viable?
Fill a glass with water, add the seeds, and wait 15–20 minutes. Viable seeds sink (they’re ready to plant!), while floaters are non-viable. For extra accuracy, try the paper towel test: Moisten a towel, place seeds between two layers, and check for sprouting in 3–5 days.
What should I do if my trumpet creeper seed pods won’t open?
Pods may resist opening due to high humidity or immature seeds. Try these fixes:
- Dry them indoors on a mesh screen for 1–2 weeks in a warm, dry spot.
- Gently slit the pod with scissors if it’s stubborn (but only after confirming seeds are fully dry).
- Plant the pod intact—sometimes nature handles it underground!
Can I grow trumpet creeper from seed pods, or should I buy plants?
You absolutely can grow from seed pods—it’s cost-effective and fun! However, seedlings may take 1–2 years to flower/vine. For faster results, buy established plants from nurseries, but save seeds for future batches. Pro tip: Stratify seeds (mix with damp sand, refrigerate 4–6 weeks) to mimic winter and boost germination.
Are trumpet creeper seed pods invasive in my area?
Trumpet creeper (Campsis radicans) is highly invasive in many U.S. states (e.g., California, Florida, Texas). Check your state’s invasive species database before planting. If concerned, opt for non-invasive alternatives like crossvine (Bignonia capreolata) or passionflower (Passiflora spp.).
Bonus Tip: Storing Trumpet Creeper Seeds
Store seeds in a cool, dry place (like a sealed jar with silica gel packets) for up to 2 years. Label with the harvest date to track freshness. For long-term storage, freeze seeds in a vacuum-sealed bag for 5+ years!
Wrapping up and next steps
Growing trumpet creeper from seed pods is a rewarding journey that unlocks vibrant, low-maintenance beauty for your lawn or garden. 🌿 Whether you're testing viability with the twist-free method or planning for year-round harvesting, patience and a little creativity will pay off in stunning, fast-growing vines.
Ready to transform your outdoor space? Start by gathering your seed pods this season and take the first step toward a lush, green retreat!