
Lawn
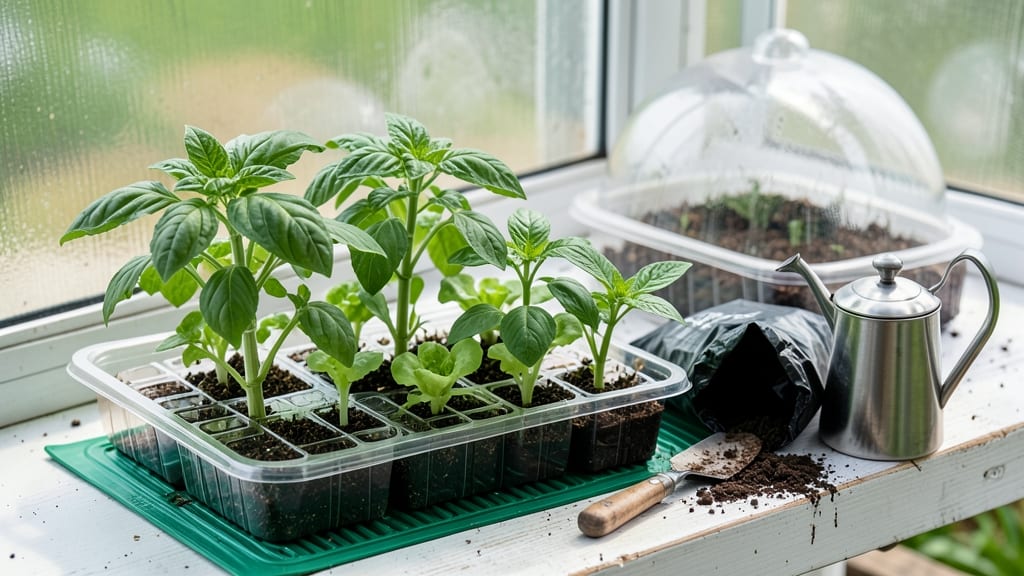
Lightweight, stackable seed trays in your greenhouse mean stronger seedlings and less wasted space. 🌱 I’ve tried everything—from flimsy plastic to heavy wood—and these trays changed my germination game by keeping roots aerated while saving shelf space.
The right trays have drainage holes, sturdy sides, and a design that stacks neatly. Plastic holds up to moisture, while biodegradable options break down with transplants, eliminating the need to disturb delicate roots. Sterilize them before use to prevent damping-off disease.
You’ll see faster germination and healthier seedlings because consistent moisture and temperature control become effortless. No more overcrowded flats or leggy, weak starts—just robust plants ready for transplanting in weeks. Works for any greenhouse size, from hobby setups to commercial operations.
Here’s how to pick and prep them for maximum success.
📚 In This Guide
- What you need
- Instructions
- Tips and common mistakes
- Wrapping up and next steps
What you need
- ● Seed Trays: Lightweight, stackable trays (e.g., plastic or biodegradable fiber) – Quantity: 10–20 trays (depending on seed volume)
- ● Size: 10" x 20" or 12" x 24" (standard for most greenhouses)
- ● Growing Medium: Seed starting mix (sterilized, well-draining) – Quantity: 1–2 cubic feet per tray
- ○ Optional: Perlite or vermiculite (10–20% mix for aeration)
- ● Seeds: Your chosen seeds (check germination requirements for depth/spacing)
- ● Tools: Spray bottle (for gentle watering)
- ● Small hand trowel or scoop (for filling trays)
- ○ Misting nozzle (optional, for even moisture)
- ● Heat mat (for cold-starting seeds like peppers or tomatoes)
- ● Humidity dome or plastic wrap (to retain moisture)
- ● Labeling tags + marker (to track seed varieties)
- ● Greenhouse shelf or rack (if trays aren’t stackable)
- ● pH testing kit (to monitor soil acidity)
How to select and use seed trays in a greenhouse for optimal germination
Here’s how I’ve learned to choose and utilize seed trays that keep seedlings healthy and organized.
🪴 Step 1: Choose the Right Seed Tray Design
Opt for lightweight, stackable seed trays with drainage holes—this prevents waterlogging while keeping weight manageable in a greenhouse. I prefer 6-inch square trays for most seeds, as they offer enough space for root development without crowding. The stackable design saves shelf space, which is critical in greenhouses where every inch counts.
Look for trays made from recycled plastic or biodegradable materials—they’re durable, easy to clean, and won’t add unnecessary weight. Avoid metal trays, which can overheat under greenhouse lights. You’ll also want cell dividers (if using modular trays) to keep seedlings separate until they’re ready for transplanting.
🌱 Step 2: Prepare the Trays for Sowing
Before adding seeds, sterilize the trays with a 10% bleach solution (1 part bleach to 9 parts water) to kill any lingering pathogens. Rinse thoroughly and let them dry completely in the greenhouse—this prevents mold from forming later. I like to place them under indirect sunlight for a few hours to ensure they’re bone-dry before use.
Fill each cell or tray with a lightweight seed-starting mix (never garden soil—it’s too dense and can harbor diseases). Press the mix down gently so it’s firm but not compacted. The goal is to create a moist, aerated environment where seeds can germinate without suffocating. Leave about ½ inch of space at the top to avoid spills when watering.
💧 Step 3: Sow Seeds and Maintain Ideal Moisture
Follow the seed packet’s depth guidelines—most seeds should be planted twice as deep as their diameter. For example, tiny lettuce seeds go in ¼ inch deep, while larger tomato seeds need ½ inch. I use a fine-mist spray bottle to water after sowing, ensuring the soil is damp but not soggy. Overwatering at this stage can cause seeds to rot before they sprout.
Cover the trays with a clear plastic dome or row cover to retain humidity, which speeds up germination. Place them in a warm, shaded area (around 70-75°F) until sprouts appear. Check moisture daily—you’ll know it’s right when the soil surface feels slightly damp to the touch but doesn’t pool water. Once seedlings emerge, remove the cover immediately to prevent damping-off disease.
☀️ Step 4: Position Trays for Optimal Light and Airflow
Move the trays to a bright, indirect light source as soon as the first true leaves appear. In a greenhouse, this means placing them under grow lights (if using artificial light) or near south-facing shelves for natural sunlight. Avoid direct midday sun, which can scorch tender seedlings. I keep trays 2-3 inches away from lights and raise them gradually as they grow.
Ensure good airflow by spacing trays 1-2 inches apart—this prevents fungal issues and strengthens stems. If your greenhouse gets humid, use a small fan on low for a few hours daily to mimic outdoor conditions. You’ll notice healthier, stockier seedlings when airflow is consistent. Rotate trays quarter-turn daily so they grow straight toward the light.
⏰ Step 5: Transplant Seedlings When Ready
Seedlings are ready for transplanting when they have 3-4 true leaves and the first set of leaves (cotyledons) have fallen off. Gently remove them from the trays, keeping the root ball intact—this minimizes shock. I use a small hand trowel to loosen the edges if roots are tightly bound. Plant them in individual pots or the garden, burying up to the first set of leaves to encourage root growth.
Water deeply after transplanting to settle the soil around the roots. In the greenhouse, keep newly transplanted seedlings in partial shade for 3-4 days before gradually introducing them to full light. You’ll see new growth within a week—that’s your signal everything is working. Stack empty trays for reuse or store them in a dry area until your next sowing.
Tips & tricks for perfect greenhouse seedling trays
Took me a while to figure these out, so here goes—these are the game-changers for greenhouse seedling success.
Tray Material Matters: While recycled plastic is ideal, I've found that biodegradable trays work beautifully for short-term projects. If you're dealing with larger seeds or root vegetables, consider deep-cell trays (up to 3 inches deep) to accommodate root growth without transplanting too soon. Just remember: plastic trays can be reused indefinitely, while biodegradable ones are better for direct planting later.
Sterilization Shortcut: For a faster sterilization method in Step 2, I've started using a steam sterilizer or even a dishwasher on the sanitize cycle. This kills pathogens just as effectively as the bleach solution but saves time. If you don't have either, boiling trays in water for 10 minutes works too—just make sure they're completely dry before use to prevent mold.
Light Management: In Step 4, the 2-3 inch distance from grow lights is perfect for most seedlings, but taller varieties like tomatoes or peppers need more space as they grow. I recommend using adjustable light stands so you can raise them gradually. For natural light, position trays on the north side of greenhouse shelves to avoid harsh afternoon sun, which can cause leaf burn.
Transplanting Technique: When seedlings reach the 3-4 true leaf stage in Step 5, I've found that gently tapping the tray on all sides loosens the root ball before removing them. This minimizes root damage during transplanting. For delicate seedlings like herbs, I use a wooden popsicle stick to gently lift them from the tray—it's less traumatic than fingers.
Pro Tips for Seed Trays For Greenhouse
- Took me a while to figure these out, so here goes—these are the game-changers for greenhouse seedling success.
- Tray Material Matters: While recycled plastic is ideal, I've found that biodegradable trays work beautifully for short-term projects.
- Sterilization Shortcut: For a faster sterilization method in Step 2, I've started using a steam sterilizer or even a dishwasher on the sanitize cycle.
Frequently asked questions
Got questions about using seed trays in your greenhouse? You’re not alone! Here are some of the most common concerns—and their simple solutions—to help you grow with confidence.
What’s the best material for seed trays in a greenhouse?
Lightweight, breathable materials like plastic or biodegradable fiber work best. Plastic trays (e.g., 1020 or 50-cell) are durable and reusable, while fiber trays break down safely when planted. Avoid heavy clay or ceramic—these can weigh down your greenhouse shelves and limit stacking.
How long should I keep seeds in trays before transplanting?
Timing depends on the plant! Most seedlings are ready in 4–6 weeks when they have 2–4 true leaves and sturdy stems. Check seed packets for species-specific guidelines. Harden off seedlings (acclimate to outdoor conditions) for 1–2 weeks before transplanting to prevent shock.
Can I reuse seed trays, or should I replace them?
Yes! Clean and sanitize trays with a 10% bleach solution or soapy water between uses to prevent disease. If trays develop cracks or warping, replace them—especially for sterile starts like tomatoes or peppers. Biodegradable trays can be planted directly into the soil.
What’s the ideal temperature for seed trays in a greenhouse?
Aim for 65–75°F (18–24°C) during the day and no lower than 50°F (10°C) at night. Use a heat mat (70–80°F) for slow germinators like peppers or lettuce. Avoid overheating—ventilate your greenhouse and monitor humidity to prevent mold.
What are some alternatives to traditional seed trays?
Consider these space-saving options:
- Grow mats: Stackable, modular systems for high-density planting.
- Peat pellets: Pre-moistened and expandable for easy transplanting.
- DIY trays: Repurpose plastic containers (e.g., egg cartons, milk jugs) with drainage holes.
- Hydroponic cubes: For seed starting without soil (great for herbs and microgreens).
Wrapping up and next steps
Investing in the right seed trays for your greenhouse can transform your gardening game—lightweight, stackable designs make seed starting effortless and space-efficient! 🌱 Whether you're a seasoned grower or just starting, these trays ensure optimal germination while keeping your setup organized and hassle-free.
Ready to grow with confidence? Start small with a few trays, experiment with your favorite plants, and watch your greenhouse thrive! Next step: Pick your trays, prep your seeds, and let nature do the rest—happy planting! 🌿